Pruning
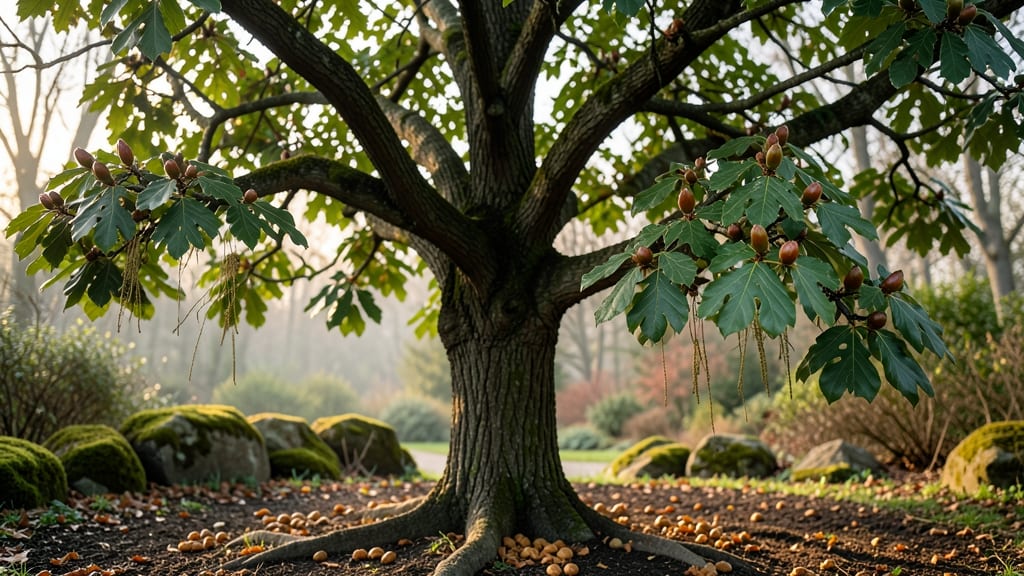
Spring’s first walnut tree buds signal a race against time—prune them right, and you’ll get healthier growth all season. 🌱 I’ve spent years watching these fuzzy, cinnamon-colored buds swell in late winter, knowing the next few weeks determine whether my tree thrives or struggles.
The key isn’t just cutting branches; it’s understanding how buds form, when they’re vulnerable, and how to protect them from pests and frost.
Healthy buds are plump, firm, and covered in fine hairs—like tiny cinnamon sticks. If they’re shriveled, brown, or oozing sap, your tree’s under stress from frost, pests, or last year’s pruning mistakes.
The best time to prune is just as buds begin swelling but before they burst, usually in early to mid-March in most climates. This timing lets you remove dead wood while preserving next year’s fruit production.
When you prune correctly, you’ll see buds fattening into new leaves and flowers within 4-6 weeks. The tree’s energy shifts from repair to growth, and you’ll avoid the weak, leggy branches that come from pruning too late.
Even a small adjustment—like thinning crowded buds—can double your harvest. Just watch for walnut husk fly and aphids, which love tender new growth.
This method works for both young trees and mature walnut groves. Start with a sharp pair of pruners, a clean workspace, and a notebook to track bud development.
By summer, you’ll know exactly how your tree responds—and what to adjust next spring. The payoff? A stronger tree that produces better-quality nuts year after year.
📚 In This Guide
- What you need
- Instructions
- Tips and common mistakes
- Wrapping up and next steps
What you need
- ● Pruning shears: Bypass shears (for cuts under ½ inch) – 1 pair (sterilized with rubbing alcohol).
- ● Loppers: For branches ½ to 1½ inches thick – 1 pair (with bypass blades for clean cuts).
- ● Pruning saw: For larger branches (1½+ inches) – 1 saw (with a fine-tooth blade).
- ● Gloves: Heavy-duty gardening gloves (cut-resistant) – 1 pair (to protect from splinters and sap).
- ● Disinfectant: 70% isopropyl alcohol or bleach solution (1 part bleach to 9 parts water) – small bottle (to sterilize tools between cuts).
- ● Tarp or drop cloth: 4’x6’ or larger – 1 sheet (to collect debris and protect the ground).
- ● Ladder: Extendable or sturdy step ladder – 1 (if tree exceeds 8 feet tall).
- ○ Pruning sealant: (Optional) – small tube (for sealing large cuts over 2 inches; skip for walnut trees—they seal naturally!).
- ● Weather check: Prune on a dry, cloudy day (avoid rain or extreme heat).
- ● Timing: Late winter to early spring (just before buds swell, ideally February–March in most climates).
- ● Tree health: Inspect for diseases (e.g., walnut blight) or pests (like codling moths) before pruning.
- ○ Safety gear: Safety glasses (optional but recommended) – 1 pair (to shield from debris).
- ○ First aid kit: (Optional) – small kit (for splinters or minor cuts).
How to prune walnut tree buds for strong, healthy growth
Spring is the perfect time to shape your walnut tree—here's how to do it right for long-term vigor.
🌱 Step 1: Identify Last Year's Growth and Dormant Buds
Start by examining the branches closely. Walnut tree buds are plump and reddish-brown, clustered where last year's growth ended. These are your dormant buds—each one holds the potential for new shoots. Look for 3-4 inch segments between buds; these are your pruning zones.
I always run my fingers along the branch first to feel the texture change where buds begin. Healthy buds feel firm, not shriveled or mushy. Avoid pruning where buds are already swelling—this signals new growth has already started, and cutting there removes future leaves or nuts.
✂️ Step 2: Remove Dead, Crossing, or Weak Branches First
Use sharp pruning shears to cut back any dead wood (gray/brown, no buds) or branches growing directly toward another branch (crossing limbs). These compete for sunlight and nutrients, weakening the tree. Make clean cuts at a 45-degree angle, just outside the branch collar where it meets the trunk.
Don't worry about making perfect cuts—just remove anything that looks damaged or diseased. Walnut trees are resilient, and removing these problem branches early prevents larger issues later. I like to step back every few cuts to visualize the tree's shape.
☀️ Step 3: Thin the Canopy for Airflow and Sunlight
Target branches that are growing inward or too densely packed. Remove 10-15% of the total branches to open up the canopy. Focus on the lower third of the tree first—this encourages sunlight to reach the ground level, promoting healthier growth there.
Watch for branches that rub against each other when the wind blows. These will eventually create wounds where pests can enter. If you're unsure whether to remove a branch, ask: "Does this branch contribute to the tree's overall health or structure?" If not, cut it.
🌿 Step 4: Prune for Shape and Future Bud Development
Now shape the tree by selectively trimming back last year's growth to just above a strong bud. Aim to create an open, vase-like shape with a dominant central leader (main upward-growing branch). For side branches, keep them at 1/3 the length of the branch below them.
Here's the thing—walnut trees respond well to pruning when you focus on the buds. Each cut should leave at least 2-3 healthy buds on the remaining branch. This ensures the tree can produce new growth without stress. Avoid heavy pruning in one season; spread it over 2-3 years for best results.
🪴 Step 5: Clean Up and Apply Wound Treatment
After pruning, collect all cut branches and dispose of them in a sealed bag—this prevents pests from spreading. Wipe your pruning tools with rubbing alcohol between cuts to avoid cross-contamination. For larger cuts (over 1 inch in diameter), apply a pruning sealant to protect the wound.
I like to finish by giving the tree a deep watering to help it recover. The goal is to stimulate new growth from those buds while keeping the tree healthy. Avoid fertilizing immediately after pruning—wait until new leaves appear to give the tree time to heal.
Tips & tricks for perfect walnut tree bud pruning
Took me years to figure out these simple tricks that'll make your walnut tree thrive after pruning—don't skip them!
Bud Identification Tip: In Step 1, when you're checking for those 3-4 inch segments between buds, look for the slight bump where the bud meets the branch. Healthy buds should feel like tiny rubber balls—firm but yielding slightly when pressed. If you find any that feel hollow or shriveled, those branches need to come off entirely. I've seen gardeners miss these early signs and end up with weak growth later.
Pruning Angle Secret: That 45-degree angle in Step 2 isn't just for looks—it helps water run off the cut and prevents moisture from collecting where pests can enter. Use a small notched trowel to make a reference line before cutting if you're unsure about the angle. I always make my cuts just outside the branch collar, which is that little swollen area where the branch meets the trunk. This ensures the tree can heal properly.
Canopy Thinning Strategy: When you're removing those 10-15% of branches in Step 3, focus on creating vertical layers rather than just horizontal thinning. Start with the lower third, then work your way up like you're building a staircase. This creates airflow from bottom to top, which prevents fungal diseases that love damp, shaded conditions. I like to visualize the tree as an open umbrella—you want sunlight to reach all the way to the ground.
Shape Development: For Step 4, think of your tree's shape as a pyramid with a broad base. The central leader (main upward branch) should be about 1/3 taller than the side branches below it. If you're unsure which branch is the central leader, look for the one that naturally grows straight up from the trunk. Walnut trees are forgiving, but consistency in shaping over 2-3 years gives you that perfect vase shape that lets sunlight reach all the buds.
Pro Tips for Walnut Tree Buds
- Took me years to figure out these simple tricks that'll make your walnut tree thrive after pruning—don't skip them!
- Bud Identification Tip: In Step 1, when you're checking for those 3-4 inch segments between buds, look for the slight bump where the bud meets the branch.
- Pruning Angle Secret: That 45-degree angle in Step 2 isn't just for looks—it helps water run off the cut and prevents moisture from collecting where pests can enter.
Frequently asked questions
Got questions about pruning walnut tree buds?
You’re not alone! Here are answers to the most common concerns to help you trim with confidence.
When is the best time to prune walnut tree buds?
The ideal window is late winter to early spring (before buds swell but after severe frost risks pass). Pruning during dormancy minimizes stress and disease risk. Avoid pruning in fall—it can invite fungal infections or attract pests like walnut husk fly. For young trees, light pruning can also happen in summer to shape growth.
How much of a walnut tree can I safely prune at once?
Never remove more than 25% of the tree’s canopy in a single season. Walnut trees are sensitive to heavy pruning—overdoing it can shock the tree, reduce nut production, or leave it vulnerable to disease. Focus on selective cuts to open the canopy and remove dead/diseased branches. If your tree needs major work, space it over 2–3 years.
Why are my walnut tree buds dying after pruning?
Dying buds often signal over-pruning, improper cuts, or stress. Check for:
- Ragged cuts: Use sharp tools to make clean cuts just outside the branch collar.
- Timing issues: Pruning too late in spring (after buds burst) can stress the tree.
- Disease/pests: Black walnut trees are prone to thousand cankers disease—inspect for oozing sap or sawdust-like frass.
Can I prune walnut tree buds if I don’t have pruning shears?
Yes! For small branches (½-inch thick), use:
- Clean, sharp hand pruners or loppers (rent or borrow if needed).
- A hacksaw for thicker branches (but make sure it’s sterilized!).
- For emergency trims, a knife (disinfected with rubbing alcohol) can work in a pinch—just avoid jagged edges.
Will pruning walnut tree buds affect next year’s nut harvest?
Pruning correctly won’t hurt your harvest—it can improve it! Removing dead wood and thinning branches boosts air circulation, reducing disease and encouraging stronger growth. However, avoid heavy pruning in nut-producing years (especially for black walnuts). Focus on structural cuts to maintain a balanced tree. Young trees (under 5 years) benefit most from pruning.
Wrapping up and next steps
Pruning walnut tree buds in spring isn’t just about shaping—it’s about setting the stage for stronger branches, better yields, and a thriving tree! 🌿 By following the right techniques, timing, and tools, you’ll encourage healthy growth while preventing disease.
Whether you’re a seasoned gardener or just starting out, every trim counts—so grab those pruners and get ready to nurture your tree’s future.
Ready to take action? Start small: focus on one section of your tree at a time, and don’t forget to check our FAQs for extra tips! With patience and care, your walnut tree will thank you with lush buds and bountiful harvests.