
Pruning
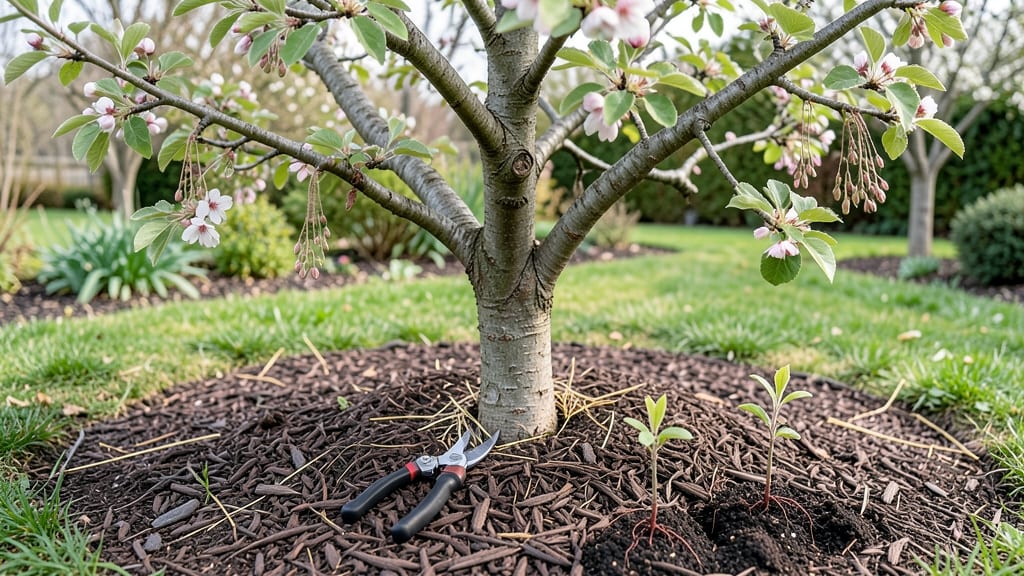
Spring is when your apple tree wakes up hungry for sunshine and strong branches—apple tree care in spring starts with sharp pruners and a clear head. 🌸 I learned the hard way that waiting until buds burst means cutting off next year’s blooms (and fruit). The secret?
Prune when the tree is still dormant but the weather’s cooperative—usually late winter to early spring—before those first pink buds peek through. You’ll need clean, sharp pruners, a ladder (for taller trees), and a bucket to collect the clippings.
The goal is to open up the canopy so light and air reach all branches, which prevents disease and encourages fruit production. Start by removing dead wood first—those branches that snap like dry twigs—and then shape the tree by cutting back crossing branches and water sprouts.
What you’re really after is a tree that looks like a well-lit cathedral inside, with sunlight streaming to every fruit-bearing branch. Proper pruning now means fewer apples on the ground later, and fruit that’s bigger, sweeter, and ready to pick in late summer or fall. The payoff?
A tree that produces for decades instead of struggling against its own overgrowth. This works for both young trees you’re training and mature ones that need rejuvenation. Just remember: less is more—you’re sculpting, not hacking. And if you’re unsure about a cut, snap a photo first.
Spring’s your chance to set up your tree for success.
📚 In This Guide
- What you need
- Instructions
- Tips and common mistakes
- Wrapping up and next steps
What you need
- ● Pruning shears (bypass pruners): 1 pair, sharp and clean (for cuts up to ½ inch thick)
- ● Look for bypass-style blades (not anvil) for precise cuts.
- ● Loppers: 1 pair, long-handled (24-30 inches) for thicker branches (½ to 1½ inches)
- ● Choose bypass loppers for cleaner cuts.
- ● Pruning saw: 1 curved-tooth saw for branches thicker than 1½ inches
- ● Opt for a foldable or compact design for portability.
- ● Rubbing alcohol (70% isopropyl) or bleach solution: Small bottle (for sterilizing tools between cuts)
- ○ Pruning sealant (optional but helpful): 1 small tube (for large wounds over ½ inch in diameter)
- ● Choose a tree-specific sealant (e.g., Tanglefoot Tree Wound Pruning Seal).
- ● Gloves: 1 pair of cut-resistant, durable gloves (to protect hands from thorns and rough bark).
- ● Ladder (if needed): 1 stable, extendable ladder (for tall trees; ensure it’s rated for your weight + tools).
- ● Disposable pruning bags or bucket: 1 for collecting debris (helps keep the workspace clean).
- ● Hand saw or folding pruning saw: For extra-large branches (2+ inches).
- ● Pole pruner: If your tree is very tall (extends reach without a ladder).
- ● Notebook & pencil: To sketch a quick pruning plan or mark branches to remove.
- ● Tree growth regulator (e.g., hydrogen peroxide 3%): For cleaning tools and disinfecting cuts.
- ● Safety glasses: Protects eyes from debris when cutting.
- ● Work boots or closed-toe shoes: For stability and foot protection.
Step-by-step guide to pruning apple trees in spring
Revitalize your apple tree with these proven pruning steps—stronger blooms and fruit start here.
✂️ Step 1: Time Your Pruning for Optimal Growth
Prune your apple tree during late winter to early spring, just as buds begin to swell but before they open. This timing ensures the tree focuses energy on new growth rather than healing wounds. I typically prune in February or March, depending on my local climate. Avoid pruning after buds break—you’ll risk inviting pests and diseases into fresh cuts.
Check your tree’s buds daily. When you see pink tips peeking from the buds, that’s your signal to grab your tools. Cold snaps can delay bud break, so stay flexible. A tree pruned too early may bleed sap excessively, while waiting too long risks losing next year’s fruit buds.
🌱 Step 2: Remove Dead, Diseased, or Crossing Branches
Start by cutting out dead, broken, or diseased branches—these are easy to spot as they’re brown, brittle, or oozing sap. Use clean, sharp pruning shears to make 45-degree cuts just outside the branch collar (the swollen area where the branch meets the trunk). This ensures the tree heals properly.
Next, remove crossing or rubbing branches—these create wounds where bacteria and fungi can enter. Look for branches growing directly toward each other; the smaller of the two should go. Thin out crowded areas to improve airflow and sunlight penetration. I always step back after each cut to visualize the tree’s shape—this helps me spot missed issues.
☀️ Step 3: Open the Tree’s Canopy for Sunlight and Airflow
Your goal is to create an open-centered tree with sunlight reaching the inner branches. Start by removing suckers (shoots growing from the base or trunk) and water sprouts (fast-growing vertical shoots). These compete with fruit-bearing branches for nutrients. Cut them back to their origin point.
Next, trim back overlapping branches to reduce shade. Aim for a balanced, vase-like shape with the widest part at the top. Leave scaffold branches (major structural limbs) intact—they support the tree’s weight. If a branch is too large to cut cleanly, make a three-cut method to avoid tearing the bark.
⏰ Step 4: Shape for Fruit Production and Structure
Apple trees thrive with a well-defined framework of 4-6 main scaffold branches spaced evenly around the trunk. Prune to encourage fruit spurs (short, stubby branches where apples form) by cutting back overly vigorous growth to 12-18 inches from the trunk. This redirects energy to spur development.
Thin out excessive fruiting wood—too many apples stress the tree. Remove weak or poorly placed branches that grow inward or downward. A good rule: Keep the strongest, most outward-facing branches. After shaping, step back again to ensure sunlight can reach the center of the tree—this prevents fungal issues and improves fruit quality.
💧 Step 5: Clean Up and Protect Your Tree
After pruning, sterilize your tools with rubbing alcohol or a 10% bleach solution to prevent spreading disease. Rake up and dispose of all debris—don’t compost pruned branches, as they may harbor pathogens. Seal larger cuts (over ½ inch in diameter) with pruning sealant to reduce sap loss and infection risk.
Apply a layer of mulch (2-3 inches thick) around the base, keeping it 6 inches away from the trunk to prevent rot. Water deeply to help the tree recover. Over the next few weeks, monitor for new growth—vigorous shoots mean your pruning worked. If buds fail to swell, check for pest damage or frost injury and adjust care accordingly.
Tips & tricks for perfect apple tree pruning
Took me years to figure out these pruning secrets—now your apple tree will thank you with better fruit and fewer pests.
Timing is Everything: The late winter to early spring window is critical because it lets the tree heal before pests wake up. I've seen trees pruned too late develop fungal issues because the cuts didn't have time to callous over before warm weather arrived. Watch for those pink bud tips—it's your tree's way of saying "I'm ready!"
Cutting Technique Matters: Those 45-degree cuts just outside the branch collar aren't just recommended—they're essential. I used to make clean cuts right at the collar, and those areas would always rot. The collar contains healing cells that help the tree recover faster. For branches over ½ inch thick, the three-cut method prevents bark tearing, which is especially important for older trees.
Shape for Sunlight: That open-centered vase shape isn't just for looks—it's about maximizing sunlight penetration to the center of the tree. I've seen trees with dense canopies develop fungal issues because the center stayed too damp. Step back every few cuts to visualize how sunlight will reach different areas. You want to see light reaching all the way to the trunk.
Post-Pruning Care: Don't skip the sterilization step—it's how I prevent spreading disease between cuts. I use a 10% bleach solution between each branch, especially when working with older trees that might have hidden infections. After pruning, that 2-3 inch layer of mulch (kept 6 inches from the trunk) helps retain moisture while preventing rot at the base.
Pro Tips for Apple Tree Care In Spring
- Took me years to figure out these pruning secrets—now your apple tree will thank you with better fruit and fewer pests.
- Timing is Everything: The late winter to early spring window is critical because it lets the tree heal before pests wake up.
- Cutting Technique Matters: Those 45-degree cuts just outside the branch collar aren't just recommended—they're essential.
Frequently asked questions
Got questions about spring apple tree care? You’re not alone! Here are answers to the most common concerns—so you can prune with confidence and set your tree up for a fruit-filled future.
When is the best time to prune apple trees in spring?
Prune your apple tree during dormancy (late winter/early spring, before buds swell) or right after harvest in summer. Avoid pruning in fall—it invites disease. For spring pruning, aim for February to March in most climates, but adjust for your USDA hardiness zone.
How do I know which branches to cut?
Focus on these 4 key cuts:
- Dead/diseased branches: Remove immediately to prevent spread.
- Crossing or rubbing branches: Trim to avoid bark damage.
- Water sprouts (fast-growing vertical shoots): Cut at the base.
- Suckers (shoots from the root crown): Snip off to redirect energy to fruit.
What if I missed spring pruning? Can I still do it later?
Yes, but time it wisely:
- Summer (June–July): Light pruning to improve airflow (avoid heavy cuts).
- Fall (October–November): Only prune for disease removal—no major structural cuts.
Will pruning reduce my apple harvest this year?
Not if done right! Pruning increases fruit quality and yield long-term by:
- Improving sunlight/airflow (fewer diseases).
- Encouraging larger, healthier fruit on remaining branches.
- Reducing overcrowding (more energy for fruit, not leaves).
Do I need special tools for apple tree pruning?
Yes! Use these essentials:
Tool
Purpose
Bypass pruners
Clean cuts on small branches (¼-inch thick).
Loppers
Medium branches (½–1½ inches).
Pruning saw
Thick branches (1½+ inches).
Rubbing alcohol & sharpening stone
Sanitize tools between cuts to prevent disease.
Wrapping up and next steps
Spring is the perfect time to give your apple tree the love it needs to thrive!
By following these pruning tips, you’ll encourage healthier growth, stronger blooms, and a bountiful harvest—all while keeping pests and diseases at bay. 🌱 With the right tools, technique, and timing, you’re well on your way to nurturing a flourishing orchard.
Ready to see your hard work pay off? Start pruning today and watch your apple tree transform into a fruitful powerhouse! For extra guidance, check out seasonal care calendars or consult a local arborist to tailor your approach.