
Landscaping
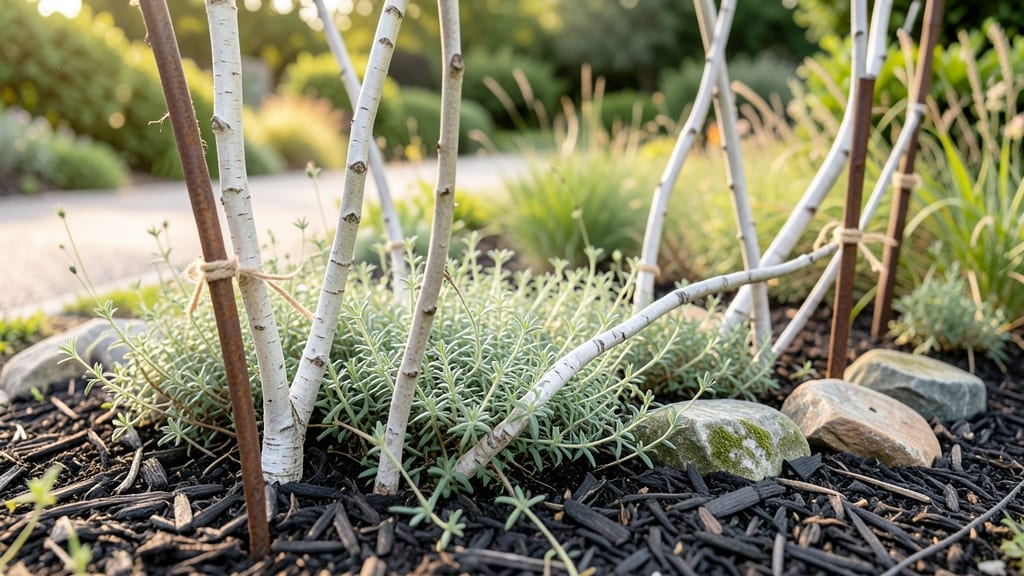
Tree branch garden edging transforms your yard into a woodland retreat without a single nail or saw. 🌿 I stumbled on this technique after struggling with plastic edging that looked cheap and never lasted—until I collected fallen branches and arranged them like nature intended.
The result? A border that feels organic, blends seamlessly with the landscape, and lasts for years.
The best part is how easy it is to start: just gather branches 2-4 inches thick, trim them to uniform lengths, and arrange them in a curved line along your garden bed. For extra stability, you can sink them slightly into the ground or secure them with landscape staples.
This method works for any garden size, from small flower beds to sprawling vegetable patches, and costs almost nothing.
What you end up with is a border that looks like it belongs in a forest glade, not a manicured yard. The natural texture contrasts beautifully with smooth mulch, and the branches even provide a home for beneficial insects.
Over time, they weather to a silvery-gray patina that adds character to your garden.
Perfect for rustic gardens, cottage-style landscapes, or anyone who wants to reduce waste by using fallen branches. Here's how to make it look effortless—because the best designs often are.
📚 In This Guide
- What you need
- Instructions
- Tips and common mistakes
- Wrapping up and next steps
What you need
- ● Tree branches: 10–20 medium-sized, flexible branches (1–3 inches in diameter, 2–4 feet long). Opt for willow, dogwood, or grapevine for natural curves.
- ○ Optional: Untreated wooden stakes (4–6 inches long) for anchoring branches in place.
- ○ Optional: Landscape fabric (to suppress weeds if branches aren’t fully covering the soil).
- ● Pruning shears or loppers (for trimming branches to size).
- ● Garden gloves (to protect hands from splinters or thorns).
- ● Mallet or rubber hammer (for securing stakes).
- ● String or twine (to outline your edging path before planting).
- ● Measuring tape (to ensure consistent spacing).
- ○ Optional: Staple gun (for attaching branches to fabric or wire if needed).
- ● Clear the area of weeds, rocks, or debris along your desired garden border.
- ● Check local regulations—some areas restrict using untreated wood near edible plants.
- ● Pro tip: If branches are fresh, soak them in water for 24 hours to prevent cracking as they dry!
Step-by-step guide to creating tree branch garden edging
Transform your garden borders with natural beauty—here’s how to craft stunning, rustic edging from fallen branches.
🪴 Step 1: Collect and Prepare Your Branches
Gather branches that are 3-6 feet long and about 1-2 inches thick—perfect for defining garden edges. Look for straight, sturdy pieces without knots or splits. I like to collect them after a storm or from pruned trees, but you can also buy them pre-cut from garden centers. Soak the branches in water for 24 hours to prevent cracking later. This step is key: dry branches will snap when bent or nailed.
Once soaked, let them dry completely in a shaded area for 3-5 days. This ensures they won’t warp or rot when installed. You’ll know they’re ready when they feel dry to the touch but still hold a slight bend without snapping. If you’re in a hurry, speed up drying with a fan on low heat.
✂️ Step 2: Cut and Shape the Branches
Trim the branches to your desired length—4 feet works well for most garden beds. Use a handsaw or pruning shears to make clean cuts at a 45-degree angle on one end. This angle helps them sit securely in the ground. Remove any small twigs or leaves along the length to create a smooth, polished look.
For a natural, wavy edge, gently bend the branches into curves as you work. If you want sharper corners, cut the ends straight. I like to test-fit a few pieces in your garden first—this helps visualize the final look before committing. The goal is a border that feels organic but intentional.
🌱 Step 3: Install the Edging Along Your Garden Border
Dig small holes—about 6 inches deep—along your garden’s perimeter, spacing them 12-18 inches apart. The holes should be just wide enough to hold the branch securely. Insert each branch into the holes at a slight angle (about 15 degrees) so the top curves outward. This creates a clean, defined edge while keeping the look natural.
For extra stability, use landscape stakes to secure the branches temporarily while you adjust the spacing. Press the soil firmly around the base to anchor them. If you’re edging a curved bed, bend the branches slightly as you go to follow the contour. Step back often to check the flow—you want it to look effortless, not forced.
💧 Step 4: Secure and Finish the Edging
Once all branches are in place, use landscape fabric or hardware cloth to cover the soil around the base if you’re worried about weeds or erosion. Secure it with small stakes, but leave the top exposed so the branches remain visible. For a polished touch, lightly stain or seal the branches with an outdoor wood finish—this protects them from weather and adds a cohesive look.
Finally, trim any overhanging grass or weeds along the base to keep the edging looking sharp. Water the area lightly to settle the soil. Over time, the branches will blend seamlessly into your garden, creating a border that feels timeless and intentional. Real talk: This project takes less than a weekend, and the results last for years!
Tips & tricks for perfect tree branch garden edging
Here's what nobody tells you about creating garden borders that look like they belong in a storybook.
Branch Selection Tip: When collecting branches, focus on those with a slight natural curve—these create the most organic, wavy edges. I've learned the hard way that perfectly straight branches can look too rigid when used for garden borders. Look for pieces that already have gentle bends; you can enhance them later, but starting with natural curves makes your job easier and the final result more beautiful.
Drying Strategy: The 3-5 day drying period is non-negotiable for sturdy edging, but here's the secret: if you're in a rush, place your branches on a wire rack in front of a fan set to low heat. This cuts drying time by about 24 hours while preventing warping. Just be sure to check them daily—they should feel dry but still pliable, not brittle.
Installation Angle: That 15-degree angle when inserting branches isn't just arbitrary—it creates the perfect visual line that draws the eye along your garden border. For extra stability, especially in windy areas, you can use small landscape staples to secure the branches to the fabric underneath. This hidden reinforcement prevents shifting without compromising the natural look.
Finishing Touches: For a truly polished look, I recommend using a clear outdoor sealant instead of stain. It protects the wood while letting the natural grain show through. Apply it with a small brush to just the visible surfaces—you don't need to coat the entire branch. This subtle step makes all the difference in how professional your edging looks.
Pro Tips for Tree Branch Garden Edging
- Here's what nobody tells you about creating garden borders that look like they belong in a storybook.
- Branch Selection Tip: When collecting branches, focus on those with a slight natural curve—these create the most orga...
- Drying Strategy: The 3-5 day drying period is non-negotiable for sturdy edging, but here's the secret: if you're in a...
Frequently asked questions
Got questions about using tree branches for garden edging?
Here are some of the most common ones—and their simple solutions!
What types of tree branches work best for garden edging?
Look for branches that are dry, straight, and sturdy—think oak, maple, or willow. Avoid branches with bark peeling off or signs of rot. Thicker branches (1–3 inches in diameter) hold up best, while thinner ones can be woven for a decorative touch. Pro tip: Collect branches after a storm or prune them from your yard for free!
When is the best time to install tree branch edging?
The ideal time is early spring or fall, when the ground is workable but not frozen. Avoid installing during wet spells, as moisture can cause branches to rot faster. If you’re using fresh-cut branches, let them dry for 2–4 weeks in a shaded area before burying them to prevent mold.
Can I reuse tree branches for edging after a few years?
Yes! With proper care, branch edging can last 3–5 years (or longer in dry climates). To refresh them, dig up the branches, scrub off dirt, and treat them with linseed oil or beeswax to preserve their natural look. If they’re splintery or crumbling, it’s time to replace them.
What’s a good alternative if I don’t have tree branches?
No branches? No problem! Try these rustic alternatives:
- Bamboo stakes – Affordable and long-lasting.
- Stone or brick – Classic and durable.
- Recycled wood planks – Great for a modern twist.
- Vines or ivy – Living edging for a soft, natural border.
How do I keep pests (like ants or termites) away from my branch edging?
Pests love untreated wood! Prevent issues by:
- Treating branches with borax or cedar oil before burying.
- Avoiding direct soil contact—bury branches only halfway or elevate them with rocks.
- Inspecting edging yearly for chew marks or tunnels.
Wrapping up and next steps
Transforming your garden with tree branch edging isn’t just about aesthetics—it’s a natural, budget-friendly way to add rustic charm while blending seamlessly with your outdoor space. Whether you’re a DIY enthusiast or a seasoned gardener, these organic borders bring texture, movement, and a touch of wilderness to your landscape.
Ready to elevate your garden? Grab those branches, roll up your sleeves, and start crafting a border that tells a story! 🌿✨
Next steps:
- Sketch a simple design to visualize your edging layout.
- Gather materials and tools—then, get creative!
- Share your progress (or final project) with fellow garden lovers for inspiration!