
Pruning
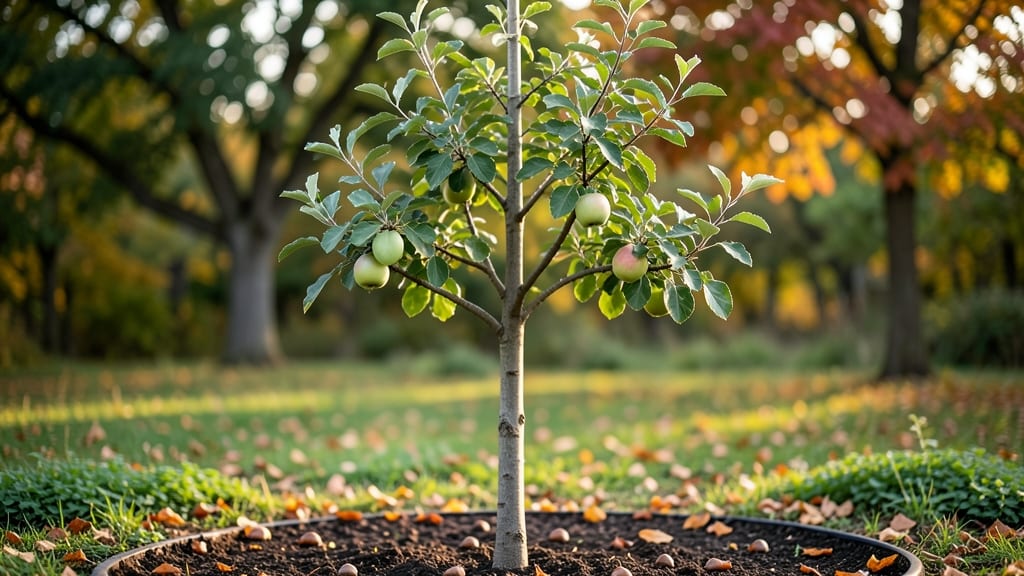
Pruning an apple tree using the central leader method turns a wild tangle into a strong, productive frame that lasts decades. 🌳 When I first tried it, my tree went from looking like a tangled mess to a sturdy, open structure that catches sunlight and resists storms—exactly what you want for heavy fruit loads.
The key is keeping one dominant vertical stem while training side branches to grow outward at 45-degree angles.
You’ll need sharp pruning shears, a saw for thicker branches, and a clear day to work—no need for fancy tools, just precision. Start with young trees by removing competing vertical stems early, and for mature trees, focus on thinning out crowded branches while preserving the main leader.
This method works best for standard-sized apple varieties, and the results are a tree that’s easier to harvest from and less prone to disease.
The payoff comes in summer when you’re picking fruit from branches that spread wide enough to avoid breaking under weight. Prune in late winter or early spring while the tree is still dormant, and you’ll see new growth emerge stronger than ever.
Even better, this system keeps your tree looking neat year-round without the stress of aggressive pruning.
Whether you’re dealing with a newly planted tree or a mature one that’s gotten out of control, the central leader approach works for both.
The secret is patience—it takes a few years to establish the framework, but once you do, your apple tree will reward you with better airflow, easier maintenance, and a lifetime of harvests.
📚 In This Guide
- What you need
- Instructions
- Tips and common mistakes
- Wrapping up and next steps
What you need
- ● Pruning shears – Sharp, bypass-style (for cuts up to ½ inch thick). Example: Felco F-2 or Corona.
- ● Loppers – For branches ½ to 1½ inches thick. Example: Felco 203 or Fiskars.
- ● Pruning saw – For thicker branches (1½+ inches). Example: Felco 12.
- ● Disinfectant – 70% isopropyl alcohol or a copper-based solution to sterilize tools between cuts.
- ○ Pruning sealant – Optional but helpful for large cuts (3+ inches). Example: Tree Tape or wound dressing.
- ● Gloves – Heavy-duty, cut-resistant gloves to protect hands from thorns and debris.
- ● Ladder or step stool – For reaching higher branches safely. Note: Ensure stability on uneven ground.
- ● 5-gallon bucket – For collecting pruned branches and debris.
- ● Pruning paint – For sealing cuts on young trees (prevents disease entry).
- ● Extension pole – For high branches (e.g., 20-30 ft. reach).
- ● Tree pruning rope – To secure branches during heavy pruning sessions.
- ● Notebook & pen – To sketch your tree’s structure and track pruning progress.
- ● Safety goggles – Protects eyes from debris, especially in windy conditions.
- ● Knowledge of your tree’s age – Central leader pruning works best for young trees (1-5 years old) or newly planted varieties.
- ● Weather check – Prune on a dry, calm day (avoid rain or frost).
- ● Tree health assessment – Ensure your tree is free of pests/diseases before pruning.
- ● Safety first! – Wear closed-toe shoes and avoid working alone if the tree is large.
Step-by-step guide to pruning an apple tree in the central leader style
This method keeps your tree strong, productive, and easy to manage year after year.
☀️ Step 1: Understand the Central Leader Structure
The central leader style keeps one dominant vertical trunk with evenly spaced scaffold branches. Look for your tree’s main trunk—this is your central leader. Remove any competing vertical stems early to avoid a multi-trunk tree, which complicates pruning later. I always start by identifying the strongest, straightest trunk and let it grow upward while removing weaker competitors at the base.
Scaffold branches should emerge from the trunk at a 45-degree angle and be spaced 12-18 inches apart. These branches will support your fruit load, so choose sturdy, outward-growing limbs. If you see branches growing inward or crossing, mark them for removal—they’ll crowd each other and create weak crotches where fruit clusters can break off.
✂️ Step 2: Prune for Airflow and Light in Late Winter
Timing matters most in late winter when the tree is still dormant but before buds swell. Use clean, sharp pruning shears to make cuts just outside the branch collar—the swollen area where the branch meets the trunk. This ensures proper healing and prevents disease entry. I cut at a 45-degree angle when removing branches larger than ½ inch thick to allow water to run off the wound.
Remove dead, diseased, or crossing branches first. Then thin out branches that grow inward or upward to open the canopy. Aim to keep 6-8 scaffold branches on mature trees, spaced evenly around the trunk. You’ll see the difference immediately—better airflow reduces fungal diseases like apple scab, and sunlight reaches all parts of the tree for even fruit ripening.
🌿 Step 3: Summer Pruning to Control Growth and Fruit Load
After the tree flowers but before harvest, do a light pruning to remove suckers (shoots growing from the base or trunk) and water sprouts (fast-growing vertical shoots). These compete with fruit production. Use hand pruners for smaller branches and a pruning saw for thicker ones. Cut back to a bud facing outward to encourage balanced growth.
Thin out clusters of fruit to 6-8 inches apart on each branch—this prevents overloading and improves fruit size and quality. You’ll notice fewer but larger apples, and the branches won’t sag under the weight. Summer pruning also helps direct energy toward next year’s blossoms rather than excessive vegetative growth.
⏰ Step 4: Annual Maintenance and Winter Cleanup
Every fall, remove any dead or diseased wood before winter sets in. Sterilize your pruning tools with rubbing alcohol between cuts to prevent spreading disease. I also rake up and dispose of fallen leaves—this reduces overwintering pests and pathogens. In late winter, before buds break, do a final check for any branches that grew too vigorously during the previous season and prune them back to maintain the tree’s shape.
Pay attention to the tree’s overall balance—if one side is heavier, prune slightly more on that side to keep the tree upright. Over time, you’ll develop a rhythm: late winter for major cuts, summer for light maintenance, and fall for cleanup. This keeps your apple tree healthy, productive, and easy to manage for decades.
Tips & tricks for perfect apple tree central leader pruning
Mastering this pruning style takes patience—but these tricks will help you avoid common mistakes and keep your tree thriving for years.
Branch Angle is Everything: When selecting scaffold branches, look for those emerging at a 45-degree angle from the trunk. This angle ensures proper weight distribution and prevents branches from breaking under fruit load. I've seen too many trees with branches growing straight out—these often snap during harvest. If you find branches growing upward, prune them back to encourage outward growth.
Late Winter Timing Secret: The key to successful late winter pruning is catching the tree when it's still dormant but before buds begin to swell. This timing—typically February to early March in most climates—allows the tree to heal quickly. If you prune too early, the cuts may not heal properly before new growth starts. If you wait too late, you risk removing next year's blossoms. Watch for buds starting to plump up—that's your signal to finish pruning.
Summer Pruning Visual Cues: When thinning fruit clusters in summer, aim for 6-8 inches between each apple. A good rule of thumb is to leave one apple per cluster that's the size of a golf ball. This spacing prevents overcrowding and ensures each apple gets enough sunlight and nutrients. I always visualize a grid pattern when spacing fruit—this helps maintain even distribution around the tree.
Tool Maintenance Matters: After each pruning session, sterilize your tools with rubbing alcohol to prevent spreading disease between cuts. I keep a small bottle of alcohol in my tool pouch for quick cleaning. Sharp tools also make a difference—dull shears tear wood rather than making clean cuts, which slows healing. Invest in good-quality pruners and sharpen them regularly. For larger branches, a pruning saw with a fine-toothed blade will give you cleaner cuts without splintering.
Pro Tips for Apple Tree Central Leader
- Mastering this pruning style takes patience—but these tricks will help you avoid common mistakes and keep your tree thriving for years.
- Branch Angle is Everything: When selecting scaffold branches, look for those emerging at a 45-degree angle from the trunk.
- Late Winter Timing Secret: The key to successful late winter pruning is catching the tree when it's still dormant but before buds begin to swell.
Frequently asked questions
Got questions about the central leader pruning method? You’re not alone!
Here are answers to the most common concerns—whether you're a beginner or a seasoned gardener looking to refine your technique.
What is the central leader pruning method, and why should I use it?
The central leader method involves training an apple tree to grow a single, strong vertical trunk (the "leader") with scaffold branches spreading outward. It’s ideal for standard-sized trees because it promotes airflow, sunlight penetration, and easier fruit harvesting. Plus, it mimics the tree’s natural growth pattern, reducing stress.
When is the best time to prune an apple tree using the central leader method?
Prune during late winter or early spring (just before buds swell) for dormant-season shaping. Light pruning can also happen in summer to control vigorous growth, but avoid heavy cuts then. Never prune in fall—it invites disease and pests. Pro tip: Mark cuts with paint to track progress over seasons!
What if my apple tree already has multiple leaders? Can I still use this method?
Yes! If your tree has competing leaders, select the strongest, straightest trunk (usually the thickest one) and prune the others back to a side branch or bud. Over time, the chosen leader will dominate. For stubborn cases, use temporary ties to guide growth. Patience is key—it may take 1–2 years to see full results.
What are the most common mistakes when pruning a central leader apple tree?
Avoid these pitfalls:
- Over-pruning: Never remove more than 25% of the canopy in one season.
- Poor cuts: Use clean, angled cuts (just above a bud) to prevent disease.
- Ignoring weak crotches: Remove branches growing at sharp angles—they’ll split under fruit weight.
- Skipping aftercare: Seal large cuts with pruning sealant (for trunks >2" thick) to prevent decay.
Are there alternatives to the central leader method for small spaces?
For limited space, consider:
- Espalier: Trains the tree flat against a fence/wall (great for urban gardens).
- Palmette or Fan Shaped: Encourages horizontal branches for dwarf varieties.
- Columnar Trees: Genetically bred to grow narrow (e.g., ‘Columnar Delicious’).
Wrapping up and next steps
Mastering the central leader pruning method is your gateway to a thriving, well-shaped apple tree that produces bountiful fruit year after year! 🍏 By understanding seasonal adjustments, proper tool use, and strategic cuts, you’re not just pruning—you’re sculpting a healthier, more productive tree.
Start small, stay consistent, and watch your efforts bloom into a stunning, low-maintenance orchard centerpiece.
Ready to take the next step? Grab your pruners and schedule a pruning session—whether it’s a light trim in summer or a structured cut in winter. Your apple tree (and future harvests) will thank you!