
Pruning
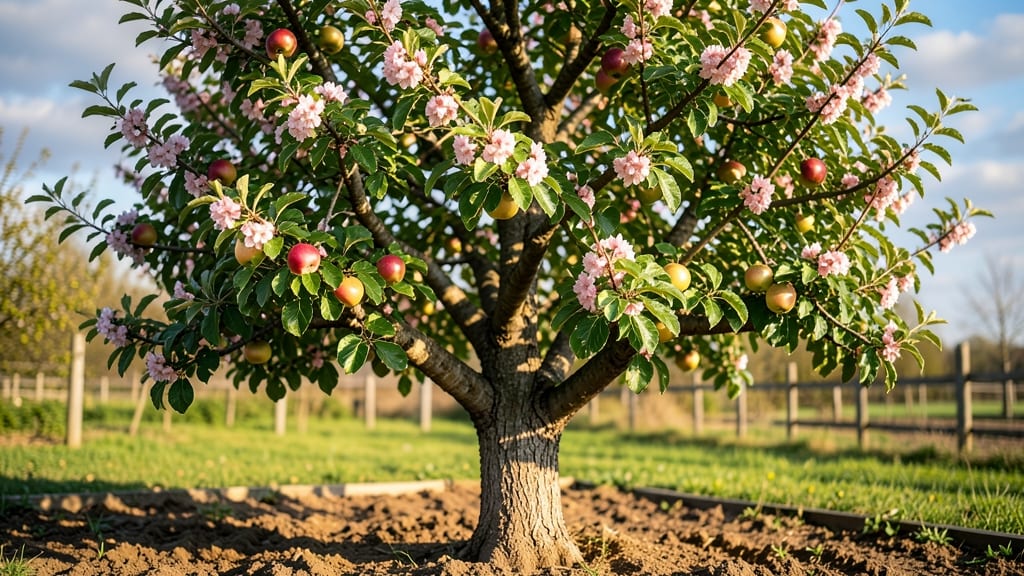
Apple tree gardening isn’t just about fruit—it’s about creating a legacy in your yard. 🌳 I’ve watched my own tree go from a sapling to a shade-providing giant, and the key to that journey starts with the right spot, soil, and care.
The first year sets the foundation for decades of harvests, so let’s get the basics right before we dive into seasonal tweaks.
You’ll need a sunny location with at least 6 hours of direct light daily, well-draining soil, and room for the tree’s mature spread (some varieties need 20+ feet).
The right tools—a sharp pruner, organic fertilizer, and mulch—make all the difference, but the real secret is patience: apple trees reward long-term care with years of fruit. Start with disease-resistant varieties if your area has common issues like apple scab or fire blight.
By summer, you’ll see the first signs of success: lush green leaves and maybe even a few tiny apples. Pruning in late winter opens airflow, while summer watering keeps roots happy without drowning them.
The payoff comes in fall harvests, when your tree becomes the star of the neighborhood—and your kitchen. Every season builds on the last, so let’s make this year count.
This works for backyard orchards, urban lots, or even container-grown dwarf varieties. Whether you’re a first-timer or refining your technique, the principles stay the same: good soil, smart pruning, and consistent care. Here’s how to make it happen without the guesswork.
📚 In This Guide
- What you need
- Instructions
- Tips and common mistakes
- Wrapping up and next steps
What you need
- ● Pruning tools: 1 sharp bypass pruners (for clean cuts on small branches)
- ● 1 pruning saw (for thicker branches, 3–5 inches in diameter)
- ● 1 loppers (for medium-sized branches, ½–2 inches thick)
- ● Disinfectant: 1 bottle rubbing alcohol (70%+) or bleach solution (1 part bleach to 9 parts water) to sterilize tools and prevent disease spread.
- ● Gloves: 1 pair cut-resistant gardening gloves (size medium or large, depending on hand size).
- ○ Tree wound sealant (optional but recommended): 1 tube pruning sealant (like Tanglefoot Tree Wound Pruning Sealant) for cuts larger than ½ inch.
- ● Tarp or drop cloth: 1 large tarp (5x7 feet) to collect debris and keep your workspace clean.
- ● Extension pole: 1 pruning pole (for reaching high branches safely).
- ● Marking spray: 1 bottle paint or spray marker (to tag branches for removal later).
- ● Safety gear: 1 pair safety goggles and 1 long-sleeve shirt (to protect from thorns and debris).
- ● Tree food: 1 bag balanced fertilizer (10-10-10 or similar) for post-pruning nourishment.
Step-by-step guide to planting and caring for apple trees
Here’s how I’ve learned to grow healthy, fruit-bearing apple trees that thrive year after year.
🌱 Step 1: Choose the Right Location and Plant at the Correct Time
Apple trees need full sun (6-8 hours daily) and well-draining soil with a pH between 6.0 and 7.0. I always plant in early spring—once the soil warms but before buds swell—so roots establish before summer heat. Dig a hole twice as wide as the root ball but no deeper, then loosen the sides to encourage root spread.
Place the tree so the graft union (the bump near the base) sits 2-3 inches above soil level. This prevents rot and ensures strong growth above ground. Fill the hole halfway with native soil, then water deeply to settle it before adding more. The goal is firm but not compacted soil around the roots.
💧 Step 2: Water Deeply and Mulch to Retain Moisture
Water the tree immediately after planting—enough to soak the root ball and surrounding soil. Over the first year, water once a week (10-15 gallons) unless rain provides 1 inch or more. You’ll know it’s enough when water drains 6 inches deep. Shallow watering stresses roots and leads to weak growth.
Spread 3-4 inches of mulch (wood chips or straw) around the base, keeping it 6 inches away from the trunk to prevent rot. Mulch locks in moisture and keeps roots cool in summer. Replenish mulch annually—it breaks down faster than you’d think.
☀️ Step 3: Prune for Structure and Airflow in Early Spring
Prune before buds swell (late winter/early spring) to shape the tree and remove dead or crossing branches. Use clean, sharp pruners to make cuts at a 45-degree angle just outside the branch collar. This encourages faster healing and stronger regrowth.
Open the center of the tree to allow sunlight and air to reach all branches—this prevents fungal diseases like apple scab. Aim for an open vase shape with main branches spaced 12-24 inches apart. Avoid heavy pruning in the first year; focus on removing only what’s necessary for structure.
✂️ Step 4: Fertilize and Monitor for Pests/Diseases Seasonally
Apply a balanced fertilizer (10-10-10) in early spring and again in early summer—about ½ pound per inch of trunk diameter. Over-fertilizing leads to weak wood and excessive leaf growth at the expense of fruit. I also add compost around the drip line (the edge of the tree’s canopy) to feed roots naturally.
Watch for aphids, codling moths, or apple scab—common issues in apple trees. Spray neem oil for pests or copper fungicide for diseases in early spring and late summer. Prevention is easier than treating an infestation. Thin fruit in June to 6-8 inches apart—this ensures larger, higher-quality apples.
⏰ Step 5: Prepare for Winter and Harvest at Peak Ripeness
In late fall, wrap the trunk with tree guard or burlap to protect it from rodents and frost cracks. Remove mulch from the base but leave it around the drip line for insulation. Prune again in dormant season to remove any dead wood or weak branches that could harbor pests.
Harvest apples when they easily separate from the tree and have full color (though some varieties stay green). I test ripeness by gently twisting the fruit—if it comes off without resistance, it’s ready. Store in a cool, dark place (like a basement) for 2-3 months to enjoy fresh apples long after harvest.
Tips & tricks for thriving apple trees
Real talk: Growing apple trees takes patience, but these simple tricks will help you avoid common mistakes and keep your tree healthy for decades.
Soil Prep Matters: Before planting, test your soil's pH using a simple kit from your local garden center. If it's outside the 6.0-7.0 range, amend with lime (to raise pH) or sulfur (to lower it) a few weeks before planting. I learned this the hard way after struggling with poor growth on acidic soil—my trees finally took off after adjusting the pH. The right soil makes all the difference in root development and fruit production.
Watering Wisdom: That 10-15 gallon weekly watering guideline is perfect, but timing matters just as much. Water deeply in the morning so the foliage has all day to dry, preventing fungal diseases. I set a timer to remind me—consistency is key, especially during the tree's first critical year when roots establish.
Pruning Precision: When you're shaping your tree in Step 3, look for branches that grow inward or cross each other—these compete for sunlight and nutrients. Remove them completely at the branch collar, not mid-branch. I also recommend keeping a small notebook to track which branches you prune each year so you can monitor their regrowth. This helps you build that perfect open vase shape over time.
Fertilizer Strategy: That ½ pound per inch of trunk diameter measurement is your gold standard, but don't forget to measure your trunk's diameter at chest height. I use a flexible tape measure for accuracy—this ensures you're applying just the right amount of 10-10-10 fertilizer. Too much nitrogen (the first number) leads to leafy growth at the expense of fruit, so follow the measurement precisely.
Pro Tips for Apple Tree Gardening
- Real talk: Growing apple trees takes patience, but these simple tricks will help you avoid common mistakes and keep your tree healthy for decades.
- Soil Prep Matters: Before planting, test your soil's pH using a simple kit from your local garden center.
- Watering Wisdom: That 10-15 gallon weekly watering guideline is perfect, but timing matters just as much.
Frequently asked questions
Got questions about growing your own apple tree? You’re not alone! Here are some of the most common concerns—plus straightforward answers to help you cultivate a thriving orchard with minimal stress.
When is the best time to plant an apple tree?
Plant bare-root apple trees in late fall or early spring (before buds break) for the best success. Container-grown trees can go in anytime, but avoid extreme heat or frost. Choose a spot with full sun (6+ hours daily) and well-draining soil to give your tree the ideal start. Pro tip: Water deeply after planting to reduce transplant shock!
How often should I prune my apple tree?
Prune young trees annually in late winter or early spring (before bud swell) to shape them and encourage strong growth. Mature trees benefit from light pruning every 2–3 years to remove dead wood, improve airflow, and boost fruit production. Avoid heavy pruning in fall—it can invite pests and diseases. Always sterilize tools between cuts!
What are the most common apple tree pests, and how do I prevent them?
Watch for aphids, codling moths, and apple maggots—they’re the usual troublemakers. Preventative care includes:
- Removing fallen fruit to deter maggots.
- Using row covers early in the season to block moths.
- Spraying neem oil or insecticidal soap for aphids (apply in early morning).
Why aren’t my apple trees producing fruit?
Common culprits include lack of pollination, improper pruning, or young age (apple trees often take 3–5 years to bear fruit). Ensure you have at least two compatible varieties for cross-pollination, prune to open the canopy for sunlight, and fertilize with balanced nitrogen, phosphorus, and potassium in early spring. Patience is key—some dwarf varieties fruit sooner!
Can I grow an apple tree in a container or small yard?
Dwarf or semi-dwarf varieties (like ‘Columnar’ or ‘Spindle’) thrive in containers or tight spaces. Use a 5-gallon pot minimum (bigger for mature trees) with drainage holes, and repot every 2–3 years. Place in full sun and choose self-pollinating varieties (e.g., ‘Liberty’ or ‘Honeycrisp’) to simplify care. Containers dry out faster—water deeply 2–3 times weekly in summer!
Wrapping up and next steps
Growing your own apple tree is a rewarding journey that blends patience, care, and a touch of nature’s magic. 🌳 From selecting the right tools to mastering pruning techniques, each step brings you closer to a bountiful harvest of crisp, delicious apples.
Whether you're a beginner or a seasoned gardener, the key is consistency—nurturing your tree year-round with love and attention.
Now that you’re armed with knowledge, it’s time to roll up your sleeves! Start by marking your calendar for seasonal pruning—your tree will thank you with vibrant growth and sweet fruit. Happy gardening, and may your orchard flourish! 🍏✨