
Pruning
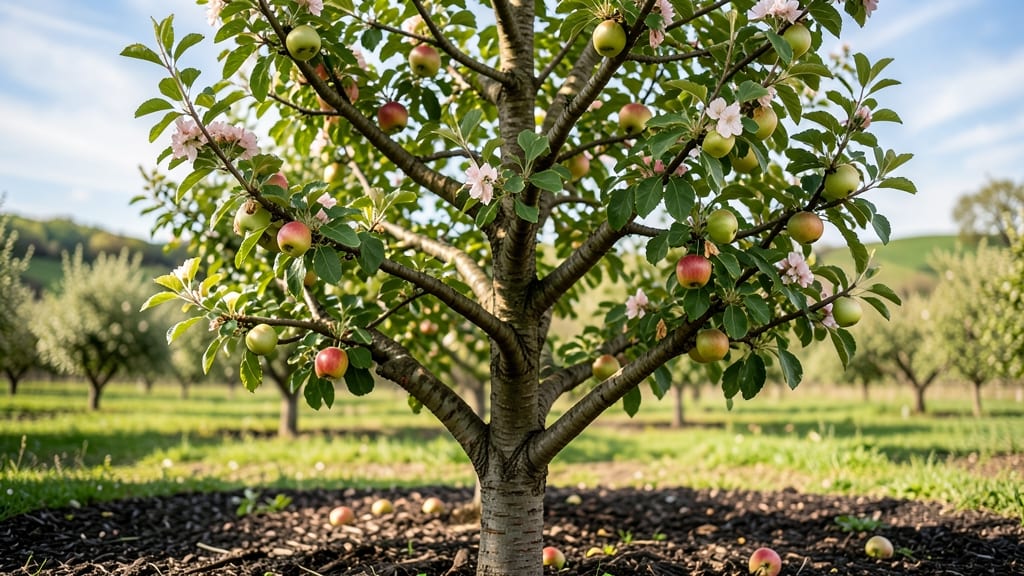
Understanding your apple tree's growth cycle means you'll prune at the perfect times—not just once a year, but four times. 🌳 I learned this after years of cutting branches at the wrong season, leaving my tree struggling with weak growth and poor fruit set.
The secret isn't complicated: each season demands a different approach to keep your tree thriving from bud break to winter dormancy.
Spring starts with light shaping cuts to encourage strong new growth, while summer focuses on thinning out crowded branches to improve airflow and fruit quality. Fall is all about removing dead wood and preparing for winter, and winter—yes, even then—lets you plan next year's structure while the tree rests.
Each phase builds on the last, turning a chaotic tangle of limbs into a productive, healthy tree.
You'll see the difference in just one season: fewer broken branches, bigger apples, and a tree that looks like it belongs in an orchard, not your backyard. The key is patience—pruning isn't about drastic changes but small, strategic cuts that pay off year after year.
No more guesswork, just a tree that rewards your effort with abundant harvests and easy care.
Works for any apple variety, from dwarf to standard trees, and adapts to your climate—whether you're battling humid summers or harsh winters. Here's how to make each season count for your tree's long-term health.
📚 In This Guide
- What you need
- Instructions
- Tips and common mistakes
- Wrapping up and next steps
What you need
- ● Pruning shears: Bypass pruners (sharp, clean, and 5-7 inches long) for small branches.
- ● Loppers: For thicker branches (1.5-2 inches in diameter), choose 8-10 inches long with a comfortable grip.
- ● Pruning saw: A bow saw or pruning saw for branches too thick for loppers (2+ inches).
- ● Gloves: Heavy-duty, cut-resistant gloves to protect your hands from thorns and sharp tools.
- ● Disinfectant: A 70% isopropyl alcohol or bleach solution (1 part bleach to 9 parts water) to sterilize tools between cuts.
- ○ Sealing wax or pruning paint: (Optional but helpful) To cover large cuts and prevent disease entry.
- ● Ladder or step stool: A sturdy, extension ladder (for tall trees) or a stable step stool (for smaller trees).
- ● Tarp or bucket: To collect pruned branches and debris.
- ● Pruning rope or spreaders: For supporting weak branches or training young trees.
- ● Tree wound dressing: (Controversial but some swear by it!) For sealing larger wounds.
- ● Garden hose or spray bottle: To rinse tools and clean sap off branches.
- ● Label tags: If you’re grafting or propagating, use waterproof labels to track varieties.
- ● Safety gear: Safety glasses and ear protection if working with power tools.
Instructions for mastering your apple tree's seasonal growth
Here's the seasonal rhythm I follow to keep my apple trees thriving—no guesswork, just science-backed timing.
⏰ Step 1: Late Winter Dormant Pruning (Before Bud Swell)
Prune your apple tree in late winter when the tree is still dormant but buds begin to swell—this is your 3-4 week window before spring growth starts. I always wait until temperatures stay above 40°F during the day to avoid stressing the tree. Use clean, sharp pruning shears to make cuts just outside the branch collar, where the branch meets the trunk.
Remove dead, diseased, or crossing branches first—they're the easiest to spot against the bare branches. Next, thin out too-tight clusters to improve airflow and sunlight penetration. Aim to open the center of the tree so light reaches the inner branches. You'll see smooth, white bark where healthy branches should be, while dead wood appears dark and shriveled.
This is also the time to shape the tree—whether you're maintaining an open-center or central-leader form. I never remove more than 25% of the tree's canopy in one year, or the tree struggles to recover. After pruning, apply wound dressing only if the cut is larger than ½ inch—small cuts heal better on their own.
☀️ Step 2: Early Spring Post-Bloom Thinning (After Flowering)
About 6-8 weeks after full bloom, when fruitlets are pea-sized, it's time for summer pruning to thin the crop. This step prevents overburdening the tree and ensures larger, higher-quality apples. I start by removing clusters with misshapen or damaged fruit—these won't develop properly. Next, thin to leave 6-8 inches between fruit on each branch.
Focus on removing vertical shoots (called "water sprouts") that grow straight up—they steal energy from fruit production. These shoots have no leaves and grow rapidly after pruning. Use hand pruners for branches up to ½ inch thick and loppers for thicker growth. Always cut just above a lateral bud pointing in the direction you want the branch to grow.
Here's the thing—thinning isn't just about fruit count. You're also encouraging stronger root growth for next year. After thinning, give the tree a deep watering to help it recover from the stress. Watch for new leaf growth in the pruned areas—that's your sign the tree is responding well.
🌿 Step 3: Summer Growth Monitoring (Mid-July to August)
From mid-July through August, your apple tree enters its rapid growth phase. This is when I monitor for pests like aphids or codling moths and water deeply every 7-10 days if rainfall is scarce. The soil should be dry 2-3 inches down before watering again—apple trees hate soggy roots but need consistent moisture during fruit development.
Look for new shoots growing from the base of the tree or along branches. These are suckers—remove them immediately with gloves and pruners, as they drain energy from the main tree. You'll also spot fruit clusters—now's the time to tie heavy branches with soft tree ties if they're bending dangerously. Never use wire or anything that can cut into the bark.
This is also when I fertilize lightly with balanced 10-10-10 if the tree shows signs of stress (yellowing leaves or stunted growth). Apply fertilizer only if the soil test shows deficiencies—over-fertilizing in summer can lead to excessive late-season growth that won't harden off before winter.
✂️ Step 4: Fall Cleanup and Winter Prep (October to November)
As temperatures drop below 50°F at night, your apple tree starts preparing for dormancy. This is the time to remove all fallen leaves and fruit—they harbor diseases like apple scab and fire blight. Rake up debris and compost it separately (don't add it back to the orchard area). I also prune out any dead or diseased wood that might have been missed earlier.
Apply a 2-3 inch layer of organic mulch (like wood chips) around the tree's drip line—but keep it 6 inches away from the trunk to prevent rot. This mulch insulates roots during winter and suppresses weeds in spring. Now's also the time to check your tree's support system—repair any broken stakes or ties from summer's fruit weight.
If you're in a cold climate, consider wrapping the trunk with tree guard to protect against sunscald and rodent damage. I've seen mice gnaw through young bark in winter—this simple step prevents that. Finally, label any new varieties you've planted so you don't confuse them next spring.
Tips & tricks for perfect seasonal apple tree care
Real talk: The difference between a thriving apple tree and one struggling with disease or poor fruit production often comes down to these precise seasonal adjustments.
Timing Secret: That 3-4 week window for late winter pruning isn't just arbitrary—it's when your tree's natural defenses are strongest. I've seen trees stressed beyond recovery when pruned too early (below 40°F) or too late (after buds swell). Test with your finger: if buds feel slightly swollen but don't pop when pressed, you're in the perfect zone. This timing prevents sap bleeding and gives branches time to heal before spring growth begins.
Branch Identification: Here's what nobody tells you—healthy branches have smooth, white bark with a slight sheen, while dead wood appears dark and shriveled (sometimes with cracks). I learned this the hard way after leaving some questionable branches on a tree that later developed fungal issues. Always cut at the branch collar where the branch meets the trunk—this is where the tree's natural healing begins. The ½ inch rule for wound dressing is critical: smaller cuts seal better on their own, but larger wounds benefit from protective paste to prevent disease entry.
Summer Growth Strategy: The 6-8 inch spacing between fruit isn't just about aesthetics—it's about light penetration and air circulation, both essential for preventing fungal diseases like apple scab. I've found that removing water sprouts (those vertical shoots) makes a surprising difference in fruit quality. These shoots divert energy that could be going to your apples. After thinning, I always do a deep watering—this helps the tree recover from the stress of pruning and sets up better root growth for next year.
Winter Protection: That 2-3 inch mulch layer in fall isn't just for show—it's a thermal blanket for your tree's roots. I've seen trees in cold climates suffer from sunscald (where winter sun warms the bark, causing cracks) and rodent damage. Wrapping the trunk with tree guard saves trees I've watched get completely girdled by mice. And here's a pro move: label your varieties now so you don't end up with a confusing mix of apple types next season.
Pro Tips for Apple Tree Growth Cycle
- Real talk: The difference between a thriving apple tree and one struggling with disease or poor fruit production often comes down to these precise seasonal adjustments.
- Timing Secret: That 3-4 week window for late winter pruning isn't just arbitrary—it's when your tree's natural defenses are strongest.
- Branch Identification: Here's what nobody tells you—healthy branches have smooth, white bark with a slight sheen, while dead wood appears dark and shriveled (sometimes with cracks).
Frequently asked questions
Got questions about keeping your apple tree thriving through every season? You’re not alone! Here are answers to the most common queries about the apple tree growth cycle—from pruning timing to troubleshooting.
When is the best time to prune an apple tree?
The ideal time is late winter or early spring (before buds swell), but you can also prune in summer after harvest to shape the tree. Avoid pruning in fall, as it can invite pests and diseases. Light pruning to remove dead branches can happen anytime, but major cuts wait for dormant season.
How long does it take for an apple tree to bear fruit?
Most apple trees take 4–7 years to produce fruit, depending on the variety and care. Dwarf trees may fruit sooner (2–3 years), while standard trees can take longer. Patience is key—focus on proper pruning, watering, and soil health to speed up the process!
Why are my apple tree’s leaves turning yellow?
Yellow leaves often signal nutrient deficiencies (like iron or nitrogen), overwatering, or fungal diseases. Check the soil pH (ideal: 6.0–7.0) and ensure good drainage. If yellowing starts at the edges, it’s likely overwatering or pests. Prune affected branches and treat with fungicide if needed.
Can I grow an apple tree from a store-bought apple?
While possible, it’s not recommended for fruit-bearing trees. Store-bought apples are often from grafted varieties that won’t grow true from seed. For consistent fruit, buy a certified nursery tree or rootstock. If you’re curious, try growing a seedling for a unique (but non-fruiting) tree!
How often should I fertilize an apple tree?
Fertilize once in early spring (before blooms) and again after harvest with a balanced 10-10-10 or organic compost. Over-fertilizing can harm the tree, so test soil annually. Young trees need less—focus on mulch and organic matter to build soil health.
Wrapping up and next steps
Understanding your apple tree’s growth cycle and mastering seasonal pruning is the key to fostering a thriving orchard—whether you’re a backyard enthusiast or a seasoned gardener. 🌳 From dormant winter cuts to summer shape-ups, each step ensures your tree stays healthy, productive, and resilient.
Now that you’re armed with the when, why, and how of pruning, it’s time to roll up your sleeves and give your tree the care it deserves!
💡 Next step: Grab your pruners, mark your calendar for the next pruning window, and observe your tree’s response. Happy growing—your future harvests will thank you!