
Pruning
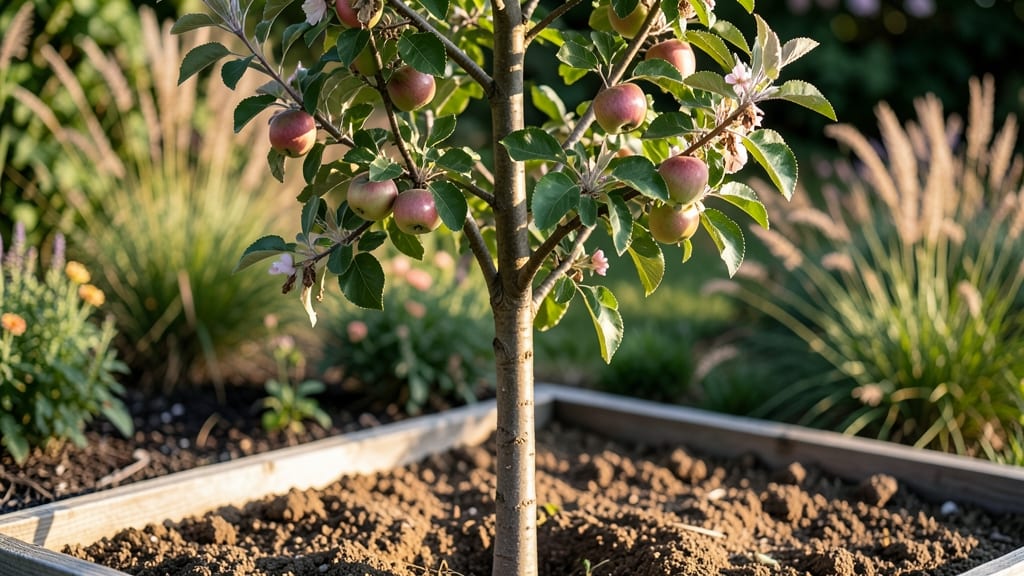
Your young apple tree’s first fruit is a promise—but only if you prune and thin like a pro. ✂️ Last summer, I watched my neighbor’s tree droop under a heavy load of tiny, bitter apples because he ignored the early-season work.
The difference between a few large, sweet fruits and a branch-breaking mess comes down to two simple moves: shaping the tree in winter and thinning fruit in spring.
Start by pruning in late winter when the tree is dormant. Remove dead, crossing, or inward-growing branches first—they compete for energy and crowd out fruit. Then, open the center to let sunlight and air reach the core.
This isn’t about cutting back hard; it’s about creating a framework where every branch has room to grow strong. Think of it like training a young athlete: you’re building structure for future performance.
When those first blossoms appear in spring, thin the fruit before it’s the size of a dime. Leave one fruit every 6–8 inches along each branch—this forces the tree to invest in fewer, larger apples with better flavor and less disease risk.
I’ve seen homegrown apples go from mealy and sour to crisp, honey-sweet just by making this one adjustment. The tree’s energy isn’t split thin; it goes into quality.
Water deeply once a week (unless it rains) and feed with balanced 10-10-10 fertilizer in early spring. Watch for codling moths—those little green worms ruin harvests—and use row covers or pheromone traps early.
With these steps, you’ll go from “Will my tree even fruit?” to picking bushels of apples in just a few years. The key is starting now—before the tree outgrows your good intentions.
📚 In This Guide
- What you need
- Instructions
- Tips and common mistakes
- Wrapping up and next steps
What you need
- ● Pruning shears: Sharp, bypass-style shears (for clean cuts on branches Quantity: 1 pair.
- ● Loppers: For thicker branches (1/2–2 inches). Quantity: 1 pair (with a long handle for reach).
- ● Pruning saw: For branches >2 inches thick. Quantity: 1 (with a curved blade for precision).
- ● Disinfectant: 70% isopropyl alcohol or a pruning sealant (to prevent disease spread). Quantity: Small bottle.
- ● Gloves: Heavy-duty, gardening gloves (to protect from thorns and sap). Quantity: 1 pair.
- ● Work boots: Sturdy, closed-toe shoes (for safety and comfort).
- ○ Pruning paint/sealant: (Optional but recommended for cuts >1/4 inch—helps heal wounds faster). Quantity: Small tube.
- ● Weather check: Prune on a dry, cloudy day (avoid wind or rain).
- ● Safety gear: Safety glasses (to shield from debris).
- ● Clean workspace: Lay down tarps or cardboard to collect clippings (easy cleanup!).
- ● Tree knowledge: Identify your apple tree’s variety and age (young trees <5 years old need lighter pruning).
- ● Sharp tools: Always sharpen blades before starting (dull tools crush branches, inviting disease).
Instructions for pruning young apple trees to encourage fruit
Here's how I shape young apple trees to set them up for a lifetime of heavy harvests.
✂️ Step 1: Identify and Remove Water Sprouts and Suckers
Start by scanning the tree for water sprouts—those fast-growing, vertical shoots that shoot up from branches or the trunk. These steal energy from fruit production. Use clean, sharp pruning shears to cut these back to their point of origin, making cuts at a 45-degree angle just above an outward-facing bud.
Next, look for suckers—those aggressive shoots growing from the base or graft union. These are the tree's way of rebelling against your pruning efforts. Snip these off at the ground level. I always do this first because it makes the rest of the pruning easier—you'll see the tree's true structure without those distracting growths.
✂️ Step 2: Shape the Central Leader and Scaffold Branches
Young apple trees need a strong central leader (the main vertical stem) and well-spaced scaffold branches (the main horizontal limbs). If your tree has a clear central leader, keep it dominant by removing any competing vertical stems. Cut these back to a strong lateral branch or bud.
For scaffold branches, aim for 4-6 main branches spaced evenly around the trunk. These should emerge at wide angles (ideally 45-60 degrees) and be spaced 8-12 inches apart vertically. If a branch grows too close to another or is growing inward, prune it back to a strong outward-facing bud. This open vase shape lets sunlight and air circulate freely, which prevents disease and encourages fruit development.
✂️ Step 3: Thin Out Crowded Growth and Encourage Fruit Buds
Look for areas where branches are growing too close together or crossing. These crowded spots create rubbing wounds and block airflow. Remove the weaker of the two branches by cutting back to a bud or lateral branch. Always make cuts just outside the branch collar (the swollen area where the branch meets the trunk or larger branch).
Now focus on the fruit buds. Apple trees produce fruit on spurs (short, stubby branches) and fruit spurs that form at the ends of branches. Thin out any branches that are growing too densely or are too small to bear fruit. Leave 3-4 strong spurs per branch to encourage fruit production. You'll know you're doing it right when you see clusters of pinkish buds in late winter—these are your future fruit.
✂️ Step 4: Clean Up and Sanitize Your Tools
After pruning, take a moment to clean up the area. Remove all pruned branches and debris from the base of the tree to prevent pests and diseases from taking hold. This is also the perfect time to sanitize your pruning tools. Wipe the blades with rubbing alcohol or a 10% bleach solution to kill any bacteria or fungi that might hitch a ride to your next pruning job.
Finally, apply a thin layer of tree wound sealant (optional but helpful) to any larger cuts to protect the tree from infection. I skip this for small cuts because the tree's natural healing response is usually sufficient, but for cuts larger than ½ inch in diameter, sealing helps prevent disease entry. Water the base of the tree deeply to help it recover from the pruning stress.
⏰ Step 5: Monitor and Adjust in Subsequent Seasons
Pruning isn't a one-time task—it's an ongoing conversation with your tree. Every year, reassess the tree's structure and adjust as needed. In the first few years, focus on establishing a strong framework. Once the tree is established (usually by year 3 or 4), shift your focus to fruit thinning—removing excess fruit to improve size and quality.
Watch for signs of stress, like yellowing leaves or stunted growth, which can indicate over-pruning. If you see these, back off and let the tree recover. The goal is balance: enough pruning to shape the tree and encourage fruit, but not so much that you weaken it. You'll know you're on the right track when you see a tree with a strong central leader, well-spaced branches, and clusters of healthy fruit buds.
Tips & tricks for pruning young apple trees
These simple strategies will help you shape your young apple tree for maximum fruit production while avoiding common pruning mistakes.
Timing is Everything: Late winter or early spring—just before buds swell—is the ideal time to prune. This timing prevents disease entry through fresh cuts and allows the tree to heal before summer stress. I always prune right after the last hard frost when the tree is still dormant but the weather is warming up. This balance gives the tree enough time to recover before new growth begins.
Tool Tip: Invest in a good pair of bypass pruners for branches up to ½ inch thick and a pruning saw for larger branches. Make sure your tools are sharp—dull blades crush stems instead of making clean cuts, which invites disease. I keep a small bottle of rubbing alcohol in my tool bag for quick sanitization between cuts on different branches. This simple habit prevents spreading any potential infections.
Visual Cues Matter: When shaping scaffold branches, look for the "branch collar"—that swollen area where the branch meets the trunk. Always make your cuts just outside this collar, never flush with it. This preserves the tree's natural healing response. For the 4-6 main branches, aim for a 45-60 degree angle from the trunk. You'll know you're on the right track when you can see sunlight reaching all parts of the canopy.
Seasonal Adjustments: In years 3-4 when your tree is established, shift focus to fruit thinning—removing excess fruit to improve size and quality. I like to leave about 6 inches between fruit clusters, which gives each apple room to grow. This step might seem counterintuitive, but it actually results in larger, higher-quality fruit. Watch for yellowing leaves or stunted growth as signs you may have over-pruned—these are your tree's way of telling you to back off.
Pro Tips for Apple Tree Young Fruit
- These simple strategies will help you shape your young apple tree for maximum fruit production while avoiding common pruning mistakes.
- Timing is Everything: Late winter or early spring—just before buds swell—is the ideal time to prune.
- Tool Tip: Invest in a good pair of bypass pruners for branches up to ½ inch thick and a pruning saw for larger branches.
Frequently asked questions
Got questions about nurturing young apple tree fruit?
You’re not alone! Here are answers to the most common concerns—from pruning puzzles to pest worries—so you can grow healthier, fruitier trees with confidence.
When should I start pruning my young apple tree for fruit?
Prune your young apple tree during its dormant season (late winter or early spring, before buds swell). For the first 2–3 years, focus on shaping the tree—removing suckers, water sprouts, and crossing branches—to encourage a strong structure. Avoid heavy pruning once fruiting begins, as this can stress the tree.
How do I know if my young apple tree’s fruit will be good?
Young apple trees may produce small, misshapen, or bitter fruit in their first few years—that’s normal! Healthy fruit depends on proper pollination (plant two compatible varieties if possible), sunlight (6+ hours/day), and balanced nutrients. Thin fruit clusters early (leave 6–8 inches between apples) to improve size and quality.
Why aren’t there any apples on my young tree?
Patience is key! Apple trees typically take 3–5 years to bear fruit. Common reasons for no apples include:
- Insufficient sunlight or water
- Lack of pollination (hand-pollinate with a brush if needed)
- Over-pruning or improper tree age (some varieties fruit later)
- Disease or pest damage (check leaves/stems for signs)
Ensure your tree has all its essentials—sun, water, and nutrients—and consult a local nursery for variety-specific tips.
Can I prune too much when the tree is young?
Yes! Over-pruning young apple trees can stunt growth, reduce fruiting potential, and invite disease. Stick to removing no more than 25% of the tree’s canopy per year. Focus on:
- Dead/diseased branches
- Competing growth (suckers, water sprouts)
- Crossing or rubbing branches
Use clean, sharp tools to make 45-degree cuts just above outward-facing buds.
What pests or diseases should I watch for on young apple fruit?
Young apple trees are vulnerable to:
- Apple scab (black spots on leaves/fruit) – Treat with copper fungicide.
- Codling moths (worms in apples) – Use pheromone traps or organic sprays.
- Aphids (sticky residue) – Blast off with water or apply neem oil.
- Fire blight (blackened, wilted branches) – Prune infected areas 6 inches below the damage.
Monitor your tree regularly and act at the first sign of trouble!
Wrapping up and next steps
Growing young apple fruit into a thriving harvest is all about patience, precision, and a little green-thumb love! 🌱 By mastering the art of pruning—removing dead wood, shaping the canopy, and encouraging airflow—you’re giving your tree the best chance to flourish.
Remember, healthy trees yield the sweetest rewards, so stay consistent with your care routine.
Ready to take the next step? Start small: monitor your tree’s growth, adjust pruning techniques as needed, and celebrate every blossom and bud! With time, your efforts will pay off in a bountiful, delicious harvest—and maybe even a few extra apples to share. Happy pruning! 🍏✨