
Propagation
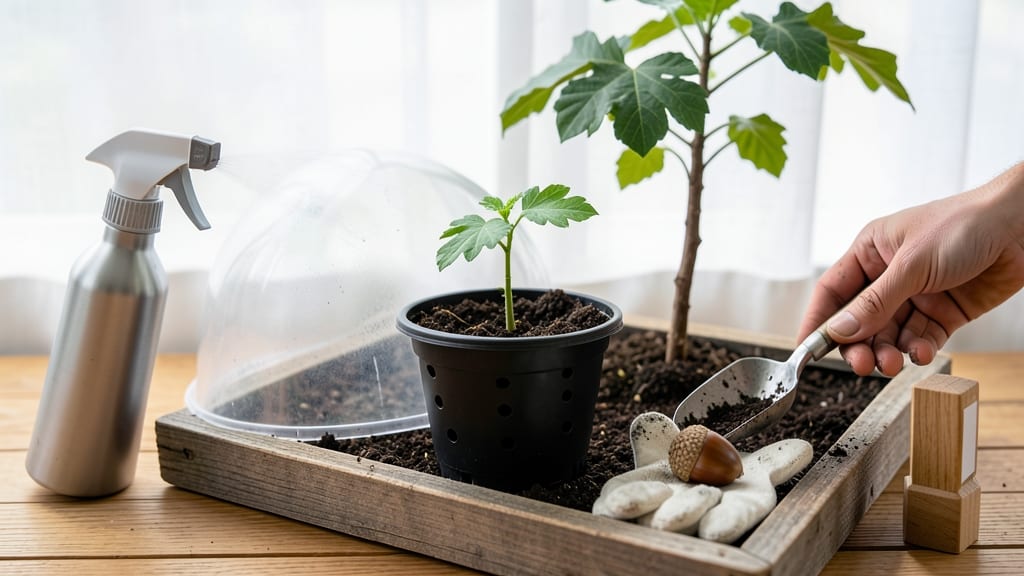
Starting an oak tree from an acorn is one of nature's most rewarding challenges—if you know the secrets. 🌰 The key begins with selecting the right acorn and mimicking winter's cold spell to break dormancy, a process called stratification that tricks the seed into thinking it's been through a real season.
Most people skip this critical step and wonder why their acorns never sprout. After my first failed attempt (I just planted them in the ground!), I learned that patience and preparation are everything.
You'll need a mix of sand and peat moss, a plastic bag, and a refrigerator—basically, a DIY cold storage system that takes about 90 days to work its magic. Once stratified, planting is simple: just tuck the acorn into moist soil, barely covering it, and wait.
Germination can take 3-6 months, but when those first leaves appear, you'll know you've done it right. The sapling grows slowly at first, but with proper care, it'll reward you for years to come. This method works for red, white, or pin oak acorns—just be patient.
The real magic happens underground, where roots develop before you even see a sprout. Let's get those acorns germinating!
📚 In This Guide
- What you need
- Instructions
- Tips and common mistakes
- Wrapping up and next steps
What you need
- ● Fresh acorns – Collect at least 10-20 acorns from mature oak trees (white oak or red oak varieties work best). Look for plump, unblemished acorns with a thick, intact cap.
- ● Water – A spray bottle or small watering can for gentle hydration.
- ● Small pots or containers – Use 3-4 inch diameter pots with drainage holes (or a shallow tray lined with paper towels for stratification).
- ● Potting soil or seed-starting mix – A well-draining, sterile mix (avoid garden soil—it can harbor fungi).
- ● Plastic wrap or clear lid – To create a mini greenhouse and retain moisture.
- ● Refrigerator or cool, dark space – For stratification (cold treatment to break dormancy).
- ● Labeling tags & marker – To track planting dates and acorn sources.
- ● A humidity dome or small greenhouse kit to speed up germination.
- ● Fungicide (like hydrogen peroxide or cinnamon powder) to prevent mold.
- ● A seedling heat mat (60–70°F) to encourage faster sprouting.
- ● Grow lights or a sunny windowsill (south-facing) for optimal light exposure.
- ● A notebook to log progress and adjust care as needed.
Step-by-Step instructions for growing oak trees from acorns
Here’s how I’ve successfully sprouted acorns into sturdy saplings—no fancy tools needed, just patience and the right timing.
🌱 Step 1: Select and Prepare Healthy Acorns
Gather acorns from mature oak trees in late fall or early winter when they’ve naturally fallen. Look for plump, intact acorns with no cracks or holes—those are your best bets. I avoid acorns with visible mold or insect damage, as they won’t germinate well. Store them in a paper bag in the fridge until you’re ready to plant, which mimics their natural winter dormancy.
Before planting, soak the acorns in lukewarm water for 24 hours. This softens the hard shell and kickstarts the germination process. After soaking, gently rub the acorn between two pieces of sandpaper to rough up the shell slightly—this helps water penetrate and speeds up sprouting. Don’t worry if it feels tedious; this small step makes all the difference.
🪴 Step 2: Plant Acorns in a Well-Draining Mix
Fill a small pot or seed tray with a mix of 50% potting soil and 50% perlite or coarse sand. This blend ensures good drainage while keeping moisture consistent. Plant the acorns 1 inch deep, spacing them about 2 inches apart in the container. If you’re planting directly in the ground, dig a shallow hole in a sunny, sheltered spot and place the acorn with the pointed end facing down.
Water lightly after planting—just enough to moisten the soil without soaking it. Too much water can cause rot, especially in the early stages. Place the pot or tray in a warm, shaded area (around 70°F) until you see signs of germination, which can take 4-12 weeks. Patience is key here; don’t give up if nothing happens right away.
☀️ Step 3: Provide Consistent Care for Sprouting Saplings
Once the first green shoot appears (usually after 6-8 weeks), move the seedlings to a spot with bright, indirect light. Direct sunlight can scorch tender young leaves, so a south-facing window with sheer curtains works well. If growing outdoors, choose a location with dappled shade during the first year—full sun can overwhelm the delicate seedlings.
Water the seedlings once a week, keeping the soil lightly moist but never soggy. You’ll know it’s time to water when the top inch of soil feels dry to the touch. Avoid getting water on the leaves to prevent fungal issues. After a few months, you can gradually introduce them to more sunlight, but do so slowly to avoid shock.
✂️ Step 4: Transplant and Protect Young Oak Trees
When the seedlings reach 6-12 inches tall (usually after 1-2 years), they’re ready for their first transplant. Choose a permanent spot in full sun with well-draining soil. Dig a hole twice as wide as the root ball but no deeper. Gently remove the seedling from its container, loosen the roots if they’re tightly bound, and place it in the hole at the same depth it was growing before.
Mulch around the base with 2-3 inches of organic mulch (like wood chips) to retain moisture and suppress weeds. Water deeply after transplanting to help the roots settle in. For the first year, protect the young tree from strong winds and pests—oak seedlings are fragile and can be easily damaged. A simple wire cage or mesh can shield them while they establish stronger roots.
Tips & tricks for growing oak trees from acorns
Here's what nobody tells you—these little details make all the difference between a thriving sapling and a failed experiment.
Timing Secret: The 24-hour soak in Step 1 isn't just about softening the shell—it mimics the natural winter chilling period acorns need to break dormancy. If you're impatient and soak them longer than 24 hours, they may develop mold. I've found that using lukewarm water (around 70°F) works best—too hot can shock the acorn, while cold water won't penetrate the shell effectively. After soaking, I like to place them in a sealed container with a damp paper towel to maintain humidity during the sandpaper rubbing stage.
Soil Mix Strategy: That 50/50 mix of potting soil and perlite/sand in Step 2 is crucial for preventing rot while maintaining moisture. I've had the best success using a mix that's about 60% perlite and 40% coarse sand—this gives even better drainage. When planting your acorns 1 inch deep, make sure the pointed end (the cap) is facing down—this is where the root will emerge. A small trick I use is to mark the pointed end with a pencil before planting to avoid confusion.
Germination Patience: The 4-12 week germination window in Step 2 can be frustrating, but there are ways to track progress without guessing. After planting, I place my containers in a clear plastic bag to create a mini greenhouse effect—this helps maintain consistent moisture and warmth. Check for germination by gently lifting the soil near each acorn; you should see a tiny white root emerging first. If nothing appears after 12 weeks, your acorn may not be viable, and it's time to try another one.
Light Transition: When moving seedlings to bright indirect light in Step 3, I recommend doing it gradually over 3-4 days. Start with just 2 hours of light per day, then increase by 1 hour each day. This helps prevent leaf scorch, which is especially common with oak seedlings. A south-facing window with sheer curtains is perfect, but if you don't have that option, a grow light on a timer works wonderfully. Remember, those first leaves are delicate—they're the tree's lifeline during this critical growth phase.
Pro Tips for How Do You Start An Oak Tree From An Acorn
- Here's what nobody tells you—these little details make all the difference between a thriving sapling and a failed experiment.
- Timing Secret: The 24-hour soak in Step 1 isn't just about softening the shell—it mimics the natural winter chilling period acorns need to break dormancy.
- Soil Mix Strategy: That 50/50 mix of potting soil and perlite/sand in Step 2 is crucial for preventing rot while maintaining moisture.
Frequently asked questions
Got questions about growing an oak tree from an acorn?
You’re not alone! Here are answers to the most common queries to help you succeed—no guesswork required.
How long does it take for an acorn to sprout?
Patience is key! Acorns typically sprout in 4 to 12 weeks, depending on moisture, temperature, and species. White oaks (like Quercus alba) often take longer, while red oaks (like Quercus rubra) may sprout faster. Keep the soil consistently moist and warm (60–70°F) to speed things up.
Can I plant an acorn in winter?
Not ideal! Acorns need warmth and moisture to germinate—planting in winter (below 40°F) risks rot or dormancy. Instead, stratify your acorns (chill them for 6–8 weeks) in fall, then plant in early spring. If you must plant now, use a heated propagator or indoor setup.
What if my acorn won’t sprout?
Don’t panic! Try these fixes:
- Check viability: Float the acorn—if it sinks, it’s viable (if it floats, it’s dead).
- Adjust moisture: Too dry? Mist daily. Too wet? Drain excess water.
- Warmth boost: Place near a sunny window or use a heat mat (70°F).
- Fresh acorns: Older acorns (over 1 year) lose viability. Use current-year acorns.
How big should my oak sapling be before transplanting outdoors?
Aim for 12–18 inches tall with a sturdy root system (3–4 inches deep). Harden off seedlings by gradually exposing them to outdoor conditions for 1–2 weeks before planting. Choose a permanent spot in full sun with well-draining soil—oaks hate soggy roots!
Can I grow an oak tree from any acorn I find?
Not all acorns are created equal! Some species (like live oaks) are slow-growing or difficult to propagate. For best results, use acorns from native oak species in your region. Avoid acorns from non-native or hybrid oaks, which may not thrive. When in doubt, ask a local nursery or forestry expert!
Wrapping up and next steps
Starting an oak tree from an acorn is a rewarding journey that connects you to nature’s patience and resilience.
With the right care—patience, consistency, and a little love—you can nurture a mighty oak from a tiny seed. Now that you’ve mastered the basics, why not expand your green thumb? Try experimenting with other native trees or share your newfound skills with fellow gardening enthusiasts.
Every sapling you grow is a step toward a greener future! 🌱💚