
Size
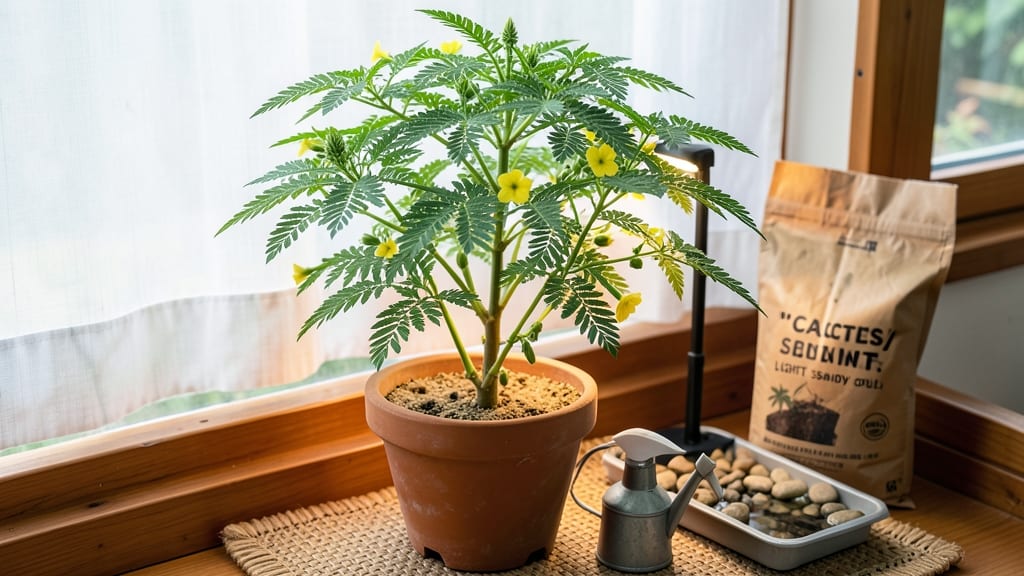
Growing moringa indoors is the fastest way to turn your kitchen counter into a superfood source—this drought-resistant tree can reach 10 feet tall in just 6 months with the right care. 🌱 I learned the hard way that most indoor growers fail by overwatering or giving it too little light, but once you nail these two basics, the rest is easy.
The secret starts with a bright window (south-facing is ideal) or a grow light for 12+ hours daily. Moringa thrives in well-draining cactus/succulent mix and a 5-gallon pot with drainage holes—no fancy soil needed.
Water only when the top inch feels dry, and you’ll avoid the root rot that kills so many beginner plants. Within 3-4 weeks, you’ll spot those signature triangular leaves, packed with 7x more vitamin C than oranges and 4x more calcium than milk.
The first harvest comes in 8-12 weeks, and with regular pruning, you’ll keep getting fresh leaves year-round without needing outdoor space. Even city apartments can grow this powerhouse—just avoid drafts, keep temps above 60°F, and watch your little tree turn into a leaf-producing machine.
Here’s exactly how to set it up without the guesswork.
📚 In This Guide
- What you need
- Instructions
- Tips and common mistakes
- Wrapping up and next steps
What you need
- ● Moringa seeds or cuttings: 3–5 seeds (or 1–2 healthy cuttings, 4–6 inches long) from an organic source.
- ● Containers: 2–3 small pots (6–8 inches in diameter) with drainage holes, or a single larger pot (10+ inches) for multiple plants.
- ● Potting mix: 2–3 bags of well-draining, nutrient-rich soil (e.g., cactus/succulent mix or a blend of 60% potting soil + 40% perlite/sand).
- ● Watering can or spray bottle: With a fine nozzle for gentle hydration.
- ● Fertilizer: Balanced liquid fertilizer (10-10-10 or 20-20-20, diluted to half-strength) or organic options like compost tea or worm castings.
- ○ Grow lights (optional but helpful): Full-spectrum LED grow lights (12–16 hours/day) if natural light is <6 hours/day.
- ○ Humidity tray (optional): A shallow tray with pebbles and water to boost humidity for seedlings.
- ○ Pruning shears (optional): Small, sharp scissors for trimming.
- ● Location: A sunny spot near a south-facing window (or under grow lights). Moringa loves bright, indirect light!
- ● Temperature: Keep it warm (65–85°F / 18–29°C). Avoid drafts or cold windowsills.
- ● Patience: Germination takes 7–14 days, and growth is fast but steady—don’t rush it!
Step-by-step instructions for growing moringa indoors
Here’s how to cultivate this nutrient-packed tree in containers—fast growth guaranteed with the right care.
🌱 Step 1: Choose the Right Container and Soil Mix
Moringa thrives in well-draining soil, so use a 10-inch diameter pot with drainage holes—terracotta works best. Fill it with a mix of 50% potting soil, 30% perlite, and 20% coco coir to prevent root rot. This airy blend mimics its native sandy soil and keeps roots oxygenated.
Sterilize the mix by baking it at 200°F for 30 minutes to kill pathogens. Moringa is sensitive to fungal issues, so this step prevents future problems. Tap the pot gently after filling to settle the soil without compacting it—firm but not dense.
🌱 Step 2: Plant Seeds at the Correct Depth and Temperature
Place 2-3 seeds per pot at a depth of ½ inch, spacing them 2 inches apart. Cover lightly with soil—don’t press down, or germination slows. Keep the pot in a warm spot (75-85°F) under a grow light or near a south-facing window.
Mist the soil daily until sprouts appear in 7-14 days. Avoid overwatering—the seeds need moisture but not soggy conditions. Once seedlings reach 2 inches tall, thin to the strongest one per pot. Weak stems snap easily, so handle carefully.
☀️ Step 3: Provide Bright Light and Controlled Watering
Moringa demands 6+ hours of direct light daily—supplement with a full-spectrum LED grow light if natural light is insufficient. Rotate the pot quarter-turn weekly to prevent lopsided growth. You’ll notice new leaves forming within 3-4 weeks if light is adequate.
Water when the top inch of soil feels dry—typically 2-3 times per week. Let excess water drain completely; moringa hates wet feet. Yellowing leaves signal overwatering, while crisp edges mean it’s thirsty. Adjust frequency based on humidity and pot size.
🌿 Step 4: Fertilize and Prune for Bushier Growth
Start fertilizing with half-strength liquid fertilizer (balanced 10-10-10) 4 weeks after germination. Apply every 2 weeks during active growth (spring/summer). Moringa grows fast—up to 6 feet in a year—so prune 2-3 inches above a leaf node to encourage branching.
Harvest leaves when 3-4 inches long by pinching stems. This stimulates bushier growth and prevents legginess. Wear gloves—moringa leaves can irritate skin. Regular pruning keeps the plant compact and productive, even in small spaces.
⏰ Step 5: Monitor for Pests and Adjust Seasonally
Check for aphids or spider mites weekly—wipe leaves with neem oil solution if spotted. Moringa’s rapid growth attracts pests, but early action prevents infestations. Increase humidity (via a pebble tray) in dry months to deter mites.
Reduce watering in winter and move the plant to a cooler (60-70°F) spot with 4-5 hours of light. Growth slows naturally, but don’t let soil dry out completely. With consistent care, your moringa will stay lush year-round, ready for harvest every 2-3 weeks.
Tips & tricks for fast moringa growth indoors
Want your moringa to grow like a jungle vine instead of a struggling sapling? These pro tips will help you maximize growth speed and keep your plant thriving.
Soil Sterilization Secret: That 30-minute bake at 200°F isn't just about killing pathogens—it's also sterilizing your tools. Use the same oven tray to sterilize your small hand tools and scissors for 10 minutes afterward. Clean tools prevent cross-contamination that could introduce fungal spores right after you've sterilized your soil.
Germination Temperature Hack: The 75-85°F range is critical, but here's the trick: place your seedling pot on top of your refrigerator (not inside) for consistent warmth without overheating. This creates a stable microclimate that speeds germination while preventing mold. Monitor daily to ensure the soil stays moist but not soggy during this crucial phase.
Light Rotation Strategy: That quarter-turn weekly isn't just about aesthetics—it's about light distribution. For even faster growth, rotate your pot every 3-4 days instead. Moringa grows toward light aggressively, and this prevents the plant from leaning while ensuring all sides get equal exposure. You'll notice more uniform leaf development within just 2-3 weeks of implementing this.
Fertilizer Timing Precision: The 4-week mark is perfect for starting fertilizer, but here's what nobody tells you: split that half-strength application into two smaller doses—one at 4 weeks and another at 5 weeks. This gradual introduction prevents root burn while giving your moringa a steady nutrient supply. The 2-week interval between applications should remain consistent thereafter during active growth seasons.
Pro Tips for Grow Moringa Tree Indoors
- Want your moringa to grow like a jungle vine instead of a struggling sapling? These pro tips will help you maximize g...
- Soil Sterilization Secret: That 30-minute bake at 200°F isn't just about killing pathogens—it's also sterilizing your...
- Germination Temperature Hack: The 75-85°F range is critical, but here's the trick: place your seedling pot on top of ...
Frequently asked questions
about growing moringa indoors—because even superfoods need a little TLC! Here are answers to the most common questions to help you nurture your thriving indoor tree.How long does it take for moringa seeds to sprout indoors?
Moringa seeds typically sprout within 7–14 days when kept in warm, moist conditions. Soak seeds overnight before planting to speed up germination. Patience is key—some may take up to 3 weeks, especially if the environment is cooler (65°F/18°C or warmer). Keep the soil consistently moist (but not soggy) to encourage faster sprouting. Pro tip: Use a heat mat if your home runs chilly!
Can I grow moringa indoors without sunlight? What’s the best alternative?
Moringa needs 4–6 hours of direct sunlight daily, but if natural light is limited, supplement with a full-spectrum grow light (LED or fluorescent) 12–16 hours/day. Place the light 6–12 inches above the plant and adjust as it grows. South-facing windows or a sunny balcony are ideal if you’re not using artificial lights. Without enough light, leaves will turn pale or leggy. Warning: Avoid cold drafts near windows!
Why are my moringa leaves turning yellow or dropping?
Yellowing leaves (chlorosis) or leaf drop usually signal overwatering, underwatering, or nutrient deficiencies. Check the soil—it should be damp but not waterlogged. Moringa prefers well-draining soil; if roots sit in water, they’ll rot. Yellow edges? It might be low humidity or fluoride in tap water (use filtered water). Brown spots? Fungal issues—trim affected leaves and improve airflow. Fix: Adjust watering and mist leaves occasionally!
How often should I harvest moringa leaves indoors?
You can start harvesting young, tender leaves once your moringa is 6–12 inches tall (usually 4–8 weeks in). Prune outer leaves first, leaving the center growth intact. Harvest every 2–4 weeks to encourage bushier growth. Avoid taking more than 20–30% of the plant at once. Bonus: Young leaves are more nutritious—use them in smoothies, salads, or teas!
What’s the best indoor temperature for moringa trees?
Moringa thrives in warmth (70–90°F / 21–32°C). If your home dips below 55°F (13°C), growth slows or stops. Avoid cold drafts from AC vents or open windows. In winter, keep moringa near a sunny window or under grow lights. Cold stress? Move it to a warmer spot immediately. Pro tip: A small space heater near the plant can help in chilly climates!
Wrapping up and next steps
Growing a moringa tree indoors is a rewarding journey that brings a nutrient-packed superfood right to your kitchen! With the right setup—like bright light, well-draining soil, and patience—you’ll enjoy fresh leaves packed with vitamins, protein, and antioxidants in just a few months. 🌱✨
Ready to take the next step? Start with a single seedling and watch it thrive—your future harvest of nature’s powerhouse awaits! Share your progress with fellow plant lovers or experiment with recipes to unlock moringa’s full potential.