Pruning
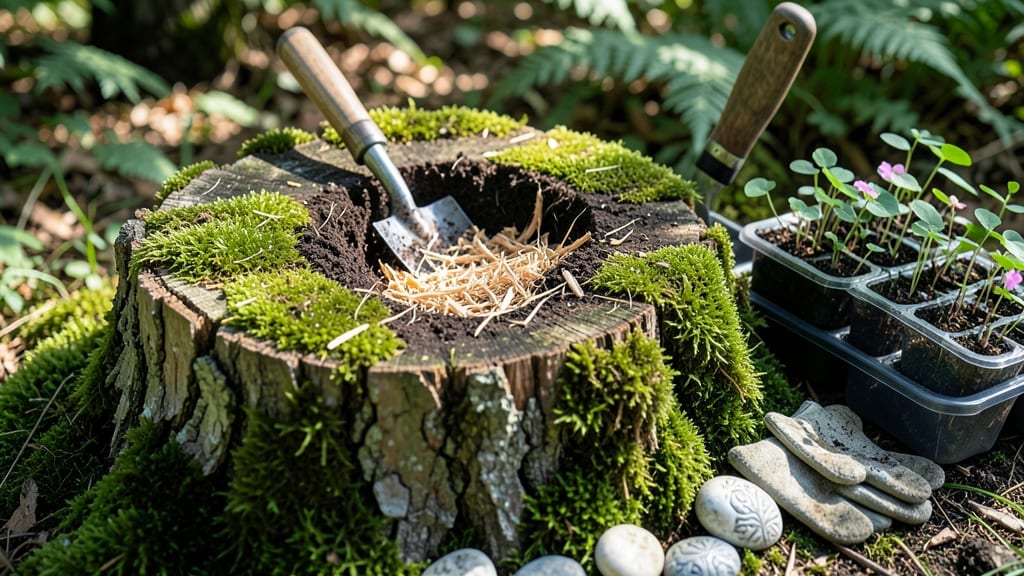
A tree stump planter turns yard waste into a stunning vertical garden that saves space and adds rustic charm. 🌿 I’ve transformed three stumps myself, and each one became the centerpiece of my garden’s focal point—no fancy tools required.
The best part? You’re giving new life to something that would otherwise be an eyesore.
Start with a clean, dry stump (about 8–12 inches in diameter works best) and a few basic supplies: a drill, waterproof liner, potting soil, and your favorite small plants. Safety first—wear gloves and goggles, and make sure the stump is stable.
The liner keeps soil contained while allowing water to drain properly, so your plants thrive without rotting the wood underneath.
By the time you’re done, you’ll have a self-watering planter that’s perfect for succulents, herbs, or even tiny flowers. The stump’s natural shape creates a built-in drainage system, so you’ll spend less time fussing over watering.
Plus, it’s a conversation starter—neighbors will ask how you did it, and you’ll get to brag about your upcycled garden hack.
Works for any outdoor space, from patios to woodland edges. Just pick a stump that fits your style—painted, natural, or even carved with designs. Here’s how to make it happen without the hassle.
📚 In This Guide
- What you need
- Instructions
- Tips and common mistakes
- Wrapping up and next steps
What you need
- ● 1 tree stump – Freshly cut (preferably within the last 24 hours for easier carving) or dried and stabilized.
- ● 1 bag of potting soil – Minimum 10-15 gallons, well-draining, and suitable for your plants (e.g., peat-based or coconut coir mix).
- ● 1 waterproof liner or heavy-duty plastic sheeting – 12" x 12" or larger, to prevent soil loss and root intrusion.
- ○ 1 bag of mulch or wood chips – Optional but recommended for moisture retention and aesthetics (2-3 cubic feet).
- ● 1 small bag of gravel or small rocks – 1-2 gallons, for drainage at the bottom.
- ● 1 handsaw or chainsaw – For carving or shaping the stump (if needed). Safety gear (gloves, goggles) is a must!
- ● 1 drill with a hole saw (2-3") or a spade bit – For creating drainage holes in the stump.
- ● 1 paintbrush or foam brush – For sealing (if using wood sealant).
- ○ 1 wood sealant or outdoor paint – Optional but recommended to protect the stump from rot (choose a non-toxic, plant-safe option).
- ● 1 trowel or small shovel – For planting and soil adjustments.
- ● 1 hammer or mallet – For securing the liner or stakes if needed.
- ● Decorative stones or mosaic tiles – To line the edges of the planter for a polished look.
- ● Solar-powered garden lights – For a magical evening glow.
- ● Small stakes or twine – To secure the liner in place if the stump is top-heavy.
- ● Plant markers or cute labels – To showcase your green babies!
Step-by-step instructions for creating a tree stump planter
Transforming a stump into a thriving planter is easier than you think—just follow these simple, satisfying steps!
🪴 Step 1: Clean and Prepare the Stump
Start by removing any loose bark or debris from the stump using a putty knife or stiff brush. Scrub the surface with a mix of 1 part bleach to 3 parts water to kill bacteria and fungi—this ensures a clean base for your plants. Let it dry completely in the sun for 24 hours before proceeding. I like to wear gloves for this step; the bleach mixture can be tough on skin.
Next, inspect the stump for deep cracks or holes. If you find any, fill them with waterproof wood filler and let it dry. This prevents soil from spilling out and keeps moisture where it belongs. For extra stability, you can also drill small drainage holes near the base if the stump isn’t already porous. Just don’t go overboard—you want enough drainage without turning it into a sieve.
💧 Step 2: Line and Fill with Soil
Cut a piece of landscape fabric to fit snugly inside the stump, leaving a little extra around the edges. This keeps soil in place and prevents weeds from sneaking in. Secure it with a few staples or by tucking the edges into any crevices. Now, fill the stump with a mix of potting soil and compost—I use about half potting soil and half compost for good drainage and nutrients.
Press the soil down gently to eliminate air pockets, but don’t compact it too tightly. You want roots to have room to spread and breathe. Leave about 1 inch of space at the top to avoid spillage when watering. If the stump is shallow, you can add a layer of gravel or small rocks at the bottom for extra drainage before filling with soil.
☀️ Step 3: Plant and Maintain Your New Planter
Choose plants that thrive in containers and match the stump’s sunlight exposure. Succulents, ferns, and ornamental grasses are perfect for stump planters because they adapt well to confined spaces. Dig small holes in the soil, place your plants gently, and cover the roots with soil. Water thoroughly right after planting to help the roots settle.
Place your stump planter in a spot that gets the right amount of light for your chosen plants—most prefer 4-6 hours of sunlight daily. Water regularly, but avoid overwatering; let the top 1-2 inches of soil dry out between waterings. A slow-release fertilizer applied every 2-3 months will keep your plants happy and healthy. Watch as your stump transforms into a lush, living centerpiece!
Tips & tricks for perfect tree stump planters
Turn that old stump into a stunning garden feature with these game-changing tips that'll make all the difference!
Cleaning Secret: I can't stress enough how important that 24-hour drying time is after cleaning with bleach. The sun does most of the work here—don't rush it! If you're in a hurry, place the stump near a fan or in direct sunlight to speed up evaporation. Just remember, bacteria and fungi need that full time to get completely eliminated.
Drainage Strategy: Those optional drainage holes near the base are actually more important than you might think. If your stump has a solid bottom, add 2-3 small holes using a drill bit—just big enough to let excess water escape. This prevents root rot while keeping your plants happy. Pro tip: Cover the holes with small pieces of mesh to keep soil in place.
Soil Science: The half-and-half mix of potting soil and compost is perfect, but here's the thing—if you're using a heavy clay soil, increase the compost to two-thirds for better drainage. For sandy soils, reduce compost to one-third to retain more moisture. Always test your soil mix by squeezing a handful—it should hold shape but crumble easily when touched.
Plant Selection: For that 4-6 hours of sunlight requirement, I recommend starting with drought-tolerant plants like sedum or hens-and-chicks if your stump gets full sun. In shadier spots, try ferns or hostas—they'll thrive in the cooler, moister environment. Just remember, smaller plants with shallow roots work best in stump planters.
Pro Tips for Make Tree Stump Planter
- Turn that old stump into a stunning garden feature with these game-changing tips that'll make all the difference!
- Cleaning Secret: I can't stress enough how important that 24-hour drying time is after cleaning with bleach.
- Drainage Strategy: Those optional drainage holes near the base are actually more important than you might think.
Frequently asked questions
Got questions about turning that old tree stump into a thriving planter? You’re not alone! Here are some of the most common queries—and their easy answers—to help you DIY like a pro.
Can I use any tree stump for a planter?
Not all stumps are created equal! Softwood stumps (like pine or cedar) rot faster and may not last long-term. Hardwoods (oak, maple, or walnut) are ideal—they’re durable, naturally resistant to decay, and hold moisture well. If your stump is already decaying, give it a good scrub to remove mold or pests before planting.
How long does it take for a tree stump planter to be ready for plants?
Patience is key! If your stump is fresh (cut recently), wait at least 2–3 months to let it dry out and stabilize. For older, weathered stumps, you can plant right away. Pro tip: Line the interior with landscape fabric to prevent soil from washing out while the stump "sets."
What’s the best soil mix for a tree stump planter?
A well-draining blend is critical to avoid rot. Mix equal parts potting soil, compost, and perlite or sand for airflow. For succulents or herbs, add extra perlite (30%) to keep roots happy. Skip garden soil—it compacts and can suffocate plants in the confined space.
Will bugs or pests move into my stump planter?
Possible, but not inevitable! Treat your stump with food-grade mineral oil or vinegar to deter ants/beetles. Elevate the planter slightly (use bricks or a saucer) to discourage crawling critters. If pests persist, opt for fast-growing annuals like marigolds, which naturally repel bugs.
What if my stump planter starts rotting?
Rotting is a sign of excess moisture. Drainage is your best friend: Add a layer of gravel at the bottom, avoid overwatering, and choose drought-tolerant plants (sedum, lavender, or rosemary). For severe rot, seal the stump’s interior with waterproof liner or replace it—better safe than sorry!
Can I paint or decorate my tree stump planter?
Use non-toxic, weatherproof paint or outdoor stain to add color. Skip sealants with harsh chemicals—they can leach into soil. For a rustic look, try stenciling or wrapping the base with moss. Just let it dry 24 hours before planting!
Wrapping up and next steps
Transforming a tree stump into a vibrant planter is a rewarding project that breathes new life into your garden while reducing waste! With just a few tools and a little creativity, you’ve turned an old stump into a functional, eco-friendly planter—perfect for flowers, herbs, or even succulents. 🌿✨
Now that you’ve mastered the basics, why not take it further? Try adding mulch or decorative stones for extra flair, or experiment with different plant combinations. Your garden will thank you—and so will the planet! Grab your tools and get planting! 🌱💚