
Pruning
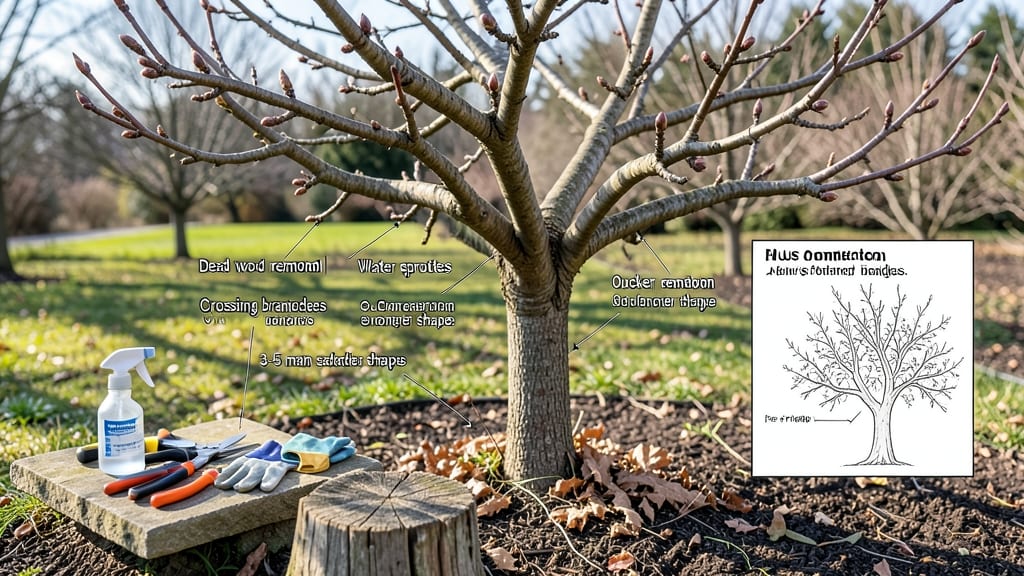
Winter’s the best time to learn how to prune an apple tree with a diagram—when cuts boost next year’s fruit and disease risks drop. ✂️ I’ve pruned dozens of trees, and the dormant season makes it easier to see the structure clearly, with no leaves hiding problems.
The right cuts now mean stronger branches, better airflow, and a harvest you’ll actually enjoy—not just a few sad apples at the top. Start with clean tools: a sharp pruning saw for thick branches, loppers for medium-sized limbs, and bypass pruners for small cuts.
You’ll also want rubbing alcohol to sterilize tools between cuts (trust me, this prevents spreading disease). The goal is to open the canopy so sunlight reaches the center and air circulates—this cuts down on rot and pests.
Picture this: you’re making 3 types of cuts—removing dead wood, thinning crowded branches, and shaping the tree’s natural form. Look for V-shaped branch collars where cuts should start, and avoid leaving stubs (they invite decay).
A well-pruned tree will have a balanced, vase-like shape that supports heavy fruit without snapping. Timing matters—prune after leaf drop but before buds swell, usually January through early March in most climates. If you’re in a warmer zone, wait until late winter to avoid encouraging early growth.
And here’s the kicker: one-third of the tree’s branches can be removed in a single winter session without stressing it.
📚 In This Guide
- What you need
- Instructions
- Tips and common mistakes
- Wrapping up and next steps
What you need
- ● Pruning shears (bypass pruners): Sharp, high-quality shears with a 4- to 6-inch blade for clean cuts on small branches (under ½ inch thick). Look for ergonomic handles to reduce hand fatigue.
- ● Loppers: A pivoting-anvil or bypass design for branches ½ to 1½ inches thick. Choose loppers with long handles (24+ inches) for leverage.
- ● Pruning saw: A curved-tooth saw for branches 1½+ inches thick. Opt for a foldable design for portability.
- ● Gloves: Heavy-duty, cut-resistant gloves (e.g., leather or Kevlar) to protect hands from thorns and sharp tools.
- ● Disinfectant (70% isopropyl alcohol or bleach solution): Clean tools between cuts to prevent disease spread. Mix 1 part bleach to 9 parts water for a DIY solution.
- ● Rubbing alcohol or hand sanitizer: For quick clean-ups between cuts.
- ● Twine or zip ties: To secure larger branches temporarily if needed.
- ● Ladder or step stool: A stable, extendable ladder (e.g., 20+ feet) for taller trees. Ensure it has non-slip feet and a weight limit that accommodates you + tools.
- ● Safety gear: Safety glasses or goggles
- ● Closed-toe shoes or boots
- ● Long sleeves/pants (to avoid scratches or thorns)
- ● Pruning sealant: A wound dressing (e.g., tree paint or pruning paste) to coat large cuts (over ½ inch) and reduce disease risk. Use sparingly—modern research suggests it’s often unnecessary!
- ● Marking spray or flags: Temporary markers to label branches for removal or special attention.
- ● Wheelbarrow or bucket: For collecting debris and disposing of pruned branches.
- ● Extension pole pruners: For high branches without a ladder (ideal for 6–10 feet reach).
- ● Notebook or app: To sketch your tree’s structure or track pruning notes for future reference.
Step-by-Step instructions for pruning an apple tree in winter
Winter’s the perfect time to shape your apple tree—here’s how to make cuts that set up a bountiful harvest next season.
✂️ Step 1: Identify and Remove Dead or Diseased Wood
Start by scanning the tree for branches that are completely brown, brittle, or oozing sap—these are dead or infected. Use your pruning shears to cut these out first, making clean cuts just outside the branch collar (the swollen area where the branch meets the trunk). This prevents disease from spreading deeper into the tree.
Look for branches with cankers (sunken, cracked spots) or fungal growth. These should be removed entirely, even if they still have some green tissue. Bag and dispose of diseased wood immediately—don’t compost it. You’ll know you’re doing this right when the tree’s structure looks more open and air can circulate freely.
✂️ Step 2: Thin Out Crowded Branches for Better Airflow
Next, focus on branches that cross or rub against each other. These create wounds where pests and diseases can enter. Use your pruning saw for thicker branches—cut at a 45-degree angle about ¼ inch above an outward-facing bud on the underside of the branch. For thinner branches, hand shears work fine.
Remove about 20-30% of the tree’s total branches to open up the canopy. You’ll see sunlight reaching the inner branches, which encourages new growth in spring. Avoid leaving stubs—always cut back to a bud or branch collar to promote proper healing.
✂️ Step 3: Shape the Tree’s Structure for Strong Growth
Now, focus on the tree’s overall form. Aim for a central leader (one main upward-growing branch) if it’s young, or a modified central leader (multiple strong branches) if it’s mature. Remove branches that grow inward or downward—these compete with fruit-bearing branches and weaken the tree.
Make sure the lowest branches are at least 6-8 feet off the ground to allow for easy harvests and reduce disease risk from ground debris. Step back occasionally to visualize the tree’s shape—you want a balanced, pyramid-like structure with sunlight reaching all sides.
✂️ Step 4: Prune for Fruit Production by Encouraging New Growth
To boost next year’s fruit, cut back last year’s fruit-bearing spurs (short, stubby branches) by about one-third. This stimulates new spurs to form, which will produce more apples. Avoid heavy pruning on young trees—focus on shaping rather than reducing size.
Pay attention to water sprouts (fast-growing, vertical shoots). These sap energy away from fruit production—cut them out completely at their base. You’ll know you’ve done this right when the tree’s framework looks sturdy and the branches are evenly spaced.
⏰ Step 5: Clean Up and Protect the Tree
After pruning, rake up all fallen branches and debris from under the tree. Sterilize your tools with rubbing alcohol to prevent spreading disease. Apply a tree wound sealant (optional but helpful) to larger cuts to protect against pests and rot.
Water the tree deeply after pruning to help it recover. Mulch around the base with 2-3 inches of organic mulch, keeping it 6 inches away from the trunk to prevent rot. This protects roots and retains moisture for spring growth.
Tips & tricks for perfect winter apple tree pruning
Winter pruning transforms your apple tree into a fruit-bearing powerhouse—here’s how to avoid common mistakes and maximize next year’s harvest.
Tool Prep is Non-Negotiable: Sterilize your pruning shears and saw with rubbing alcohol before you start. I learned this the hard way after transferring fungal spores from one branch to another—now I always clean tools between cuts. Sharp blades make cleaner cuts that heal faster, so hone your tools before beginning. For larger branches, a bypass pruner works best to avoid crushing the branch collar.
The 20-30% Rule in Step 2: Removing about one-fifth to one-third of the tree’s branches opens the canopy dramatically, but don’t overdo it. I once pruned too aggressively and ended up with sparse fruit production the following season. Focus on removing branches that cross, rub, or grow inward—these are the real culprits blocking sunlight and air circulation. Remember: you’re sculpting, not deforesting.
Bud Direction Matters: When making angled cuts in Step 2, always aim for an outward-facing bud on the underside of the branch. This ensures new growth will angle away from the center, creating an open structure. I mark the bud with a white pencil before cutting to avoid mistakes—especially helpful when working with multiple branches. The goal is to train the tree to grow outward, not inward.
Seasonal Timing Secret: Prune during late winter (just before buds swell) when the tree is dormant but sap isn’t flowing heavily. This minimizes stress on the tree. I’ve found that temperatures between 40-50°F provide ideal conditions—cool enough for clean cuts but warm enough to work comfortably. Avoid pruning in freezing conditions when branches become brittle and more likely to snap unpredictably.
Pro Tips for Prune An Apple Tree Diagram In Winter
- Winter pruning transforms your apple tree into a fruit-bearing powerhouse—here’s how to avoid common mistakes and maximize next year’s harvest.
- Tool Prep is Non-Negotiable: Sterilize your pruning shears and saw with rubbing alcohol before you start.
- The 20-30% Rule in Step 2: Removing about one-fifth to one-third of the tree’s branches opens the canopy dramatically, but don’t overdo it.
Frequently asked questions
Got questions about pruning your apple tree in winter? You’re not alone! Here are answers to the most common concerns—so you can prune with confidence and set your tree up for a bountiful harvest next season.
Can I prune my apple tree if it’s freezing or snowing?
Wait for a dry day with temperatures above 32°F (0°C)—ideally between 40–60°F (4–15°C). Cold, wet, or icy conditions stress the tree and can introduce disease. If snow covers branches, brush it off gently to assess cuts before pruning.
What if I miss the winter pruning window?
Don’t panic! You can prune in early spring (before buds swell) or late summer (after harvest), but winter is ideal. Avoid heavy pruning in late spring/early summer—it stresses the tree and attracts pests. Light shaping is fine, but prioritize winter for major cuts.
How do I know if I’ve cut too much?
Remove no more than 20–25% of the tree’s canopy in one season. Signs of over-pruning:
- Excessive water sprouts (fast-growing, weak shoots)
- Leafy growth concentrated at the top (caused by removing too many lower branches)
- Stunted growth or few flowers the next year
Will pruning in winter reduce this year’s apple harvest?
No! Winter pruning boosts next year’s fruit by improving airflow and sunlight. This year’s crop is already set (formed last summer), but proper cuts now ensure healthier branches for bigger, better apples in 2025. Think of it as “spring cleaning” for your tree!
What should I do with the pruned branches?
Here’s your disposal checklist:
- Small branches (<1 inch thick): Chop into mulch for garden beds or compost.
- Medium branches (1–3 inches): Burn them (if allowed) or use as firewood.
- Avoid: Leaving branches on the ground (attracts pests/disease) or piling them near the tree trunk.
Wrapping up and next steps
Pruning your apple tree in winter isn’t just about shaping—it’s an investment in healthier growth and bountiful harvests next season! 🍏 With the right tools, timing, and technique, you’ll set the stage for strong branches, better airflow, and fewer pests.
Remember: less is more—focus on strategic cuts, and your tree will thank you with vibrant blooms and juicy fruit.
Ready to give your apple tree the care it deserves? Grab your pruners, sketch out your cuts with our diagram, and get pruning! Then, stay tuned for tips on fertilizing in spring to maximize your tree’s potential. Happy pruning! 🌱