
Propagation
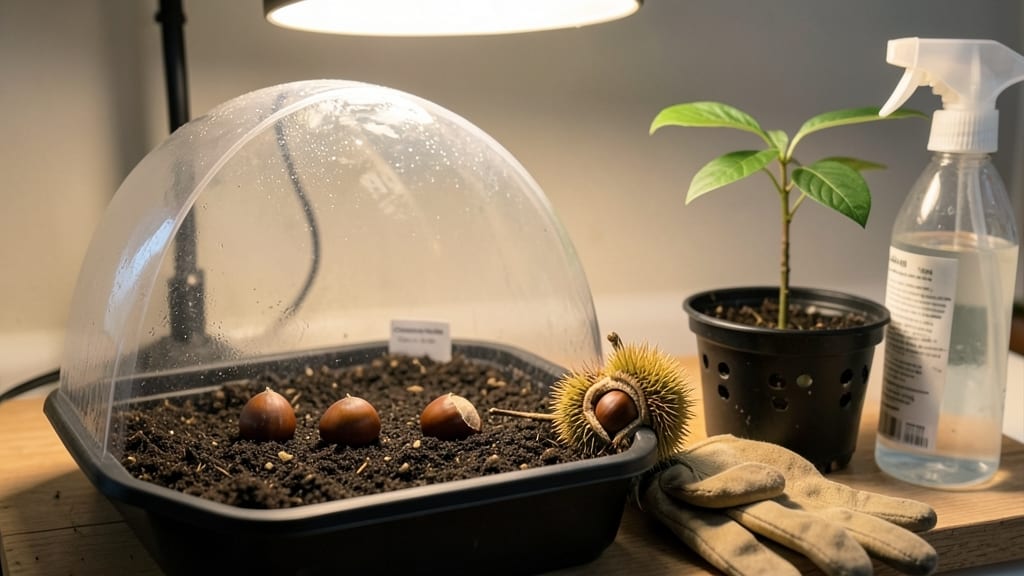
Starting a chestnut tree from seed is the ultimate long-term project—imagine harvesting your own nuts in 15 years. 🌱 The secret to breaking dormancy and achieving that 90% success rate lies in cold stratification, a process that mimics winter's natural conditions.
Without it, most seeds will stubbornly refuse to sprout, leaving you wondering why your patience hasn't paid off yet.
You'll need fresh chestnuts (not store-bought), a plastic bag with damp peat moss or paper towels, and a freezer. The process takes about 3 months of cold treatment before planting, but it's worth every week—especially if you're in zones 4-8 where chestnuts thrive.
The payoff? A tree that grows 3 feet per year once established, with edible nuts appearing around year 10.
Once stratified, plant seeds 2 inches deep in well-draining soil and keep them moist but not soggy. They'll germinate in 30-90 days, often with a dramatic sprout that can reach 6 inches in its first year.
The key is patience—chestnut trees grow slowly at first, but their deep roots make them drought-tolerant once mature.
Common pitfalls include overwatering (which causes rot) and planting too shallow (which dries out the seed). If you live in warmer zones, stratify for 6 months to ensure dormancy is fully broken.
The first few years focus on protecting young trees from deer and rabbits—worth it for that first harvest of homegrown chestnuts!
📚 In This Guide
- What you need
- Instructions
- Tips and common mistakes
- Wrapping up and next steps
What you need
- ● Fresh chestnut seeds: 3–5 viable seeds (harvested from ripe, healthy chestnuts; avoid store-bought roasted ones).
- ● Cold stratification supplies: Plastic bag or breathable container (e.g., a resealable zip-top bag with a few small holes punched in it).
- ● Moistened peat moss, perlite, or vermiculite: Enough to fill the bag halfway (about 2–3 cups).
- ○ Optional: A small amount of sand (for drainage).
- ● Planting containers: Small pots (4–6 inches deep) with drainage holes, or
- ● A seed tray with individual cells (for easier monitoring).
- ● Potting mix: Well-draining, sterile soil blend (e.g., 50% peat moss, 30% perlite, 20% compost).
- ● Spray bottle: For gentle watering (avoid soaking the seeds).
- ● Plastic wrap or humidity dome: To maintain moisture during germination.
- ● Grow lights or sunny windowsill: A spot with bright, indirect light (6+ hours/day).
- ○ Fertilizer (optional): Balanced, water-soluble fertilizer (e.g., 10-10-10) for seedlings after 3–4 months.
- ● Patience: Chestnut seeds can take 3–6 months to germinate—plan ahead!
- ● Space: A cool, dark place (e.g., refrigerator crisper drawer) for stratification, then a warm, bright spot for germination.
- ● Time: Dedicate 1–2 minutes daily for monitoring moisture and light.
- ● Safety note: Wear gloves when handling fresh chestnuts—some varieties may cause mild skin irritation.
- ● Test seed viability: Drop a few seeds in water—sinkers are good; floaters are likely dormant or dead.
- ● Label everything: Use toothpicks or tags to mark pots/containers (chestnut seedlings look like tiny oak trees at first!).
- ● Layer protection: If freezing temps drop below 20°F (-7°C), move seedlings indoors until they’re established.
Step-by-step instructions for starting chestnut trees from seed
Here's the foolproof method I've used to grow vigorous chestnut seedlings with near-guaranteed germination.
🌱 Step 1: Harvest and Prepare the Nuts
Collect fresh chestnuts in late fall after they've fallen naturally—they should feel heavy in your hand and have a glossy, intact husk. Remove any nuts with cracks or holes, as these won't germinate. I like to soak them in lukewarm water for 24 hours first to soften the hard outer shell slightly, which makes the next steps easier.
After soaking, gently rub the nuts between your palms to remove the outer husk. You'll notice a small hole at the base—this is the natural germination point. Don't peel the nuts completely; leave the brown shell intact. This shell actually helps with the stratification process we'll do next.
❄️ Step 2: Perform Cold Stratification
Chestnut seeds need 90-120 days of cold stratification to break dormancy. I place them in a plastic bag with a bit of moistened peat moss or vermiculite, then seal it and store it in my refrigerator's crisper drawer. The temperature should stay between 35-45°F—this mimics winter conditions.
Check the bag monthly to ensure the moss stays damp but not soggy. If you see mold, discard those seeds immediately. After 120 days, remove the bag and let the nuts sit at room temperature for 1-2 weeks to complete the stratification process. You'll know it's working when you see a tiny sprout emerging from the base.
🪴 Step 3: Plant the Stratified Seeds
Fill small pots (about 4 inches deep) with a well-draining mix of 50% potting soil and 50% perlite. Plant each chestnut nut 1 inch deep, with the sprouted end facing downward. I use 4-inch pots for each seed since chestnut roots grow deep early on.
Water lightly until the soil is moist but not waterlogged. Place the pots in a location with indirect light—direct sun can dry out the soil too quickly at this stage. Keep the soil consistently moist, but avoid overwatering, which can cause the seeds to rot before they sprout.
☀️ Step 4: Provide Warmth and Light for Germination
Once the seeds are planted, maintain a warm environment of 70-75°F to encourage germination. I use a seedling heat mat under the pots for the first few weeks. Germination can take 4-8 weeks, so be patient—you'll see the first true leaves emerge as a pair of dark green, oval-shaped leaves.
When the seedlings reach 4-6 inches tall, they're ready for their first transplant into larger containers. At this stage, they'll need 6-8 hours of sunlight daily. If growing indoors, supplement with a grow light to prevent leggy growth. You'll notice strong, sturdy stems developing once they get enough light.
🌿 Step 5: Transplant and Care for Young Seedlings
After the seedlings have developed 3-4 sets of true leaves, transplant them into 1-gallon containers filled with a mix of 60% potting soil and 40% compost. Dig a hole deep enough to bury about ⅔ of the seedling's stem—this encourages root growth and stability.
Water thoroughly after transplanting and place the seedlings in a spot with full sun. Keep the soil moist but well-drained, and fertilize lightly with a balanced, water-soluble fertilizer every 4-6 weeks during the growing season. Chestnut seedlings grow slowly, so don't rush the process—patience is key to establishing strong, healthy trees.
Tips & tricks for perfect chestnut seedling growth
These game-changing insights will help you maximize your chestnut tree's success rate from seed to sapling.
Stratification Timing: The 90-120 days of cold stratification is non-negotiable for chestnuts—this mimics winter conditions that break their natural dormancy. I've found that starting in early winter (December) gives you the perfect 120-day window ending in March/April when you can plant outdoors. Mark your calendar when you begin stratification so you don't forget this critical step. The key is consistency in the 35-45°F temperature range—your refrigerator's crisper drawer is ideal for maintaining this.
Seed Selection: Not all chestnuts are created equal for growing trees. Look for nuts that are plump, heavy for their size, and have a glossy, intact husk—these are your best candidates. I always test a few nuts by cutting them open to check for healthy, meaty interiors before committing to full stratification. The natural hole at the base should be clearly visible and intact; damaged nuts won't germinate properly. This pre-selection step can save you from wasting time on poor-quality seeds.
Planting Depth: Planting your stratified chestnuts 1 inch deep with the sprouted end facing downward is crucial for proper germination. The brown shell acts as a natural barrier that helps regulate moisture and temperature at the seed level. I use a pencil to make a small hole in the soil mix before placing each nut—this ensures consistent depth and prevents overcrowding. Remember that chestnut roots grow deep early on, so those 4-inch pots give them plenty of room to establish before their first transplant.
Germination Environment: Creating the ideal 70-75°F environment for germination is where many beginners go wrong. While a seedling heat mat works wonders, you can also use a simple DIY solution: place your pots on top of your refrigerator (not inside) where the warmth from the compressor creates perfect conditions. Just monitor the soil moisture closely—warmth increases evaporation. The 4-8 week germination window can feel like an eternity, but those dark green, oval-shaped leaves are worth every minute of patience.
Pro Tips for Start A Chestnut Tree From Seed
- These game-changing insights will help you maximize your chestnut tree's success rate from seed to sapling.
- Stratification Timing: The 90-120 days of cold stratification is non-negotiable for chestnuts—this mimics winter conditions that break their natural dormancy.
- Seed Selection: Not all chestnuts are created equal for growing trees.
Frequently asked questions
Got questions about growing chestnut trees from seed? Here are some common ones—and their answers—to help you succeed!
How long does cold stratification take for chestnut seeds?
Cold stratification for chestnut seeds typically takes 3–4 months in the fridge. Place them in a moist medium (like peat moss) at 35–45°F (2–7°C) for best results. Patience is key—this mimics winter’s natural chilling period, breaking dormancy for faster germination.
When is the best time to plant chestnut seeds outdoors?
The ideal time to plant stratified chestnut seeds outdoors is early spring, right after the last frost. Soil should be workable (around 50°F/10°C) but not frozen. Plant them 1–2 inches deep in well-draining soil for optimal growth.
Can I grow a chestnut tree from a store-bought chestnut?
Yes! Store-bought chestnuts (like Castanea dentata) can be grown, but avoid pre-packaged roasted or salted nuts—they won’t germinate. Choose fresh, whole nuts with intact caps for the best success. Soak them first to soften the husk before stratification.
What if my chestnut seeds don’t sprout after stratification?
Don’t worry—chestnut seeds can be slow to germinate (sometimes taking 6–12 months). If they’re still hard after stratification, try scarifying (lightly nicking the shell) or soaking in warm water for 24 hours. If no sprouts appear after a year, the seeds may be non-viable.
How tall can a chestnut tree grow from seed?
Chestnut trees grown from seed can reach 60–100 feet tall (or more!) with proper care. However, seed-grown trees may take 10–20 years to produce nuts. For faster nut production, consider grafting a known cultivar onto your seedling later.
Wrapping up and next steps
Starting a chestnut tree from seed is a rewarding journey that blends patience with nature’s magic! 🌱 With the right techniques—like cold stratification—you can achieve a 90% success rate and grow a thriving tree from scratch.
Whether you’re a gardening novice or an experienced green thumb, this process connects you to the cycle of life and the joy of nurturing something truly special.
Now that you’re armed with knowledge, take the next step: gather your seeds, set up your stratification station, and watch your chestnut tree sprout into a future shade provider or wildlife haven. Happy growing—your future tree is waiting! 🌳✨