
How To
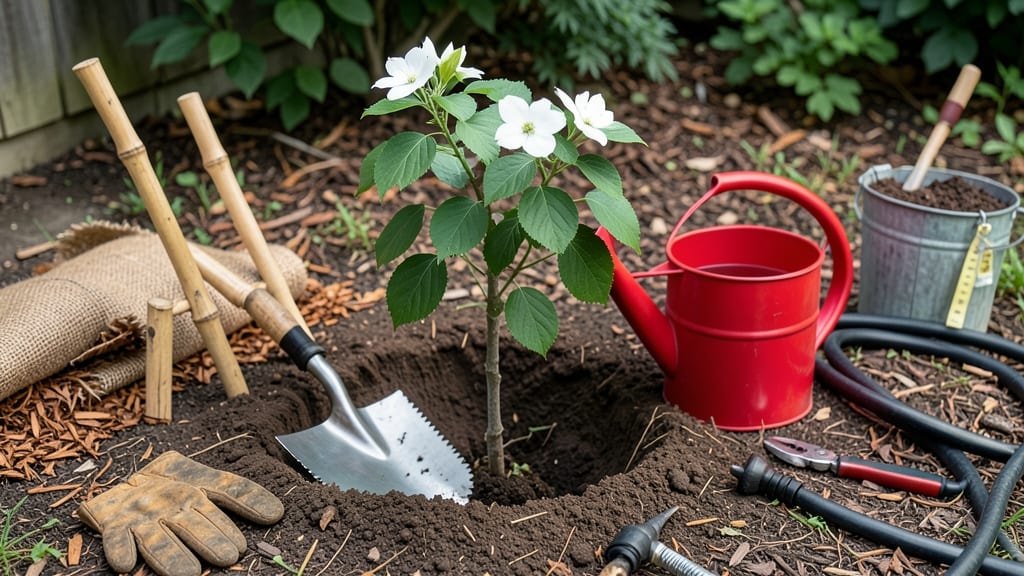
Transplanting a tree sapling feels like moving a fragile houseplant—except the stakes are higher when you're dealing with a future shade tree or fruit-bearing giant. 🌳 The key isn't brute strength but timing, root care, and patience that lets the tree adjust without shock.
I've salvaged more struggling saplings than I've lost by following these simple steps that keep roots happy and growth steady.
Start with the right tools—a sharp spade, burlap for wrapping roots, and a hose for settling soil. Dig the new hole twice as wide as the root ball but no deeper, then loosen the soil around the edges so roots can spread easily.
The best time to move is on a cloudy day when temperatures are mild—spring or early fall—when the tree isn't stressed by heat or dormancy. Water deeply the day before transplanting to help roots slide out of the ground smoothly.
📚 In This Guide
- What you need
- Instructions
- Tips and common mistakes
- Wrapping up and next steps
What you need
- ● Tree sapling (1–2, depending on your project! Ensure roots are healthy and well-hydrated before transplanting)
- ● Shovel or spade (1, wide and deep—at least 12–18 inches for digging)
- ● Pruners or sharp shears (1 pair, sterilized to avoid disease transfer)
- ● Garden hose or watering can (1, with a spray nozzle for gentle watering)
- ● Mulch (3–5 gallons, organic like wood chips or straw)
- ○ Root stimulator or mycorrhizal fungi (1 bottle, optional but helpful for root growth)
- ● Stakes and twine (2–4 stakes, if sapling is tall or top-heavy)
- ● Gloves (1 pair, gardening-grade for comfort and protection)
- ● Transplanting spade (1, for delicate root extraction)
- ● Burlap or root ball wrap (1 roll, to protect roots during transport)
- ● Soil amendments (e.g., compost or peat moss, if native soil is poor)
- ● Tree guard or protective collar (1, to shield young bark from pests)
- ● Moisture meter (1, to monitor soil hydration post-transplant)
Step-by-Step instructions for transplanting tree saplings
Here’s how I’ve successfully moved saplings without losing them to transplant shock.
🪴 Step 1: Dig the New Hole at the Right Size and Depth
Start by digging a hole that’s twice as wide as the sapling’s root ball but only as deep as the root ball itself. The top of the root ball should sit 1-2 inches above ground level—this prevents waterlogging and rot. I like to loosen the soil around the edges of the hole with a shovel or hands to encourage roots to spread outward.
If your soil is heavy clay, mix in a handful of compost or sand to improve drainage. You’ll know the hole is ready when the sides are firm but not compacted. A loose, aerated hole helps roots establish faster. Don’t rush this—taking 10 minutes to prep the hole saves weeks of recovery time later.
✂️ Step 2: Carefully Remove the Sapling from Its Container
Water the sapling thoroughly the day before transplanting so the roots stay moist and slide out easily. Gently squeeze the sides of the container to loosen the root ball, then tip it sideways and tap the bottom. If the sapling resists, run a knife around the edges to free it. Never pull by the stem—this tears roots and stresses the plant.
Inspect the roots as you remove the sapling. If you see roots circling tightly around the root ball, use your fingers to tease them outward. These “root-bound” roots will strangle the tree if left intact. Place the sapling in the hole, ensuring the top of the root ball aligns with the ground level you marked earlier.
💧 Step 3: Backfill and Water Deeply to Settle the Soil
Fill the hole halfway with soil, then water deeply to eliminate air pockets. Let the water soak in completely before adding more soil. This step is critical—skipping it leaves gaps where roots can’t grow. I like to use my hands to press soil gently around the edges of the root ball, encouraging roots to spread outward into the loose soil.
Once the hole is full, mound soil slightly higher than the ground level to create a watering basin. This helps direct water straight to the roots. Water again until the soil is damp 12 inches down. You’ll know it’s right when water runs out the bottom of the hole without pooling on top.
☀️ Step 4: Mulch and Protect the Sapling for Recovery
Spread 2-3 inches of mulch around the base, keeping it 6 inches away from the trunk to prevent rot. I use shredded bark or wood chips because they break down slowly and improve soil over time. Mulch keeps roots cool in summer and insulated in winter, which is especially important for young trees still building strength.
Stake the sapling only if it’s top-heavy or in a windy area. Use soft ties to attach the trunk loosely to the stake—tight straps can girdle the tree as it grows. Water the sapling every 2-3 days for the first month, checking that the soil stays moist but not soggy. You’ll see new growth within 4-6 weeks if the transplant went well.
Tips & tricks for transplanting tree saplings
Took me years of trial and error to learn these tricks—now your saplings will thrive instead of struggle.
Root Ball Prep: Before removing the sapling, run your fingers through the root ball to check for any tightly wound roots. These "root-bound" roots can strangle new growth if left intact. Gently tease them outward with your fingers or a small garden fork. This simple step in Step 2 makes all the difference in how quickly your sapling establishes itself.
Soil Prep Matters: The 10 minutes you spend loosening the soil around the edges of your hole in Step 1 is time well spent. Compacted soil prevents roots from spreading outward, which is how they establish a strong foundation. Use a garden fork or your hands to create a loose, aerated environment—roots will thank you by growing faster and deeper.
Watering Wisdom: When you water to settle the soil in Step 3, don't just give it a quick drink. Let the water soak in completely and run out the bottom of the hole. This ensures there are no air pockets around the roots, which can cause rot. I like to water until the soil is damp 12 inches down—this gives roots plenty of moisture to start growing outward.
Mulch Placement: Keep that 2-3 inches of mulch at least 6 inches away from the trunk when you apply it in Step 4. Too much mulch touching the bark can cause rot, while too little won't provide the insulation roots need. Think of it like a cozy blanket—just enough to keep roots happy without smothering them.
Pro Tips for Transplant A Tree Sapling
- Took me years of trial and error to learn these tricks—now your saplings will thrive instead of struggle.
- Root Ball Prep: Before removing the sapling, run your fingers through the root ball to check for any tightly wound roots.
- Soil Prep Matters: The 10 minutes you spend loosening the soil around the edges of your hole in Step 1 is time well spent.
Frequently asked questions
Got questions about transplanting tree saplings? You’re not alone! Here are answers to the most common concerns to ensure your new tree thrives from day one.
When is the best time of year to transplant a tree sapling?
The ideal window is late fall or early spring—when trees are dormant but not yet stressed by extreme heat or cold. Avoid transplanting during summer droughts or winter freezes. For tropical or evergreen species, opt for overcast days to reduce shock.
How long does it take for a transplanted sapling to establish roots?
Most saplings take 1–2 years to fully establish, but roots begin growing within weeks if conditions are right. Water deeply 2–3 times per week for the first month, then taper to weekly deep watering. Mulch helps retain moisture and signals roots to spread.
What if my sapling’s leaves turn yellow or wilt after transplanting?
Yellowing leaves (chlorosis) often mean root damage or nutrient shock. Wilt could signal underwatering or transplant shock. Prune any dead branches, ensure the root ball stays moist, and avoid fertilizing for 4–6 weeks. If wilting persists, check for pests or fungal issues.
Can I transplant a sapling in a pot instead of planting it directly in the ground?
Yes! Container transplanting works well for small saplings or if soil conditions are poor. Use a 5–10 gallon pot with drainage holes and well-draining soil. Move it outdoors during warm months and bring it inside if frost is forecast. Gradually acclimate it to outdoor conditions before permanent planting.
How do I know if my sapling’s root system is healthy enough for transplanting?
Healthy roots should be white or light tan and firm, with a dense network around the root ball. Avoid transplanting if roots are circling tightly (common in container-grown saplings) or mushy (sign of rot). Gently tease out tangled roots before planting to encourage outward growth.
Wrapping up and next steps
Transplanting a tree sapling might seem daunting, but with the right prep, patience, and care, you’re already setting it up for a thriving future! 🌱 Remember: proper handling, timing, and aftercare make all the difference—your little green friend will thank you with years of shade, beauty, or even fruit.
Ready to give your sapling the best start? Now’s the time to roll up your sleeves and get planting! 🌿 Check local planting seasons, gather your tools, and watch your hard work grow into a stunning addition to your landscape. Happy gardening!