
Pruning
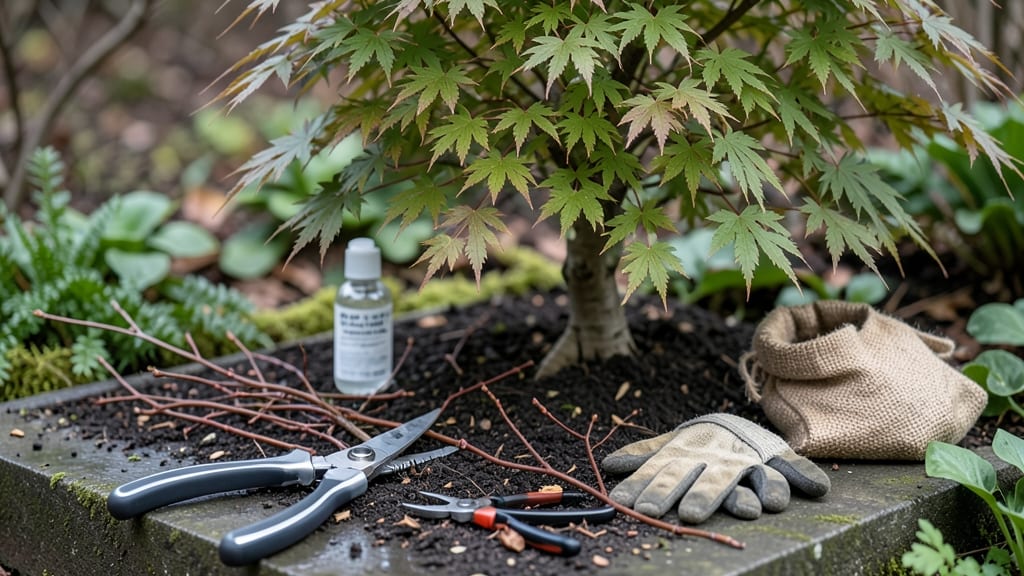
Winter’s the perfect time to give your Japanese maple a clean, healthy trim—when the tree’s dormant and diseases lurk less. ✂️ I’ve learned the hard way that late-season cuts invite rot, but winter pruning strengthens branches for next year’s vibrant foliage.
The key? Timing, sharp tools, and knowing exactly where to cut.
Start with sterilized pruners and a ladder—safety first, especially in cold weather. You’ll need a clear day (no frost) to work, and gloves to protect against sap and sharp edges. The goal is to remove dead wood, crossing branches, and any growth that weakens the tree’s graceful shape.
Look for Y-shaped branches or stubs—these are winter’s telltale signs of trouble. Cut just outside the branch collar (that swollen area where the branch meets the trunk), and avoid leaving stubs. The result? A stronger canopy come spring, with fewer pests and diseases creeping in.
Pro tip: Prune on a warmer winter day (above 40°F) to reduce shock. And skip heavy pruning—just 10-15% of the canopy at a time keeps the tree happy. Your maple will thank you with lush, healthy growth all season long.
📚 In This Guide
- What you need
- Instructions
- Tips and common mistakes
- Wrapping up and next steps
What you need
- ● Pruning shears (bypass pruners): Sharp, high-quality shears (4-6" blade) for small branches (up to ½ inch thick). Example: Felco F-2 or Corona Tools.
- ● Loppers: For medium branches (½ to 1½ inches thick). Opt for bypass loppers (not anvil-type) to avoid crushing wood. Example: Fiskars X27 or Bahco.
- ● Pruning saw: For thicker branches (1½+ inches). A curved-tooth saw prevents tear-out. Example: Felco F-20 or Corona CS-6.
- ○ Extension pole: A 6-10 ft telescopic pole with a pruner attachment for high branches (optional but helpful).
- ● Gloves: Heavy-duty, cut-resistant gloves (e.g., Mechanix or high-quality gardening gloves) to protect hands from thorns and sharp tools.
- ● Safety glasses: To shield eyes from debris.
- ● Disposable pruning bags or bucket: To collect trimmings (5+ gallon capacity).
- ● Rags or paper towels: For wiping tool blades and hands.
- ● Hand sanitizer or disinfectant: To clean tools between cuts (prevents disease spread).
- ● Ladder (if needed): A sturdy, 3-point contact ladder (e.g., 24 ft aluminum extension ladder) for taller trees. ⚠️ Safety note: Never stand on the top rung!
- ● Tree wound dressing: Not recommended for Japanese maples (they seal cuts naturally), but if used, opt for pruning sealant (e.g., Tanglefoot Tree Wound Pruning Seal).
- ● Marking spray: Fluorescent paint to mark branches for removal (useful for large trees).
- ● First-aid kit: For minor cuts or scrapes.
- ● Camera or phone: To document the tree’s structure before/after trimming.
Step-by-Step guide to trimming a Japanese maple in winter
Winter's the perfect time to shape your Japanese maple—clean cuts now prevent disease and encourage vibrant spring growth.
✂️ Step 1: Gather Your Tools and Assess the Tree
Start with sharp, clean pruning shears (for branches under ½ inch thick) and loppers (for thicker branches up to 2 inches). I always sanitize my tools with rubbing alcohol first—this prevents spreading any fungal spores hiding in old cuts. Grab a ladder if you need to reach higher branches safely, and wear gloves to protect your hands from thorns.
Stand back and examine the tree's structure. Look for dead, crossing, or rubbing branches—these are your top priorities. Dead branches snap easily when bent, while healthy ones bend slightly. Mark any branches growing inward or crossing others with twist ties or a piece of tape so you don’t miss them later. This step ensures you focus on what truly needs attention.
🌿 Step 2: Remove Dead, Diseased, or Damaged Branches First
Cut out dead branches at their point of origin, making the cut just outside the branch collar—the swollen area where the branch meets the trunk. This ensures the tree can seal the wound properly. For diseased branches, sterilize your tools between cuts to prevent spreading pathogens. You’ll know a branch is diseased if it has black spots, oozing sap, or unusual growths.
If a branch is broken but still attached, remove it entirely unless it’s a major scaffold branch. For broken branches, cut ¼ inch above a bud or lateral branch if possible. This encourages new growth in the right direction. Watch for water sprouts—those fast-growing, weak vertical shoots—and remove them completely. They drain energy from the tree.
✂️ Step 3: Thin the Canopy for Better Airflow and Light
Step back and visualize the tree’s shape. Your goal is to open the canopy by removing 20-30% of the smallest branches first. Focus on branches growing inward or upward—these compete for light and weaken the tree’s structure. Cut these back to a side branch or bud that grows in the direction you want the tree to fill.
For thicker branches, use the three-cut method to avoid tearing the bark: Make the first cut 1-2 feet out from the trunk on the underside, then a second cut just outside the branch collar on the top side. Finally, twist the branch free and make a clean cut at the collar. This method prevents the bark from stripping away, which can invite disease.
🌱 Step 4: Shape the Tree While Preserving Its Natural Form
Japanese maples have a graceful, layered look—don’t over-prune to achieve a rigid shape. Instead, refine the tree’s natural silhouette by shortening branches that disrupt its balance. For horizontal branches, cut back to a bud facing outward to encourage fuller growth. Avoid cutting more than ¼ of the branch length at once—this prevents shock.
Pay special attention to the upper canopy. If branches are too dense, they block light from reaching lower branches, which can lead to weak, leggy growth. Aim for a balanced, open structure that lets sunlight filter through. Step back frequently to check your progress—you’ll see the tree’s natural beauty emerge as you go.
🪴 Step 5: Clean Up and Apply Wound Dressing (If Needed)
After pruning, rake up all debris and dispose of it properly—don’t leave it under the tree, as it can harbor pests or disease. For larger cuts (over ½ inch thick), you can apply wound dressing (like pruning sealant) to protect the wound, but many experts argue it’s unnecessary if you’ve made clean cuts. The tree’s natural healing process works best with fresh, unobstructed wounds.
Water the tree deeply after pruning to help it recover. A slow, thorough soak encourages root growth and compensates for the temporary stress of trimming. Avoid fertilizing right after pruning—wait until late winter or early spring when new growth begins. This gives the tree time to heal before putting extra energy into leaves.
Tips & tricks for perfect Japanese maple trimming
Winter pruning transforms your Japanese maple—here's how to avoid common mistakes and elevate your tree's health.
Tool Prep is Non-Negotiable: I can't stress this enough—your pruning shears and loppers need to be razor sharp before you even look at the tree. Dull blades crush rather than cut, causing more damage than the cut itself. Test your tools by making a clean cut through a piece of paper—if it tears, sharpen them. And that rubbing alcohol sanitizing step? Don't skip it between cuts, especially on diseased branches. I've seen fungal infections spread through contaminated tools that weren't properly cleaned.
Visual Assessment Matters More Than You Think: When you're marking branches for removal in Step 1, take an extra 10 minutes to step back and really study the tree's structure. Look for branches that create a "V" shape where they cross—these are prime candidates for removal. Also, pay attention to the tree's natural growth pattern: Japanese maples grow in a layered, cascading form. Any branch disrupting this graceful flow should go. I learned this the hard way after removing too many branches from one side, leaving my tree looking lopsided for years.
Three-Cut Method Secrets: The three-cut method in Step 3 isn't just about preventing bark tearing—it's also about controlling the branch's fall. Make that first undercut about 1-2 feet out from the trunk, but not too close to the branch collar. This creates a hinge that lets the branch fall away cleanly when you make the final cut. Pro tip: If you're working with branches over 2 inches thick, consider using a pruning saw for the final cut at the collar. The saw's teeth will make a cleaner separation than your loppers.
Post-Pruning Care Makes All the Difference: After you've finished trimming, don't just walk away! That deep watering in Step 5 should be slow and thorough—aim for about 10-15 gallons of water for a mature tree. The key is to water until the soil is completely saturated about 6 inches deep. You can check this by sticking a screwdriver into the ground; if it goes in easily, you're good. This helps the tree recover from the stress of pruning and prevents transplant shock if you've recently planted your Japanese maple.
Pro Tips for Trim A Japanese Maple Tree In Winter
- Winter pruning transforms your Japanese maple—here's how to avoid common mistakes and elevate your tree's health.
- Tool Prep is Non-Negotiable: I can't stress this enough—your pruning shears and loppers need to be razor sharp before you even look at the tree.
- Visual Assessment Matters More Than You Think: When you're marking branches for removal in Step 1, take an extra 10 minutes to step back and really study the tree's structure.
Frequently asked questions
about trimming your Japanese maple in winter—because even pros need a little guidance! Here are answers to the most common queries to keep your tree thriving.Can I trim a Japanese maple in winter if it’s still cold?
Yes, but time it right! Trim after the first hard frost but before late winter’s last freeze (typically January–February in most climates). Cold dormancy helps reduce stress, but avoid trimming during extreme cold snaps or thaw cycles. If your area has unpredictable winters, wait until late winter for safety.
How do I know if I’m cutting too much off?
Japanese maples are sensitive to heavy pruning—never remove more than 25% of the canopy in one season. Look for thinning cuts (removing entire branches back to the trunk) rather than shearing. If you see excessive leaf loss or bare spots post-trimming, you’ve likely overdone it. Light shaping is key!
What if my tree’s branches are already dead or frozen?
Dead or frozen branches (often brown/black and brittle) should be pruned immediately in late winter, even if the rest of the tree is dormant. Use clean, sharp shears to cut back to healthy green tissue or a live bud. Avoid waiting—deadwood can harbor pests or diseases. Pro tip: If unsure, scratch the bark: green underneath means it’s alive!
Should I fertilize after winter trimming?
Hold off on fertilizer until early spring (March–April). Winter pruning stresses the tree, and fertilizing too soon can encourage tender new growth that might freeze. Instead, focus on mulching (2–3 inches of organic mulch) to protect roots. Once buds swell, a balanced, slow-release fertilizer will support recovery.
What’s the best way to heal large cuts?
For cuts over ½-inch thick, use a pruning sealant (like tree paint) to prevent disease entry and reduce water loss. Smooth the cut surface with a knife to minimize jagged edges. Larger wounds may take 1–2 years to fully heal—avoid pruning near them again until they’ve sealed over. Bonus: Prune on a dry day to speed drying!
Wrapping up and next steps
Trimming your Japanese maple in winter is all about precision, patience, and care—it’s your chance to shape its beauty while keeping it thriving for years to come! 🌿 By following the right techniques, you’ll encourage lush growth, prevent disease, and maintain that stunning silhouette.
Remember, less is more—avoid over-pruning, and always use sharp tools for clean cuts.
Now that you’re armed with the know-how, roll up your sleeves and get pruning! If you’re still unsure about a tricky branch or want to refine your skills, consider watching a few YouTube tutorials or consulting a local arborist for hands-on guidance.
Happy trimming—your Japanese maple will thank you with vibrant blooms and graceful branches! ✂️💚