
Propagation
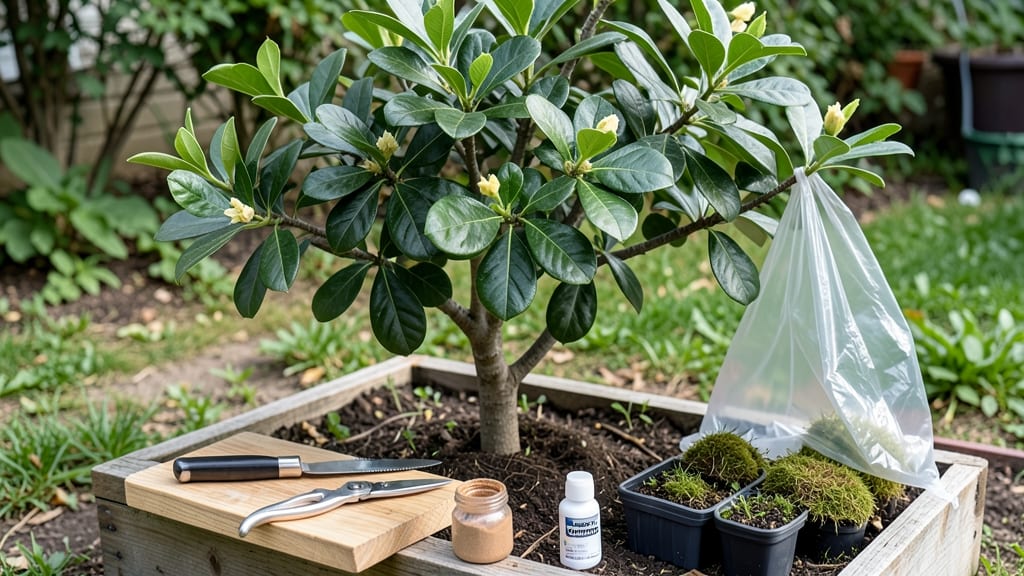
Growing a loquat tree through propagation from seed feels like unlocking a tropical treasure in your own yard. 🌱 The process is simpler than you'd think—just seeds, patience, and the right conditions—and I've turned my kitchen scraps into thriving young trees this way.
What starts as a small pit can become a fruit-bearing tree in just a few years, with those golden-orange fruits ready to pick by late winter or early spring.
The key is timing and soil. Plant your seeds in late fall or early spring when temperatures are mild, and use a well-draining mix of potting soil and perlite. Keep the soil consistently moist but not soggy, and place your pots in a warm, sunny spot.
Most people overthink the soil—loquat seeds don’t need fancy mixes, just good drainage and warmth to sprout within 4-6 weeks.
Once your seedlings hit 6 inches tall, they’re ready for their first transplant into individual pots. That’s when the real magic happens—they’ll start developing their signature glossy leaves and sturdy stems.
By the time they’re a year old, you’ll have a small tree that can handle outdoor conditions, provided your climate stays warm enough (loquats love zones 8-11).
Here’s the best part: even if you mess up, loquat trees are forgiving. They handle pruning well, bounce back from neglect, and reward you with fruit in just a few years.
Whether you’re a beginner or a seasoned gardener, this method lets you grow your own loquat tree without the high cost of nursery plants.
📚 In This Guide
- What you need
- Instructions
- Tips and common mistakes
- Wrapping up and next steps
What you need
- ● Loquat seeds or cuttings: 10–20 fresh, viable seeds (from ripe loquat fruit) or 3–5 semi-hardwood cuttings (4–6 inches long, pencil-thick) from a healthy loquat tree.
- ● Well-draining potting mix: 1 part perlite or coarse sand (for aeration) 1 part peat moss or coconut coir (for moisture retention) 1 part compost or aged bark (for nutrients)
- ● 6-inch pots or seedling trays: 5–10 units (with drainage holes).
- ○ Rooting hormone: 1 small bottle (optional but recommended for cuttings).
- ● Clear plastic bags or humidity dome: 1–2 units (to retain moisture).
- ● Spray bottle: 1 (for gentle watering).
- ● Pruning shears: 1 (sterilized with rubbing alcohol).
- ● Gloves: 1 pair (to protect hands from sap or sharp edges).
- ● Trowel or small shovel: 1 (for transplanting seedlings).
- ● Sunlight access: A bright, indirect spot (6+ hours of light daily).
- ● Watering can or cup: 1 (for bottom-watering).
- ● Label markers: 5–10 (to track propagation dates).
- ● Heat mat: 1 (to speed up germination if seeds are slow to sprout).
- ● Fertilizer (balanced, low-nitrogen): 1 small bag (e.g., 5-5-5) for post-propagation care.
- ● Grow lights: 1–2 (if natural light is insufficient).
- ● Aluminum foil or mylar: 1 roll (to cover pots and encourage rooting).
Step-by-step guide to propagating loquat trees
Here's how I grow sturdy loquat seedlings—no fancy tools needed, just patience and a few key tricks.
🌱 Step 1: Collect and Prepare Seeds
Pick fully ripe loquat fruit and scoop out the seeds—you'll need about 4 seeds per pot for your 4 seedlings. Rinse them gently to remove any pulp, then let them dry on a paper towel for 24 hours. This prevents mold while keeping them viable. I always test-float them first: place seeds in water. Good seeds sink; discard any that float—they're empty or damaged.
Soak the viable seeds in warm water for 12 hours before planting. This softens the hard outer shell and speeds up germination. Here's the thing—loquat seeds germinate best when warm, so if your room runs cool, place the pot in a sunny windowsill or use a seedling heat mat set to 75°F.
🪴 Step 2: Plant in Moist, Well-Draining Soil
Fill small pots (about 4 inches deep) with a mix of 50% potting soil and 50% perlite. This balance keeps roots from sitting in soggy soil, which loquat seedlings hate. Moisten the mix until it feels like a damp sponge—press it gently, and just a few drops should bead on the surface.
Plant each seed ½ inch deep and 1 inch apart in its own pot. Crowding them now leads to weak stems later. Tap the soil lightly to settle it around the seeds, then cover the pots with clear plastic wrap to trap warmth and moisture. Place them in a spot with bright, indirect light—direct sun will dry out the soil too fast.
💧 Step 3: Maintain Warmth and Moisture
Check the soil daily—it should stay consistently moist but never waterlogged. Mist the plastic wrap with water if it fogs up, but avoid lifting it until you see tiny green sprouts breaking through in 3-6 weeks. Real talk: germination can take longer if your home stays cool, so don't give up after two weeks.
Once sprouts appear, remove the plastic wrap immediately. You'll notice the seedlings' first leaves are thick and rounded—these are their cotyledons, not true leaves. Keep the soil moist but reduce misting to prevent fungal issues. When the first true leaves (thinner and more pointed) emerge, it's time to move them to a brighter spot.
☀️ Step 4: Transition to Sunlight and Care
Gradually introduce the seedlings to morning sun over 1-2 weeks. Start with just 1 hour of direct light daily and increase by 30 minutes each day. You'll see their stems thicken and leaves darken as they toughen up. Avoid harsh afternoon sun at first—it can scorch tender new growth.
When seedlings reach 4-6 inches tall with 4-5 true leaves, transplant them into larger pots (about 6 inches deep) with regular potting soil. Prune any leggy stems back by ⅓ to encourage bushier growth. Keep them in partial shade for another week while they adjust.
Tips & tricks for loquat tree propagation
Here's what nobody tells you about growing these delicate seedlings from scratch.
The Seed Viability Test: I learned this the hard way after wasting seeds on moldy soil. Always test-float your seeds first—only plant the ones that sink like stones. This simple 30-second check saves you from planting empty husks that'll never sprout. The 24-hour drying period after rinsing is non-negotiable too; it prevents mold while keeping seeds viable.
Warmth is Everything: Loquat seeds need that 75°F warmth to germinate properly. If your home runs cool, don't just hope for the best—use a seedling heat mat or place pots on top of your fridge. I've seen germination times stretch from 3-6 weeks to over 2 months when seeds were kept too cool. The 12-hour warm water soak is your secret weapon for breaking through that tough outer shell faster.
Light Transition Strategy: That gradual 1-2 week sunlight transition in Step 4 is where most people mess up. Start with just 1 hour of morning sun daily and increase by 30 minutes every other day. You'll know you're doing it right when you see the stems thicken noticeably—this means the seedlings are hardening off. Too much sun too soon will bleach those delicate leaves white.
Pruning for Bushiness: When you prune those leggy stems back by ⅓ at the 4-6 inch stage, you're not just shaping the plant—you're forcing it to grow stronger. Make your cuts just above a leaf node where new growth will emerge. I like to do this with clean scissors and then immediately water the plant to reduce stress. The partial shade week after transplanting helps them recover from this shock.
Pro Tips for Loquat Tree Propagation
- Here's what nobody tells you about growing these delicate seedlings from scratch.
- The Seed Viability Test: I learned this the hard way after wasting seeds on moldy soil.
- Warmth is Everything: Loquat seeds need that 75°F warmth to germinate properly.
Frequently asked questions
Got questions about propagating loquat trees? You’re not alone! Here are some of the most common concerns—plus straightforward answers to help you grow confidently.
When is the best time to propagate a loquat tree?
The ideal window is late winter to early spring (just before new growth starts). For semi-hardwood cuttings, aim for summer when the tree is actively growing but not yet flowering. Avoid harsh winters or extreme heat—timing matters for rooting success!
How long does it take for loquat cuttings to root?
Patience is key! Most cuttings take 4–8 weeks to develop roots, depending on humidity and temperature. Check for resistance at the base (a sign of rooting) or gently tug—if roots hold, you’re golden. Keep them moist but not soggy during this phase.
Can I propagate a loquat tree from seed instead of cuttings?
Yes, but expect unpredictable results. Seed-grown trees may not match the parent’s flavor, size, or disease resistance. Cuttings preserve the mother tree’s traits—ideal for consistency. Save seeds for experimentation if you’re curious, but prioritize cuttings for reliable propagation.
Why are my loquat cuttings rotting or turning black?
Overwatering or poor airflow are the usual culprits. Reduce moisture and ensure your cuttings are in a well-ventilated spot (like a humidity dome). Use a rooting hormone and sterile potting mix to minimize rot. If black spots appear, trim affected areas and repot in fresh, dry medium.
What’s the best temperature range for rooting loquat cuttings?
Aim for 65–75°F (18–24°C) during the day and slightly cooler at night. Avoid drafts or direct sun—consistent warmth speeds up rooting. A heat mat under propagation trays can help if your climate dips too low. Think of it as a cozy nursery for your future tree!
Wrapping up and next steps
Propagating a loquat tree is a rewarding journey that blends patience with the joy of nurturing new life! 🌱 Whether you choose seeds, cuttings, or grafting, each method offers a unique path to success—just remember, consistency in care is key.
Now that you’re armed with the right techniques and tips, there’s no better time to roll up your sleeves and get growing.
Your next step? Pick your preferred method and start your loquat adventure today—watch as your tiny seedling transforms into a thriving tree, ready to gift you with sweet, golden fruit for years to come! 🍊✨