Orchid Care
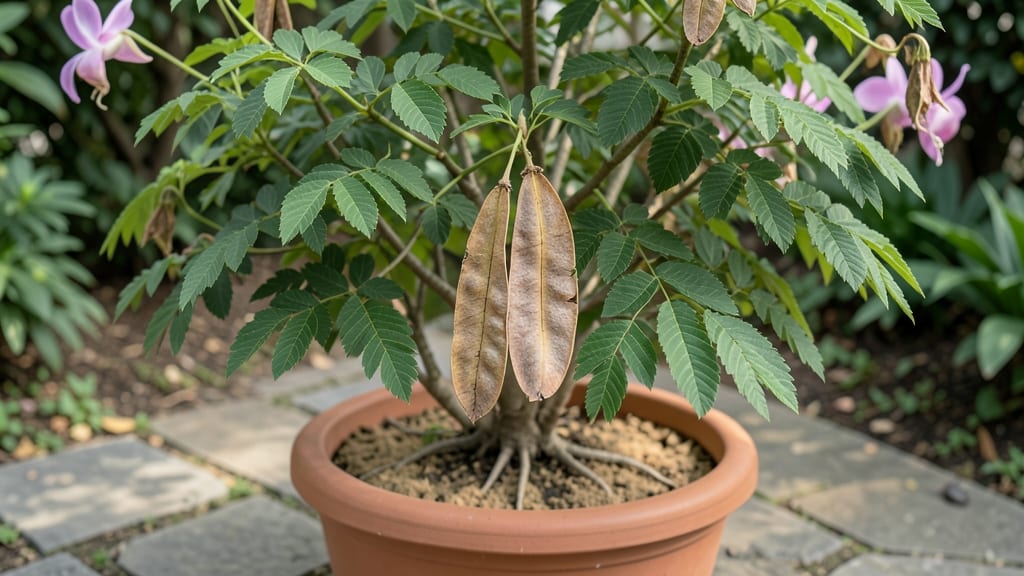
Those papery orchid tree seed pods hold a world of tropical potential—if you're willing to wait. 🌿 I've cracked the code on coaxing germination from Bauhinia seeds, and the results—once they arrive—are worth every month of patience.
The key lies in breaking dormancy the right way, and I'll walk you through every step from pod to sprout.
You'll need just a few simple supplies: a sharp knife for pod opening, sandpaper for scarification, a plastic bag for humidity, and a mix of perlite and peat for drainage.
The real magic happens in the waiting—some seeds take 3-6 months to crack open, but once they do, you'll see those first tiny leaves within weeks. This isn't a quick project, but the payoff is a tree that can live for decades.
What you end up with are sturdy seedlings ready to handle the outdoors once they've developed their first true leaves.
The roots grow fast once germination kicks in, and with proper care, you'll have a small tree in just a few years—one that blooms with those iconic orchid-like flowers every spring. The challenge is worth it for anyone who loves watching something grow from almost nothing.
Works best in warm climates but can be overwintered indoors if you live in cooler zones. Here's how to make those seeds work for you—without the guesswork or wasted time.
📚 In This Guide
- What you need
- Instructions
- Tips and common mistakes
- Wrapping up and next steps
What you need
- ● Orchid tree seed pods: Fresh or slightly dried pods (preferably from a Bauhinia purpurea or Bauhinia variegata tree). Aim for 3–5 pods to maximize success.
- ● Sterilized potting mix: A well-draining blend of: 50% orchid bark (coarse, 1–2 inch chunks)
- ● 30% perlite or pumice (for aeration)
- ● 20% coconut coir or peat moss (for moisture retention)
- ● Seed-starting trays or small pots: 2–3 inch containers with drainage holes (or a clear plastic propagator for humidity).
- ● Spray bottle: With room-temperature water (avoid tap water if it’s chlorinated).
- ● Plastic wrap or humidity dome: To create a mini greenhouse effect.
- ● Labeling tags: Waterproof markers and tags to track sowing dates.
- ● Pruning shears or scissors: For carefully opening seed pods (sterilize with rubbing alcohol first!).
- ○ Heat mat (optional): Set to 75–85°F to speed up germination (not required but helpful in cooler climates).
- ● Grow lights: LED or fluorescent (12–14 hours/day) if natural light is insufficient.
- ○ Fungicide (optional): A mild solution like hydrogen peroxide (3%) or cinnamon powder to prevent mold.
- ● Journal or app: To log moisture levels, temperature, and germination progress.
Step-by-Step instructions for germinating orchid tree seed pods
Slow germination is the orchid tree's secret—here's how to break the cycle with the right approach.
🌱 Step 1: Harvest and Prepare the Seed Pods
Collect mature pods when they turn brown and begin splitting open naturally—this signals full ripeness. I always use sterilized scissors to snip them from the tree, leaving a small stem attached. The key here is freshness: pods left on the tree too long lose viability.
Open the pods carefully with a small knife, scraping out the gelatinous seed mass inside. This translucent substance contains thousands of tiny seeds—each one needs the right conditions to break dormancy. Store the mass in a sealed plastic bag in the fridge for 1-2 months to mimic natural winter stratification, which triggers germination.
💧 Step 2: Create the Ideal Germination Environment
Orchid tree seeds require a sterile, humid, and warm space to germinate. I use a clear plastic container with a tight-fitting lid to create a mini greenhouse. Line the bottom with 1 inch of sterile perlite or coarse sand—this provides drainage while maintaining humidity.
Add 2 cups of distilled water to the container, then place the seed mass on top of the perlite. Seal the container and store it in a warm spot (70-75°F) with indirect light. You'll see condensation on the lid within days—this is perfect. Check weekly but never open the container until you see signs of germination, which can take 3-6 months.
☀️ Step 3: Transfer Seedlings to Growing Medium
Once you spot tiny green specks (first true leaves) through the container, it's time to move them. I carefully lift the seed mass and rinse away the perlite, then place the seedlings on a sterile paper towel to dry slightly. This prevents rot when they go into their permanent home.
Use a 50/50 mix of orchid bark and perlite for your first planting. Divide the seedlings into 4-inch pots (about 4 seedlings per pot) and bury them just enough to cover the roots. Keep the medium moist but never soggy—orchid tree seedlings rot faster than they grow.
🌿 Step 4: Provide Consistent Care for Early Growth
Place the pots under bright, indirect light—a north-facing window or grow light works best. Avoid direct sun, which will scorch the delicate leaves. I water my seedlings by misting the surface daily and soaking the pots once a week to encourage root development.
You'll see real growth in 6-12 months, but patience is critical. The seedlings need time to develop a strong root system before they can handle more frequent watering. Once they reach 3-4 inches tall, you can gradually introduce them to outdoor shade conditions during the day.
⏰ Step 5: Transition to Outdoor Conditions
After 12-18 months of indoor growth, your orchid tree seedlings will be ready for their first taste of outdoor life. Start by placing them in a shaded, sheltered spot for 2-3 hours daily. Watch for any signs of stress—yellowing leaves or wilting means they're not ready yet.
Gradually increase their outdoor time over 2-3 weeks, moving them to partial shade before finally introducing them to full sun. This slow transition prevents shock and gives their roots time to adjust. Once established, orchid trees thrive in USDA zones 10-11 with consistent humidity.
Tips & tricks for germinating orchid tree seed pods
Patience truly is the name of the game when it comes to orchid tree seed pods—here's how to make the waiting worthwhile.
The Freshness Factor: When harvesting your seed pods in Step 1, don't rush the process. The pods need to be fully brown and naturally splitting open—this ensures maximum viability. I've learned the hard way that pods still green on the tree won't germinate no matter how long you wait. Also, sterilize your tools thoroughly to prevent any fungal contamination that could ruin your entire batch.
Stratification Secret: The 1-2 month cold stratification period in Step 1 mimics winter conditions and breaks the seeds' natural dormancy. Don't skip this step! I've tried germinating without stratification, and it took twice as long—or failed completely. Place the sealed bag with the seed mass on a refrigerator shelf (not the door where temperatures fluctuate) for consistent results.
Humidity Control: In Step 2, maintaining that perfect humidity level in your mini greenhouse is crucial. The condensation you see on the lid is your visual cue that conditions are ideal. If you notice mold growth instead of condensation, your container might be too warm. Try moving it to a slightly cooler spot (around 70-75°F) and reduce the amount of distilled water slightly. A small fan on low setting can help circulate air without disturbing the humidity.
Seedling Transition: When moving seedlings to their growing medium in Step 3, handle them like delicate glass ornaments. The key is to keep their roots moist but not waterlogged during this transfer. I use a fine mist spray bottle to gently rinse away perlite and a soft paintbrush to carefully separate seedlings. This prevents root damage that could set back growth for months. Remember, these tiny seedlings have been developing for 3-6 months—give them the gentle treatment they deserve!
Pro Tips for Orchid Tree Seed Pods
- Patience truly is the name of the game when it comes to orchid tree seed pods—here's how to make the waiting worthwhile.
- The Freshness Factor: When harvesting your seed pods in Step 1, don't rush the process.
- Stratification Secret: The 1-2 month cold stratification period in Step 1 mimics winter conditions and breaks the seeds' natural dormancy.
Frequently asked questions
Frequently Asked Questions About Orchid Tree Seed Pods
Got questions about those mysterious, slow-to-germinate orchid tree seed pods? You’re not alone! Here are some of the most common queries—and their answers—to help you navigate this rewarding (but patience-testing) process.
How long do orchid tree seed pods take to germinate?
Be prepared for a marathon, not a sprint! Orchid tree seeds typically take 6 months to 2 years (or even longer) to germinate. The key is consistency—keep them in a warm, humid environment with indirect light. Think of it as a slow-burning adventure with a big payoff!
Can I speed up germination of orchid tree seed pods?
While you can’t rush nature, you can optimize conditions. Use a sterile, moist seed mix (like sphagnum moss) and maintain 70-80°F temperatures. Adding a fungicide (like Captan) prevents mold. Some growers use a seed germinator or even a clear plastic bag with a heat mat for better control.
How do I know if my orchid tree seed pods are viable?
Fresh pods should be firm, plump, and slightly leathery. If they’re shriveled, dry, or leaking, they’re likely dead. For a quick check, crack one open—viable seeds look tiny, dust-like, and pale. If they’re dark or clumpy, they’ve probably lost viability. Store them in a cool, dry place until sowing.
What’s the best medium for orchid tree seed germination?
A sterile, well-aerated mix is critical. Popular options include:
- Sphagnum moss (keeps moisture without suffocating roots)
- Coconut coir (retains humidity, resists mold)
- Perlite + peat moss (50/50 ratio for drainage)
Why aren’t my orchid tree seeds germinating after months?
Don’t panic—it’s normal! But check these troubleshooting tips:
- Moisture: Keep the medium constantly damp (not soggy). Use a spray bottle.
- Temperature: Orchids thrive at 70-80°F. A heat mat helps.
- Light: Bright, indirect light (no direct sun). A grow light works if natural light is weak.
- Patience: Some seeds need mycorrhizal fungi to activate—this can take years!
Wrapping up and next steps
Growing orchid tree seed pods is a rewarding journey that teaches patience and deepens your connection to nature. While their slow germination may feel challenging, the unique beauty of these tropical treasures makes every effort worthwhile.
Once you’ve mastered the process, you’ll be equipped to nurture these delicate plants—and maybe even share your success with fellow orchid enthusiasts!
Ready to take the next step? Start small—germinate a few pods in a controlled environment, and let your green thumb grow! 🌱