Lawn
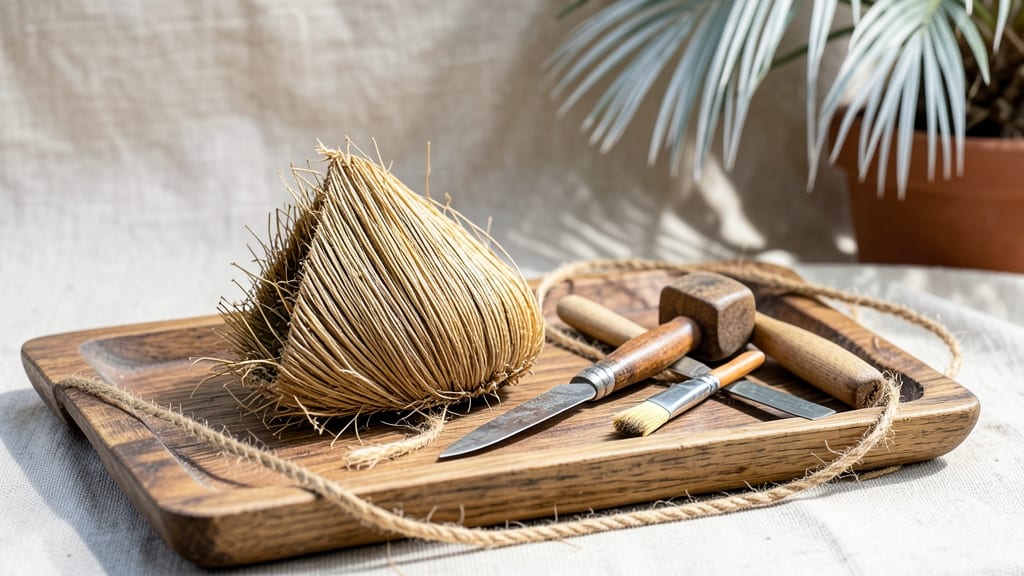
Transforming your lawn into a tropical retreat starts with this stunning palm tree seed pod art. 🌴 The natural curves and earthy tones of palm tree seed pods bring instant sophistication to any outdoor space, whether you're crafting rustic wall hangings or whimsical garden accents.
Gathering materials is half the fun—collect pods from fallen trees or source them sustainably from local nurseries. A few basic tools (drill, sandpaper, twine) turn these organic shapes into statement pieces that outshine store-bought decor. The best part? Every piece tells a story of nature's artistry.
You'll end up with one-of-a-kind decor that thrives in sunlight or shade, adding texture and movement to patios, pergolas, or even indoor spaces. The projects scale from simple 5-minute hooks to elaborate installations that become conversation starters.
Perfect for gardeners who love low-maintenance elegance with a touch of the exotic. Here's how to get started with your first piece!
📚 In This Guide
- What you need
- Instructions
- Tips and common mistakes
- Wrapping up and next steps
What you need
- ● Palm tree seed pods: 5–10 (fresh or dried, depending on project size; avoid pods with mold or pests).
- ● Sandpaper: Medium-grit (120–150) for smoothing rough edges.
- ● Acrylic paint: 2–3 colors (e.g., white, gold, or pastels for a dreamy look).
- ● Paintbrushes: Fine-tip (size 2–4) + wider brush (size 6–8) for details and base coats.
- ● Sealer/spray: Clear matte or glossy (e.g., Mod Podge Outdoor or polyurethane) to protect your art.
- ● Hot glue gun + glue sticks: For assembling larger pieces or attaching handles (if making planters).
- ○ Drill (optional): With small bits (1/8"–1/4") for adding drainage holes to planters.
- ● Twine or jute rope: For hanging decorations or wrapping handles.
- ● Gold leaf or metallic spray: To add a luxe, sun-kissed finish.
- ● Small pebbles or moss: For filling planters and enhancing natural textures.
- ● Stencils or freehand templates: To guide intricate designs (e.g., geometric patterns or tropical motifs).
- ● Wire or coat hangers: For bending pods into unique shapes (e.g., mobiles or arches).
- ● Work surface: Newspaper, drop cloth, or a plastic tray to protect your space.
- ● Patience + steady hands: Seed pods can be delicate—take your time!
- ● Outdoor space: For drying/sealing (if working with fresh pods).
- ● Safety gear: Gloves (if sanding rough pods) and a well-ventilated area for sealing.
Step-by-Step instructions for crafting palm tree seed pod art
Transforming seed pods into statement pieces is easier than you think—just follow these steps for stunning tropical decor.
🪴 Step 1: Gather and Clean Your Seed Pods
Collect 4-6 large palm seed pods (like coconut or palmetto) from your yard or a trusted supplier. Rinse them thoroughly under lukewarm water to remove dirt and debris, then scrub gently with a soft-bristle brush to dislodge stubborn grime. You’ll notice the natural texture of the pods emerges as you clean—this is what adds character to your piece.
Let the pods dry completely in a well-ventilated area for 24-48 hours. Arrange them on a towel-lined surface to prevent moisture buildup, which can cause mold. If you’re impatient, a fan on low speeds up drying time while keeping the pods safe from warping.
🎨 Step 2: Design Your Artistic Layout
Sketch a rough tropical-inspired design on paper first—think fan shapes, cascading fronds, or abstract palm motifs. Use the pods as reference points: their natural curves will guide your composition. For 4 servings, aim for a 12-18 inch diameter base to balance the pieces without overcrowding.
Lay out the pods on your workspace to visualize the flow. Adjust spacing until you achieve a harmonious, organic look—too tight, and the piece feels cluttered; too loose, and it loses impact. Take photos from different angles to refine your vision before committing to glue or wire.
✂️ Step 3: Secure Pods With Hidden Fasteners
For a lightweight, display-ready piece, use thin floral wire (20-22 gauge) to bind pods together. Thread the wire through the natural holes in the pods or wrap it around the base, twisting tightly to hold. Avoid visible knots—bury them inside the pod’s crevices for a seamless finish.
If you prefer a heavier, ground-level installation, use E6000 adhesive or hot glue (for temporary projects). Apply glue sparingly to 2-3 contact points per pod—too much can weigh the piece down or create unsightly drips. Let the adhesive cure for 1-2 hours before handling to ensure a sturdy bond.
☀️ Step 4: Seal and Weatherproof (Optional)
To protect your art from moisture, UV rays, or pests, apply a clear outdoor sealant like Mod Podge Outdoor or polyurethane. Use a soft brush to coat the entire piece lightly, focusing on the glued or wired areas where moisture might seep in. Work in thin layers—thick applications can yellow or crack over time.
Let each layer dry for 4-6 hours before adding another. For extra durability, add a mix of sand or fine gravel to the sealant for texture. This not only enhances the tropical aesthetic but also adds grip if your piece sits on a lawn or patio. Avoid sealing if you prefer the pods’ natural, rustic look.
🌿 Step 5: Display With Tropical Flair
Place your finished piece in a sunlit, high-traffic area where its organic beauty shines. For lawn installations, bury the base 1-2 inches in the soil to anchor it securely. In container gardens, nestle it among tropical plants like hibiscus or bird-of-paradise for a cohesive look.
Rotate the piece every few months to prevent uneven fading from sunlight. If pods shift over time, reinforce weak spots with additional wire or glue—a little maintenance keeps your art looking fresh for years. Pro tip: Add fairy lights or solar-powered LEDs woven through the pods for an enchanting evening glow.
Tips & tricks for perfect palm tree seed pod art
Transforming seed pods into stunning tropical decor takes a little finesse—here's how to avoid common pitfalls and elevate your project.
Drying Strategy: The 24-48 hour drying time is non-negotiable for preventing mold, but humidity can extend this significantly. If your space feels damp (like a basement or rainy season), prop a small dehumidifier nearby or place your pods on a cooling rack elevated above the towel. This creates better airflow around the pods while they dry, ensuring they're completely moisture-free before assembly.
Design Tip: In Step 2, when sketching your layout, consider the natural growth patterns of palm trees—fronds typically fan out from a central trunk. Place your largest pods at the base and work upward in decreasing size for a more authentic look. For extra drama, arrange pods so their natural curves create flowing lines rather than rigid geometric shapes.
Wire Technique: When using floral wire in Step 3, twist the ends tightly together and then fold them back into the pod's crevices rather than leaving them exposed. This hidden technique creates a cleaner finish and prevents the wire from showing through the natural texture. For extra stability, make a small loop at the end of each wire segment before twisting—this gives you more control when positioning pods.
Sealing Wisdom: If you choose to seal your piece in Step 4, work in a well-ventilated area with good lighting. The 4-6 hour drying time between layers is crucial—rushing this can cause the sealant to remain tacky and attract dust. For a natural finish, mix a tiny amount of sand into your final sealant layer to create subtle texture that complements the organic look of the pods.
Pro Tips for Palm Tree Seed Pod Art
- Transforming seed pods into stunning tropical decor takes a little finesse—here's how to avoid common pitfalls and elevate your project.
- Drying Strategy: The 24-48 hour drying time is non-negotiable for preventing mold, but humidity can extend this significantly.
- Design Tip: In Step 2, when sketching your layout, consider the natural growth patterns of palm trees—fronds typically fan out from a central trunk.
Frequently asked questions
Got questions about creating stunning palm tree seed pod art? You’re not alone! Here are some of the most common queries—and their answers—to help you craft your tropical masterpiece with confidence.
Where can I find palm tree seed pods for art projects?
You can source seed pods from local palm trees (check for fallen or dropped ones), nurseries, or online plant shops. Always ensure they’re clean, dry, and free of pests. If you’re unsure about identification, snap a photo and ask a local botanist or gardening forum for help!
How long does it take for seed pods to dry completely?
Drying time varies by pod size and humidity, but most take 2–4 weeks in a well-ventilated, dry space (like a garage or shed). Place them in a single layer on a screen or tray, flipping occasionally. Pro tip: Use a fan to speed up the process in humid climates!
Can I paint or stain palm seed pods for a different look?
Lightly sand rough edges first, then use acrylic paint, wood stain, or sealant for a polished finish. For a natural look, try tea or coffee staining—just brush it on, let it dry, and wipe off excess. Seal with polyurethane to protect your design.
What’s the best way to attach pods to my lawn art?
Use weather-resistant adhesives (like E6000 or outdoor-grade glue) or hot glue for quick fixes. For larger pieces, secure pods with staples or small nails into a wooden base. If you’re creating a mobile, use strong fishing line or wire for hanging.
How do I protect my palm pod art from rain or pests?
Seal pods with outdoor varnish or polyurethane to repel moisture. For extra protection, place your art under a covered patio, pergola, or gazebo. To deter pests, avoid leaving organic debris nearby and occasionally inspect for signs of mold or insects.
Wrapping up and next steps
Transforming your lawn into a tropical paradise with palm tree seed pod art is easier—and more rewarding—than you think! 🌴 Whether you’re a DIY novice or a creative enthusiast, these natural masterpieces bring a touch of island charm to any outdoor space.
The key? Start small, embrace the organic beauty of nature, and let your imagination run wild.
Now that you’re inspired, take the next step—grab your supplies and begin crafting! Share your creations on social media with #PalmPodArt and tag us for a chance to be featured. Your lawn (and your neighbors!) will thank you for the tropical glow-up! 🌟