
Pruning
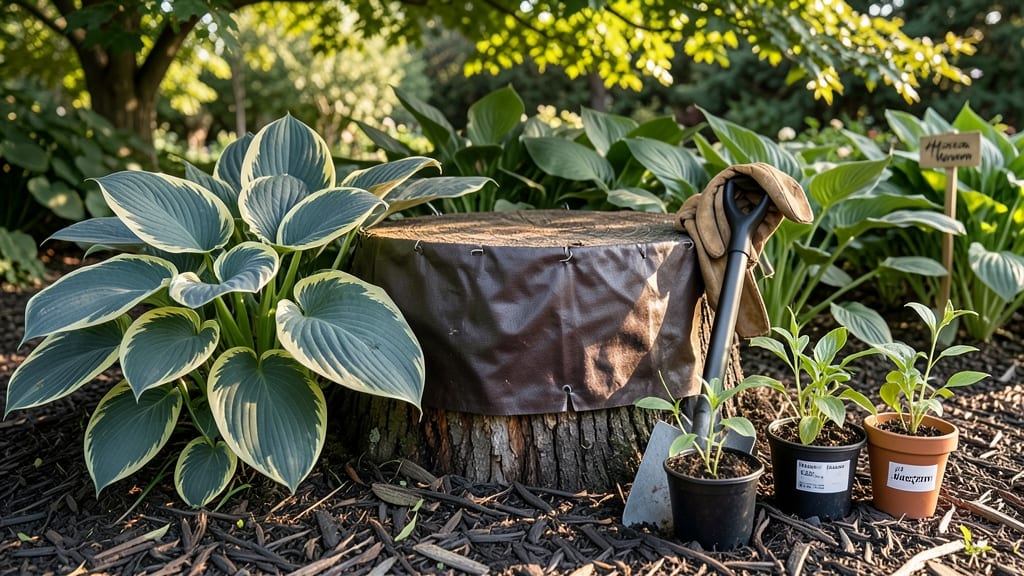
Planting around tree stumps transforms dead wood into a lush, living privacy screen. 🌿 I once had a bare patch that looked like a forgotten construction site—until I filled it with shade-loving perennials that now create a natural barrier all year.
The key is choosing plants that tolerate root competition and thrive in the stump's microclimate.
Start with native plants like foamflower or smooth hydrangea—they handle shade, moisture fluctuations, and even rocky soil. Add fern varieties for texture and hostas for height contrast. Space them 12-18 inches apart to give roots room to establish without crowding the stump's remaining roots.
By late summer, you'll have a dense, fragrant screen that blocks wind and prying eyes. The foliage colors shift with seasons—deep greens in spring, golden hues in fall—while the stump itself becomes a natural centerpiece. Mulch with wood chips to suppress weeds and retain moisture.
This works for any yard with stumps, whether you want a low-maintenance hedge or a wildflower meadow vibe. The best part? No digging required—just plant, water, and enjoy the transformation over time.
📚 In This Guide
- What you need
- Instructions
- Tips and common mistakes
- Wrapping up and next steps
What you need
- ● Native perennial plants (3–10, depending on stump size): Low-maintenance options: Spirea, ferns, hostas, or asters (check local climate suitability).
- ● Drought-tolerant picks: Sedum, lavender, or Russian sage.
- ● Mulch (2–3 bags, 2–3 cubic feet each): Shredded bark, pine straw, or wood chips (3–4 inches deep).
- ○ Optional: Add compost (1–2 bags) for nutrient boost.
- ● Garden soil or topsoil (1–2 bags, 40–60 lbs each).
- ● Pruning shears or loppers (for trimming existing roots/shoots).
- ● Garden trowel or spade (for digging small holes).
- ● Watering can or hose with nozzle (gentle spray setting).
- ● Garden stakes or markers (6–12, 12–18 inches tall).
- ○ Burlap or landscape fabric (optional, to suppress weeds if needed).
- ● Slow-release fertilizer (granular or spikes for perennials).
- ● Mulch ring or edging (to keep mulch in place).
- ● Drip irrigation kit (for hands-off watering).
- ● Garden kneeler or stool (for comfort during planting).
- ● Tree stump cover or decorative planter (if stump is large or unsightly).
Step-by-Step instructions for planting around tree stumps
Here's how to transform bare stumps into a lush, year-round privacy screen using native perennials.
🌱 Step 1: Assess the Stump and Soil Conditions
Start by examining the stump's diameter and surrounding soil. Measure the space—most stumps create a 3-5 foot radius of disturbed ground. Use a trowel to test soil moisture and texture; stump areas often retain excessive moisture from decomposed wood, which can suffocate roots. If the soil feels compacted, loosen it with a broadfork to a depth of 6-8 inches—this improves drainage and aeration for new plants.
Look for signs of fungal growth or rot at the stump's base. If you see white, stringy mycelium or soft, spongy wood, avoid planting directly adjacent. Instead, create a 12-inch buffer zone with mulch or groundcover to prevent root competition. Healthy soil should crumble when moist but not stick to your hands—this is your target texture for successful planting.
🌿 Step 2: Select the Right Native Perennials
Choose perennials that thrive in your hardiness zone and tolerate the stump's microclimate. For moist, shaded areas, consider ferns (Osmunda cinnamomea), hostas (Hosta spp.), or wild ginger (Asarum canadense)—all spread via rhizomes and fill space quickly. In drier, sunnier spots, opt for shrubby st. john's wort (Hypericum prolificum) or butterfly weed (Asclepias tuberosa), which handle reflected heat from the stump.
Group plants by size at maturity to avoid overcrowding. Place taller varieties like spirea (Spiraea japonica) or eastern redbud (Cercis canadensis) behind the stump, where they won’t compete for light with shorter groundcovers. I like to sketch a quick layout, marking plant positions with stakes—this prevents the "too-late-to-move" panic after transplanting.
💧 Step 3: Prepare Planting Holes and Amend the Soil
Dig holes twice as wide as each plant’s root ball but only as deep—planting too deep suffocates roots. For stump areas, mix 2 parts native soil with 1 part compost and 1 part perlite to improve drainage. Avoid garden soil; it compacts and can introduce weeds. Add a handful of bone meal or kelp meal to the hole for phosphorus and micronutrients, which help roots establish in disturbed soil.
Water each hole deeply before planting to settle the amended soil. If the stump area drains poorly, create a slightly raised bed by mounding soil around the edges. This elevates roots above waterlogged zones while keeping the surface level for mulching. I tap the sides of the hole gently to remove air pockets—this ensures roots make immediate contact with moist, nutrient-rich soil.
✂️ Step 4: Plant and Mulch for Long-Term Success
Remove plants from containers and loosen roots if pot-bound. Place each in its hole, ensuring the top of the root ball sits ½ inch above soil level—settling will occur over time. Backfill with amended soil, pressing lightly to eliminate gaps. Water again to eliminate air pockets, then apply 3 inches of mulch (wood chips or shredded bark) around—but not touching—the stump. Mulch retains moisture, suppresses weeds, and prevents soil temperature swings that stress young roots.
Stagger planting sessions if working with multiple stumps; this lets you focus on watering and monitoring each area individually. In the first 4-6 weeks, check soil moisture daily—stump areas dry out faster than surrounding ground. You’ll know watering is right when the top inch of soil feels damp but not soggy. Avoid heavy foot traffic until plants show new growth after 6-8 weeks.
☀️ Step 5: Maintain and Monitor Seasonal Growth
Fertilize lightly in early spring with a balanced 10-10-10 formula to support foliage growth. Native perennials rarely need extra nutrients, but stump soil often lacks organic matter. Top-dress with ½ inch of compost annually in late winter to replenish nutrients without overfeeding. Prune leggy growth in early summer to encourage bushier habits—this is especially important for shrubs like spirea, which can become top-heavy near stumps.
Watch for voles or deer in the first year; they’re drawn to tender new shoots. A chicken wire barrier buried 6 inches deep around the planting area deters burrowing pests. By year two, your screen will fill in, providing year-round privacy. The key is patience—native perennials take 2-3 seasons to reach full density, but once established, they require minimal care and thrive without supplemental watering.
Tips & tricks for planting around tree stumps
Here's what I've learned from years of transforming bare stumps into thriving privacy screens—these details make all the difference.
Soil Preparation Secret: When loosening soil with a broadfork in Step 1, focus on breaking up those dense, compacted layers created by the stump's decay. The 6-8 inch depth is non-negotiable—this creates the necessary root zone while preventing waterlogging. I've found that adding a handful of perlite to the soil mix (as mentioned in Step 3) doesn't just improve drainage; it also helps prevent soil compaction from settling over time. Think of it as creating a mini aeration system for your new plants.
Plant Placement Strategy: The 12-inch buffer zone around rotting stumps isn't just about avoiding root competition—it's also about heat reflection. Stumps absorb and radiate heat differently than surrounding soil, which can stress nearby plants. Place heat-tolerant species like butterfly weed or shrubby st. john's wort closest to the stump, while moisture-loving hostas or wild ginger should go on the outer edges where soil stays cooler. This creates a natural microclimate gradient that works with your landscape.
Mulching Technique: That 3 inches of mulch in Step 4 serves multiple purposes beyond just moisture retention. Apply it in a volcano shape—thicker in the center, tapering toward the edges—to direct water toward plant roots while preventing erosion. I've learned the hard way that mulch should never touch the stump itself; this prevents moisture buildup that encourages fungal growth. Use shredded bark mulch specifically—it breaks down slowly and improves soil structure over time.
Seasonal Care Calendar: The 4-6 week initial watering window is critical, but don't stop monitoring after 6-8 weeks when you see new growth. In early spring, when you apply that 10-10-10 fertilizer, pair it with a ½ inch compost top-dressing to prevent salt buildup from the fertilizer. For the first two years, check soil moisture weekly during dry spells—stump areas dry out faster than you'd expect, even with mulch.
Pro Tips for Planting Around A Tree Stump
- Here's what I've learned from years of transforming bare stumps into thriving privacy screens—these details make all the difference.
- Soil Preparation Secret: When loosening soil with a broadfork in Step 1, focus on breaking up those dense, compacted layers created by the stump's decay.
- Plant Placement Strategy: The 12-inch buffer zone around rotting stumps isn't just about avoiding root competition—it's also about heat reflection.
Frequently asked questions
Got questions about transforming that leftover tree stump into a thriving privacy screen? Here are some of the most common ones—and their answers!
What’s the best time of year to plant around a tree stump?
For native perennials, aim for early spring or fall when soil is workable but not frozen. Avoid extreme heat or drought—roots need moisture to establish. If planting in summer, water deeply daily for the first two weeks to help new plants recover.
Will planting too close to the stump compete with its roots?
Yes! Keep new plants at least 3–6 feet from the stump’s edge to avoid root competition. If the stump is large or the tree was mature, increase spacing to 8+ feet. Smaller perennials (like shrubby cinquefoil) tolerate closer proximity better than deep-rooted species like spirea.
Can I use annuals instead of perennials for quick privacy?
Fast-growing annuals like sunflowers or cleome can create instant height and texture. However, they’ll die back by winter, so pair them with perennials for year-round coverage. Mulch heavily to retain moisture and suppress weeds while annuals establish.
My new plants are wilting—what’s going wrong?
Common culprits: overwatering (stumps retain moisture, leading to rot), underwatering (perennials need consistent soil moisture), or root competition from nearby grass. Check soil drainage—amend with compost if needed—and water at the drip line (not the stump) to encourage outward root growth.
Should I remove the stump first, or can I plant around it?
You don’t need to remove it! Stumps act as natural mulch, preserving moisture. However, if it’s rotting or fungus-covered, treat it with a stump killer or cover it with landscape fabric before planting. For a cleaner look, top-dress with 3–4 inches of mulch (avoid piling it against the stump’s base).
Wrapping up and next steps
Transforming a tree stump into a thriving privacy screen is simpler—and more rewarding—than you might think!
By choosing native perennials and following a few key steps, you’ll create a lush, low-maintenance garden that flourishes year-round. 🌿 Whether you’re a seasoned gardener or just starting out, this project is your chance to add beauty and functionality to your outdoor space.
Ready to get growing? Start small: Pick one or two plants from our list, prep your stump, and watch your privacy screen take shape. Before you know it, you’ll have a vibrant, eco-friendly oasis that’s all your own! Grab your tools and begin today!