
Flowers
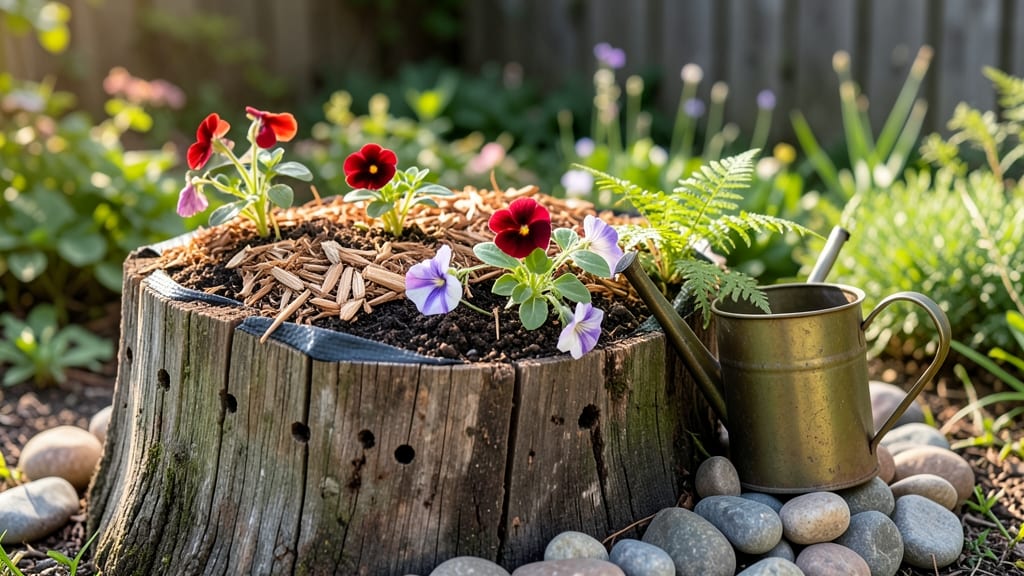
Transforming old tree stumps into planting flowers in a tree stump adds unexpected charm to any yard. 🌿 I stumbled upon this idea after clearing a fallen oak, and now my stump hosts a thriving mix of succulents and wildflowers that draws bees all summer long.
The best part? It turns dead wood into a living art piece while saving space for other plants.
Start by cleaning the stump thoroughly and drilling holes for drainage—about 3-4 inches deep, spaced evenly. Choose compact plants like sedum, ferns, or small perennials that thrive in shallow soil.
A mix of cactus and moss also works beautifully, requiring minimal water once established. The key is matching plant size to the stump's diameter for a balanced look.
Within a few weeks, you'll see lush green growth climbing the stump's sides, creating a striking focal point. These gardens need regular watering the first month but become drought-tolerant once rooted.
The visual impact is stunning—imagine a sunlit stump bursting with color, surrounded by mulch or pebbles for extra texture.
This technique works year-round, from spring wildflowers to winter evergreens, and even adapts to containers if you don't have stumps. Perfect for small yards, patios, or as a conversation starter in your garden. Let's bring that stump back to life!
📚 In This Guide
- What you need
- Instructions
- Tips and common mistakes
- Wrapping up and next steps
What you need
- ● Tree stump: A freshly cut, clean stump (preferably less than 2 feet in diameter for manageability). Avoid stumps with signs of rot or pests.
- ● Drill or auger: A ½-inch to ¾-inch bit (for planting holes) or a spade bit (for larger stumps). Battery-operated drills work great for portability.
- ● Potting soil: A well-draining, peat-based mix (e.g., Miracle-Gro Potting Mix or Black Gold Natural & Organic). Aim for 2–3 gallons per stump, depending on size.
- ● Small flowering plants: Choose compact, stump-friendly varieties like: Succulents (e.g., Sedum, Sempervivum)
- ● Annuals (e.g., Petunias, Begonias, Impatiens)
- ● Perennials (e.g., Heuchera, Ferns, Hosta)
- ● Watering can or hose with a gentle spray nozzle: For even moisture distribution without over-saturating the soil.
- ○ Mulch (optional but recommended): Shredded bark or coconut coir to retain moisture and suppress weeds. Use 1–2 inches around the base.
- ● Stump sealant or paint: For a polished look (choose non-toxic, breathable options like AFM Safecoat).
- ● Slow-release fertilizer: A balanced 10-10-10 or organic option to boost growth (apply once every 2–3 months).
- ● Moss or decorative stones: To enhance aesthetics and retain humidity in drier climates.
- ● Planting tray or liner: A plastic nursery pot (cut to fit the stump) to contain soil and make cleanup easier.
- ● Solar-powered stake lights: For evening ambiance (battery-operated or USB-charged).
Step-by-Step instructions for planting flowers in tree stumps
Turn that old stump into a stunning vertical garden with these simple, creative steps.
🪴 Step 1: Prepare the Tree Stump for Planting
First, clean the stump thoroughly with a stiff brush and mild soap to remove dirt, moss, and debris. You want a clean surface so your plants can establish proper contact with the wood. If the stump is still damp, let it dry completely—moisture can rot your planting medium and invite pests. I like to use a wire brush for stubborn spots, especially in the crevices where roots will nestle.
Next, drill ¼-inch drainage holes every 4-6 inches around the stump's perimeter. These holes prevent waterlogging while allowing roots to explore the wood's natural channels. Space them evenly so moisture distributes uniformly. For larger stumps, add holes vertically too—this creates more planting pockets. Wear a mask during drilling to avoid inhaling wood dust.
🌱 Step 2: Create a Planting Medium Mix
Combine equal parts peat moss, perlite, and coconut coir to create a lightweight, moisture-retentive mix that mimics natural forest conditions. This blend drains well but holds enough water for shallow-rooted flowers. I always stir in 1 cup of slow-release organic fertilizer per 4 cubic feet of mix—this gives plants a nutrient boost without overfeeding.
Moisten the mix until it feels like a wrung-out sponge: damp but not dripping. Pack it firmly into the stump's crevices and holes, pressing it into every nook. Leave ½-inch gaps between planting pockets to prevent overcrowding. For extra stability, I weave landscape fabric strips through the holes before adding soil—this keeps the mix in place while allowing roots to grow into the wood.
☀️ Step 3: Select and Plant Suitable Flowers
Choose shade-tolerant annuals like impatiens, ferns, or caladiums, or drought-resistant perennials like sedum and heuchera. These thrive in the stump's microclimate where moisture levels fluctuate. For a 4-stump garden, I plant 3-5 small plugs per stump, spacing them 2-3 inches apart. Dig holes twice as wide as the root ball but only as deep as the container—stump planting is all about shallow roots.
Gently tease out roots if they're circling, then place each plant into its pocket. Fill gaps with your planting mix, pressing lightly to eliminate air pockets. Water immediately with a slow, deep soak until moisture runs out the bottom holes. This settles the soil and encourages roots to explore the wood's natural channels. Avoid overhead watering—it can wash soil out of the crevices.
💧 Step 4: Establish a Watering and Maintenance Routine
Water every 2-3 days for the first 2 weeks, then taper to weekly deep waterings once plants establish. Stumps dry out faster than ground soil because wood is porous. I test moisture by sticking my finger 1 inch into the planting mix—if it feels dry, it's time to water. Mulch the top of the stump with ½-inch of bark chips to retain moisture and suppress weeds.
Fertilize monthly with a balanced liquid fertilizer (10-10-10) during the growing season. Stump gardens are nutrient-poor, so consistent feeding keeps flowers vibrant. Watch for yellowing leaves—this usually means overwatering. If you see pests like slugs, apply organic slug bait around the base. With proper care, your stump garden will flourish for 3-5 years before needing a refresh.
Tips & tricks for perfect vertical stump gardens
Transforming tree stumps into thriving gardens is easier than you think—here are the secrets to making it flourish.
Drainage is Everything: In Step 1, those ¼-inch drainage holes aren't just for show—they're the lifeline of your stump garden. If your stump is particularly large, consider adding a few extra holes vertically to create deeper planting pockets. I've found that using a step bit on your drill makes this job faster, and it gives you more control over hole depth. For extra insurance against waterlogging, line the bottom of each pocket with a small piece of landscape fabric before adding your planting mix.
Mix Like a Pro: When combining your planting medium in Step 2, resist the urge to skimp on the peat moss—it's the secret to moisture retention. I like to pre-moisten each component separately before mixing to ensure even hydration. For larger stumps, you might need more than 4 cubic feet of mix. In that case, simply scale up the fertilizer proportionally: 1 cup per 4 cubic feet remains the golden ratio. Pro tip: Add a handful of worm castings to your mix for an extra nutrient boost without overfeeding.
Planting Precision: Step 3 is where most beginners make their biggest mistake—overcrowding. That ½-inch gap between planting pockets isn't arbitrary; it allows roots to breathe and prevents competition for nutrients. For a truly stunning display, consider creating a cascading effect by planting taller varieties in the center and shorter ones around the edges. And here's a little-known trick: Gently score the sides of your root balls before planting to encourage roots to grow outward into the stump's wood.
Watering Wisdom: The 2-3 day watering schedule in Step 4 works perfectly in most climates, but don't rely solely on the calendar. That finger test is your best friend—if the top inch of your planting mix feels dry, it's time to water. For a real game-changer, install a slow-drip irrigation system using soaker hoses wrapped around the stump. This delivers water directly to the roots without disturbing your carefully arranged plants, and it's especially helpful during hot, dry spells.
Pro Tips for Planting Flowers In Tree Stumps
- Transforming tree stumps into thriving gardens is easier than you think—here are the secrets to making it flourish.
- Drainage is Everything: In Step 1, those ¼-inch drainage holes aren't just for show—they're the lifeline of your stump garden.
- Mix Like a Pro: When combining your planting medium in Step 2, resist the urge to skimp on the peat moss—it's the secret to moisture retention.
Frequently asked questions
Got questions about transforming tree stumps into vibrant flower beds?
You’re not alone! Here are answers to the most common queries to help you get started with confidence.
Can I plant flowers in any tree stump?
Not all stumps are ideal! Look for stumps that are completely dry and decayed (no sap or moisture) and have a hollow center. Freshly cut stumps or those with rot won’t hold soil well. If yours is still green, wait 6–12 months for it to dry out.
How long does it take for flowers to grow in a stump?
Patience is key! Most flowers take 4–8 weeks to sprout, depending on the species and weather. Succulents and annuals (like petunias) grow faster, while perennials (like ferns or hostas) may take longer. Keep the soil moist but not soggy during the first few weeks.
What’s the best soil mix for stump gardening?
Use a lightweight, well-draining mix: 60% peat moss or coconut coir, 30% perlite or vermiculite, and 10% compost. Avoid heavy garden soil—it compacts and suffocates roots. For extra drainage, drill small holes in the stump’s sides before filling it.
Will pests or mold be a problem?
Pests like ants or mold can be an issue if the stump isn’t prepped properly. Prevent them by:
- Disinfecting the stump with a 10% bleach solution before planting.
- Avoiding overwatering—keep soil damp, not wet.
- Choosing disease-resistant flowers (e.g., marigolds, lavender).
What if my stump flowers die after a few weeks?
Don’t worry—it’s often due to poor drainage, overwatering, or weak roots. Try these fixes:
- Check for root rot (smelly, mushy soil). Drain excess water and repot.
- Switch to drought-tolerant plants like sedum or hens-and-chicks.
- Ensure the stump has sunlight exposure matching your flowers’ needs (most need 4–6 hours/day).
What are some low-maintenance alternatives to stump gardening?
If stumps seem too tricky, try these easy vertical gardening hacks:
- Hanging planters (great for herbs or trailing flowers).
- Pallet gardens (upcycle wood for a rustic look).
- Wall-mounted pockets (ideal for small spaces).
- Cinder block towers (super simple and customizable!).
Wrapping up and next steps
Transforming old tree stumps into vibrant flower beds is a creative and rewarding way to breathe new life into your space—no matter how small! 🌸 With just a few simple steps, you’ve turned what was once forgotten into a thriving vertical garden that adds beauty and charm to your yard. Now’s your chance to get growing!
Ready to take the next step? Start by gathering your favorite flowers and stumps, then pick a sunny spot to create your own mini ecosystem. Share your progress with fellow gardeners or even try experimenting with different plants—your green thumb will thank you! 🌱