
Pruning
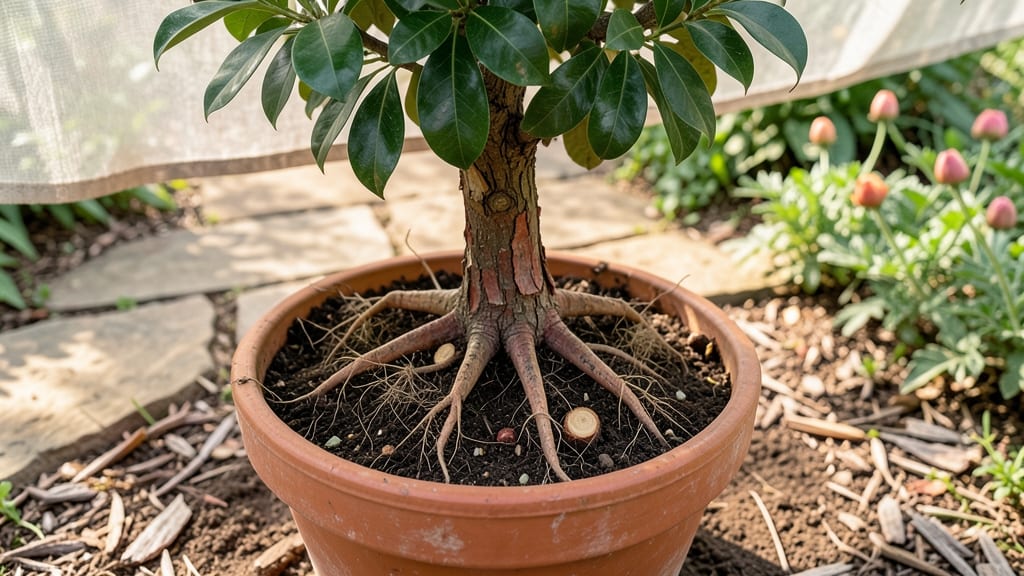
Pomegranate tree roots are the hidden powerhouse behind those jewel-toned fruits we love. 🌱 I’ve watched my own pomegranate tree go from a struggling sapling to a fruit-bearing giant—all because I finally understood its root needs.
The secret isn’t just about planting depth or spacing; it’s about creating an environment where roots can spread freely and access nutrients without competition.
Most gardeners overlook roots until problems appear, but healthy roots mean bigger harvests and stronger branches. Start with well-draining soil mixed with compost—pomegranates hate soggy feet. Plant the root ball just below soil level, leaving enough space for roots to expand outward (at least 10-15 feet between trees).
Mulch lightly to protect roots from temperature swings, but keep it away from the trunk to prevent rot.
What you’ll notice after proper root care is a tree that thrives even in dry climates. Roots dig deep for water, so deep watering once a week (not frequent shallow drinks) keeps them happy.
Prune roots only when necessary—never cut more than 20% of the root mass at once, or you’ll shock the tree. The payoff? A tree that produces fruit for decades with minimal fuss.
This works for both container-grown pomegranates and in-ground plantings. Whether you’re fixing an established tree or starting fresh, these root habits make all the difference. Let’s get those roots growing strong!
📚 In This Guide
- What you need
- Instructions
- Tips and common mistakes
- Wrapping up and next steps
What you need
- ● Pruning shears – Sharp, clean, and sterilized (bypass pruners work best for precision cuts).
- ● Loppers – For thicker roots (if needed) (16-20 inch reach recommended).
- ● Garden gloves – Heavy-duty, cut-resistant (to protect hands from sharp roots and debris).
- ● Disinfectant (70% isopropyl alcohol or bleach solution) – 1 part bleach to 9 parts water (to sterilize tools between cuts).
- ○ Pruning sealant (optional but helpful) – Tree wound paint or beeswax (to prevent disease in larger cuts).
- ● Shovel or root saw – For deeper root adjustments (if extensive pruning is required).
- ● Watering can or hose – For post-pruning hydration (5 gallons minimum).
- ● Mulch (organic or inorganic) – 2-3 inches of shredded bark, straw, or wood chips (to retain moisture and suppress weeds).
- ● Measuring tape – For assessing root spread and spacing (10-15 feet recommended for mature trees).
- ● Root stimulator or mycorrhizal fungi – Boosts root health post-pruning (follow package instructions).
- ● Root barrier fabric – If controlling root spread (for aggressive root systems).
- ● Camera or sketchbook – To document root structure before/after pruning (great for tracking progress!).
- ● Knee pads or a small stool – For comfort during ground-level work (especially for larger trees).
Step-by-Step guide to pruning pomegranate tree roots
Healthy roots mean bigger harvests—here’s how to keep your pomegranate thriving below ground.
🌱 Step 1: Identify the Right Time for Root Pruning
Late winter or early spring, just before new growth begins, is your best window. The tree’s dormant season means less stress from pruning. Look for bare branches and no fresh leaves—that’s your cue. Avoid pruning during hot summers or cold winters, when the tree is already struggling to recover.
I always mark the calendar for February or March, right after the last frost but before buds swell. If you miss this window, you risk shocking the tree or inviting pests to fresh wounds. A quick check of your local frost dates helps—just don’t wait until leaves appear.
✂️ Step 2: Dig Carefully to Expose Problem Roots
Start by clearing a 12-inch radius around the trunk with a spade, cutting through any surface roots that circle the base. These "girdling roots" strangle the tree by restricting water flow. Use a sharp spade to make clean cuts—ragged edges slow healing and invite rot.
Once you’ve exposed the roots, look for thick, woody roots spreading outward and thin, hair-like feeder roots. The woody ones are structural; the fine ones are your priority. Prune only the thin, tangled roots that cross the main trunk or grow in tight circles. Leave the healthy, outward-spreading roots intact—they’re the tree’s lifeline.
💧 Step 3: Prune Only What’s Necessary
Cut only the circular or crossing roots that are less than ½ inch thick. Thicker roots are too vital to remove—they support the tree’s stability and nutrient flow. Use clean, sharp pruners or a spade to make 45-degree cuts just outside the root collar (the swollen base where roots meet trunk).
Here’s the thing—don’t overdo it. Remove no more than 20-30% of the root system in one session. If you see oozing sap after cutting, that’s normal, but if the wound looks mushy or discolored, you’ve cut too deep. A light dusting of cinnamon powder on the cuts helps prevent infection while the tree heals.
☀️ Step 4: Water and Mulch for Recovery
After pruning, water deeply to 12 inches down to help the roots recover. The soil should feel moist but not soggy—think of it as giving the tree a drink of water to kickstart healing. Overwatering now can drown the freshly pruned roots, so let the top 2 inches of soil dry between waterings afterward.
Spread a 3-inch layer of organic mulch (like wood chips or straw) around the base, keeping it 6 inches away from the trunk. This protects the roots from temperature swings and retains moisture. Mulch also discourages weeds that compete for water and nutrients. Check the mulch every few weeks—if it’s breaking down, add a little more to maintain that protective layer.
⏰ Step 5: Monitor for New Growth
Within 4-6 weeks, you should see signs of recovery: new shoots on the trunk or branches, and possibly fresh leaves if you pruned early enough. These are your signals that the tree is healing. If you don’t see any new growth by 8 weeks, the pruning might have been too aggressive—next time, go lighter.
Keep an eye out for yellowing leaves or wilted branches, which could mean the tree is struggling. If this happens, give it extra water and hold off on fertilizing until new growth appears. A healthy pomegranate tree will bounce back, but it needs patience—especially after root work.
Tips & tricks for pruning pomegranate roots
Here’s what I’ve learned from years of working with these resilient trees—small details make all the difference.
Timing is Everything: The February-March window in Step 1 is non-negotiable for pomegranates. I once pruned in late April and watched my tree struggle through summer—it took two years to fully recover. Check your local frost dates and mark your calendar for the week after the last frost but before buds swell. This dormant period gives the tree maximum healing capacity.
Root Identification Trick: In Step 2, when distinguishing between woody and feeder roots, run your fingers along them—woody roots feel tough and fibrous, while feeder roots are soft and delicate. I learned this the hard way by accidentally cutting a major structural root that nearly toppled my tree. Always verify by gently tugging: if it moves easily, it’s a feeder root ready for pruning.
Precision Cutting Technique: For those 45-degree cuts in Step 3, use a clean spade or pruners and cut just outside the root collar. I now keep a small bottle of rubbing alcohol nearby to wipe down tools between cuts—this prevents spreading disease between wounds. The goal is clean cuts that heal quickly, not jagged edges that invite rot.
Mulch Maintenance Secret: After spreading that 3-inch layer of mulch in Step 4, I recommend checking it every 2-3 weeks during the growing season. If it breaks down too quickly, top it up—this keeps the soil temperature stable and moisture levels consistent. I’ve seen trees recover faster when the roots stay in that ideal environment.
Pro Tips for Pomegranate Tree Roots
- Here’s what I’ve learned from years of working with these resilient trees—small details make all the difference.
- Timing is Everything: The February-March window in Step 1 is non-negotiable for pomegranates.
- Root Identification Trick: In Step 2, when distinguishing between woody and feeder roots, run your fingers along them—woody roots feel tough and fibrous, while feeder roots are soft and delicate.
Frequently asked questions
Got questions about pomegranate tree roots and pruning? You’re not alone! Here are answers to the most common concerns—from timing to troubleshooting—to help you nurture a thriving tree.
When is the best time to prune pomegranate tree roots?
Prune roots in early spring (before new growth) or late winter when the tree is dormant. Avoid pruning in fall or winter, as cold stress can weaken the tree. If you must prune in summer, do so early in the morning or late evening to reduce water loss.
How do I know if my pomegranate tree’s roots are overgrown or damaged?
Watch for these signs:
- Stunted growth or yellowing leaves (root-bound or compacted roots).
- Mushrooms or mold near the base (fungal infection or rot).
- Cracks or oozing sap on roots (physical damage or pests).
How long does it take for pruned roots to recover?
With proper care, roots typically recover within 4–8 weeks. Focus on watering deeply but infrequently (1–2 inches per week) and avoid heavy fertilization immediately after pruning. New root growth should appear in 3–6 months.
Can I prune pomegranate roots if the tree is young (under 3 years old)?
Yes, but minimize root pruning—limit to 10–15% of the root system to avoid stress. Young trees need all their roots for establishment. Instead, focus on surface-level adjustments (e.g., removing circling roots) and prioritize soil health with compost.
What should I do if my pomegranate tree’s roots are rotting?
Act fast!
- Trim away mushy, black, or foul-smelling roots with sterilized pruners.
- Apply copper fungicide or a baking soda solution (1 tbsp/baking soda per gallon of water) to the soil.
- Improve drainage by raising the tree’s base with gravel or sand.
Pro Tip:
Use a root pruning saw for thick roots (1+ inches) and hand pruners for finer ones. Always sterilize tools with rubbing alcohol to prevent disease spread!
Wrapping up and next steps
Understanding and caring for your pomegranate tree roots is the foundation of a thriving, fruit-bearing tree! 🌱 From proper pruning techniques to soil health and seasonal adjustments, these steps ensure stronger growth, deeper root systems, and bountiful harvests.
With patience and the right approach, your pomegranate tree will reward you with vibrant blooms and juicy fruit for years to come.
Ready to take the next step? Start by inspecting your tree’s roots this season—whether it’s spring’s new growth or fall’s preparation for winter. Small, consistent efforts now will lead to a healthier, more productive pomegranate tree tomorrow! 🍇✨