
Pruning
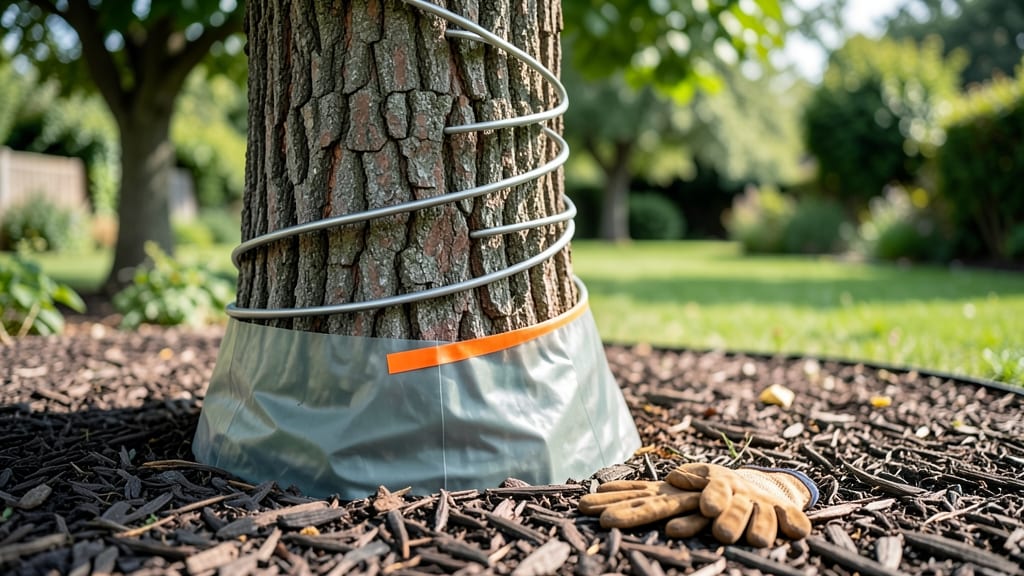
Protecting tree trunks from rodent damage is easier than you think—and way more effective than just hoping for the best. 🌳 I’ve watched squirrels and voles turn healthy trunks into Swiss cheese—until I learned the right protective tricks. The key isn’t just wrapping; it’s choosing the right material, timing, and technique to actually work. Most people grab whatever’s handy, but that’s how you end up with gnawed-through bark and trapped pests. I use hard plastic tree guards for young trees and burlap wraps for established ones—both keep critters out while letting the trunk breathe. The difference between a scarred trunk and a smooth one? Proper installation and checking it every few months. By spring, you’ll see fresh growth where others see damage. The tree won’t just survive—it’ll thrive, with stronger bark and fewer pest problems. And yes, this works for apple, maple, or even your prized oak without looking like a DIY disaster. The best part? Most solutions cost under $20 and take less than an hour. Skip the guesswork—here’s exactly how to do it right, from start to finish.
📚 In This Guide
- What you need
- Instructions
- Tips and common mistakes
- Wrapping up and next steps
What you need
- ● Tree trunk guards: 1-2 per tree (depending on height/diameter). Choose metal mesh (hardware cloth, ¼" or 1/8" openings) or plastic spiral wraps (pre-cut to fit trunk circumference).
- ● Staple gun or heavy-duty staples: For securing mesh guards (ensure staples are rust-resistant).
- ● Measuring tape: Flexible, 16+ ft. for accurate trunk circumference measurements.
- ● Scissors or tin snips: For cutting mesh/plastic to size (if pre-cut guards aren’t available).
- ● Gloves: Work gloves (cut-resistant if handling sharp mesh).
- ● Ladder (if needed): Sturdy, extendable ladder for taller trees (ensure it’s rated for your weight + tools).
- ● Pencil or marker: For marking measurements on guards.
- ● Tree wrap (burlap or fabric): To cushion trunk guards and prevent rubbing damage (especially for young trees).
- ● Wire or zip ties: For securing plastic guards without staples (eco-friendly alternative).
- ● Rodent repellent granules: Non-toxic, like castor oil-based pellets, to sprinkle at the base before installing guards.
- ● Post-hole digger: If burying guards 12" deep for extra protection (prevents gnawing at the base).
- ● Spray paint (matching bark color): To camouflage guards and blend them into the landscape.
Step-by-Step instructions for protecting tree trunks from rodent damage
Here’s my battle-tested method to shield tree trunks using simple, effective barriers that deter rodents while keeping your trees healthy.
🪴 Step 1: Measure and Select the Right Protection Material
Start by measuring the circumference of each tree trunk at 4 feet above ground level—this is where rodents typically gnaw. Use a flexible tape measure for accuracy, and record the diameter. For 4 trees, you’ll need enough material to wrap each trunk completely, with a 6-inch overlap at the seams. I recommend hardware cloth (¼-inch mesh) or plastic tree guards—both are rodent-proof and durable.
If using hardware cloth, cut it into strips 2 feet tall (taller than expected gnawing height) and 12 inches wide (enough to overlap when wrapped). For plastic guards, select ones designed for your tree’s diameter range. Avoid wire mesh with gaps larger than ¼ inch, as mice can squeeze through.
✂️ Step 2: Prepare the Trunk Surface
Before installing protection, remove any loose bark, debris, or moss from the trunk using a wire brush or putty knife. Smooth surfaces help the protective material adhere better and prevent gaps where rodents could chew through. Pay special attention to the base of the trunk, where bark is often thinner and more vulnerable.
If the bark is damaged, apply a tree wound dressing (like Tanglefoot Tree Wound Pruning Sealer) to seal minor injuries. This step isn’t just about rodents—it also prevents disease and pest entry through open wounds. Let the dressing dry completely before proceeding.
🪴 Step 3: Install the Protective Barrier
Wrap the hardware cloth or plastic guard around the trunk starting 6 inches above ground level, ensuring the bottom edge is buried 2 inches deep in the soil. Secure the material with stainless steel staples or plastic-covered wire ties every 6 inches to prevent shifting. For hardware cloth, fold the edges inward at the top to create a 2-inch lip—this deters climbing rodents.
If using plastic guards, follow the manufacturer’s instructions for securing the seams. Avoid using nails or sharp objects that could damage the trunk. Double-check for gaps or loose sections—rodents exploit even small openings. For added security, extend the protection 1 foot above the expected gnawing height (usually 5-6 feet total).
🌿 Step 4: Monitor and Maintain the Protection
Inspect the barriers every 3 months for signs of wear, rust (if using metal), or rodent activity. Replace any damaged sections immediately, especially if you spot fresh gnaw marks or burrows near the base. Trim back vegetation that grows against the trunk to eliminate hiding spots for rodents.
In late winter, before rodents become active, recheck the protection. This is when mice and voles are most aggressive, and a quick inspection can save your tree from irreversible damage. If you notice persistent chewing above the guard, extend the protection higher or add a second layer of hardware cloth for stubborn pests.
Tips & tricks for protecting tree trunks from rodent damage
These practical strategies will help you create an impenetrable defense system that actually works the first time—no more wasted materials or frustrated inspections.
Material Selection: Hardware cloth with a ¼-inch mesh is your best bet for durability, but if you opt for plastic guards, choose ones with a thickness of at least 0.03 inches—thinner materials can crack under rodent pressure. I’ve seen mice chew through flimsy plastic in winter, so don’t skimp on quality. For larger trees, consider two layers of hardware cloth for extra protection against determined pests like beavers.
Installation Precision: When burying the bottom edge 2 inches deep in Step 3, use a trowel to create a shallow trench first. This prevents the material from shifting when rodents dig nearby. For the 6-inch overlap at seams, fold the edges tightly and secure with additional staples—rodents can pry apart loose seams surprisingly fast. The 2-inch lip at the top isn’t just decorative; it creates a physical barrier that makes climbing nearly impossible for most rodents.
Maintenance Strategy: The 3-month inspection schedule in Step 4 works perfectly, but mark your calendar for late winter—this is when rodents are most active. I keep a small toolkit with extra staples and hardware cloth strips in my garage for quick repairs. If you notice persistent chewing above your initial guard, extend it higher immediately; rodents will keep trying until they find a weak spot. The key is consistency—don’t wait for visible damage to act.
Pro Tips for Protecting Tree Trunks
- These practical strategies will help you create an impenetrable defense system that actually works the first time—no more wasted materials or frustrated inspections.
- I’ve seen mice chew through flimsy plastic in winter, so don’t skimp on quality.
- Installation Precision: When burying the bottom edge 2 inches deep in Step 3, use a trowel to create a shallow trench first.
Frequently asked questions
Got questions about safeguarding your trees from nibbling critters? Here are some of the most common concerns—and their answers—to help you protect those precious trunks like a pro.
What’s the best time of year to wrap tree trunks?
Apply protective wraps or guards before winter (late fall) when rodents are most active. For year-round protection, install them in early spring. Avoid wrapping in extreme heat—it can trap moisture and harm bark.
Can I use hardware cloth instead of commercial tree guards?
Hardware cloth (1/4-inch mesh) is a budget-friendly, durable alternative. Cut it to fit snugly around the trunk, leaving a 1-inch gap at the base to prevent rodent entry. Secure it with staples or zip ties—just ensure it’s tight enough to deter chewing.
Why do some tree guards fail to stop rodents?
Common mistakes include gaps, loose fits, or using materials rodents can chew (like plastic without reinforcement). Always check for holes, ensure the guard extends at least 2 feet above ground, and use metal or thick plastic. A little extra effort goes a long way!
Are tree wraps safe for young trees?
Yes, but choose breathable materials like burlap or paper wraps to avoid suffocating the trunk. Avoid plastic wraps that trap moisture—this can lead to rot or pest infestations. For extra safety, pair wraps with hardware cloth for double protection.
How long should I leave a tree guard in place?
Keep guards on until the tree’s trunk reaches 4 inches in diameter (usually 3–5 years). Remove them gradually to avoid damaging the bark. Monitor for new rodent activity—some species return yearly!
Wrapping up and next steps
Protecting your tree trunks from rodent damage is a simple yet powerful way to safeguard your greenery—and your wallet! 🌳🛡️ By using materials like hardware cloth, tree guards, or even DIY wraps, you’re giving your trees a fighting chance against gnawing pests.
The effort is minimal, but the long-term benefits—stronger trees, healthier landscapes, and fewer surprises—are priceless.
Ready to take action? Start by inspecting your trees this weekend and apply your chosen protective measures. Your trees will thank you—and so will your future self! 🌱✨