
Pruning
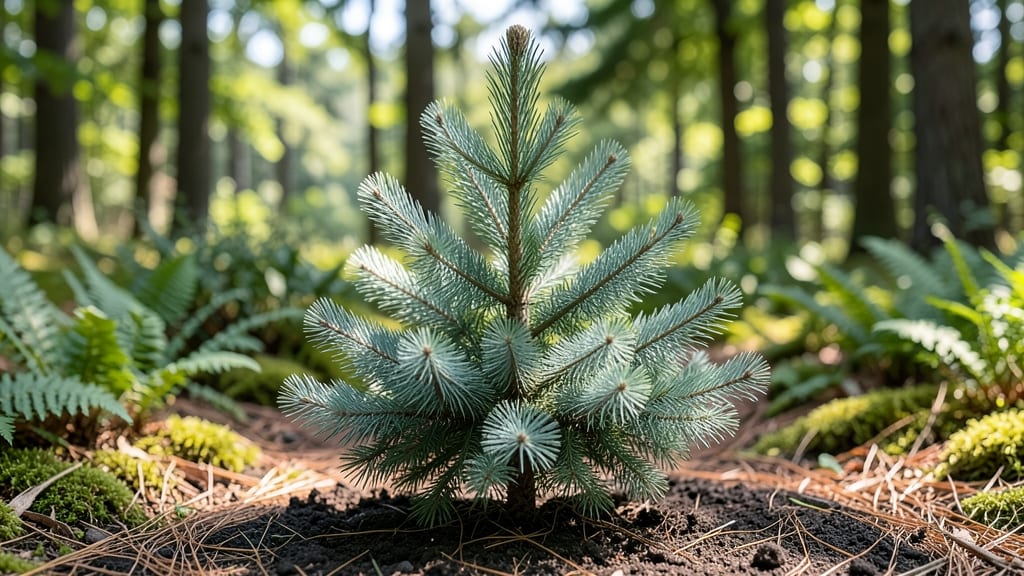
Growing a spruce tree seedling into a sturdy, fast-starting sapling starts with the right first steps. 🌲 I’ve learned that the difference between a leggy, struggling seedling and a strong, healthy one comes down to soil, light, and consistent care in those first critical weeks.
What seems like a delicate task turns out to be straightforward once you know the key moves.
The secret isn’t complicated—just match the seedling’s needs to your setup. You’ll need well-draining soil (think 60% potting mix, 30% perlite, and 10% compost), a container with drainage holes, and a spot with 6-8 hours of sunlight daily.
Overwatering is the #1 killer, so let the top inch of soil dry out between waterings. Spruce seedlings hate soggy roots, but they also won’t thrive if they dry out completely.
Within 4-6 weeks, you’ll see the first signs of real progress: darker green needles, new growth at the tips, and roots pushing against the container walls.
That’s when you know you’re on the right track. The goal is to avoid the common pitfalls—like transplant shock or fungal issues—that derail so many young seedlings.
This method works for both container-grown spruces and those destined for the ground, whether you’re in a cold climate or a milder zone. The key is patience and consistency—no shortcuts, just steady care. Ready to get started?
📚 In This Guide
- What you need
- Instructions
- Tips and common mistakes
- Wrapping up and next steps
What you need
- ● Spruce tree seeds or seedlings: 1–3 (choose disease-resistant varieties like Picea glauca or Picea abies for best results).
- ● Seed-starting mix: 1–2 bags (sterilized, well-draining blend—avoid garden soil!).
- ● Seedling trays or small pots: 4–6 (3–4" diameter with drainage holes).
- ● Grow lights or sunny windowsill: 1 (LED full-spectrum lights work best for 12–16 hrs/day).
- ● Misting spray bottle: 1 (to keep soil moist without overwatering).
- ○ Humidity dome or plastic wrap: 1 (optional but helps retain moisture early on).
- ● Fertilizer (balanced, water-soluble): 1 small bottle (e.g., 10-10-10 NPK, diluted to half-strength).
- ● Pruning shears (sterilized): 1 (for future trimming—start small, like bypass pruners).
- ● pH test kit: 1 (ideal soil pH: 5.0–6.0 for spruce seedlings).
- ● Heating mat: 1 (keeps soil warm for faster germination, ~70°F).
- ● Automatic watering system: 1 (e.g., self-watering trays for hands-off care).
- ● Rooting hormone: 1 small tube (speeds up root development when transplanting).
- ● Organic mulch (e.g., pine straw): 1 bag (protects seedlings from temperature swings).
- ● Label markers: 10+ (track varieties and planting dates!).
- ● Outdoor hardening-off tray: 1 (for gradual acclimation before transplanting).
Step-by-Step instructions for growing spruce tree seedlings
Here’s how to give your spruce seedlings a strong, fast start with deep roots and sturdy growth.
🌱 Step 1: Prepare the Planting Site for Fast Germination
Choose a location with partial shade and well-draining soil—spruce seedlings hate soggy roots. If your soil is heavy clay, mix in 1-2 inches of compost to improve drainage and aeration. Spruce seeds need consistent moisture but never waterlogged conditions, so avoid low spots where water pools.
Loosen the soil to a depth of 6 inches with a garden fork or trowel. This helps roots penetrate easily and prevents compaction. If planting in containers, use a mix of 50% peat moss and 50% perlite to mimic natural, airy forest soil. Spruce seedlings thrive when their roots can breathe.
💧 Step 2: Plant Seeds at the Right Depth and Keep Moist
Spruce seeds should be planted ¼ inch deep—any deeper delays germination because they struggle to push through dense soil. Space seeds 4-6 inches apart to give seedlings room to grow without competing for nutrients. A light sprinkle of soil over the seeds is all you need; pressing too hard can damage the tiny seed.
Water gently but thoroughly after planting to settle the soil around the seeds. Keep the soil evenly moist (not soggy) for the first 4-6 weeks
Young spruce seedlings need partial shade (30-50% sunlight) for their first 2-3 months to prevent stress. Too much direct sun causes leaves to scorch, stunting growth. If planting outdoors, use shade cloth or place seedlings under taller plants until they establish roots. Watch for pale or yellowing needles—this signals too much sun. After 8-12 weeks, gradually introduce more sunlight by moving seedlings to slightly sunnier spots over 1-2 weeks. Mature spruces tolerate full sun, but seedlings need time to adjust. You’ll see strong, dark green needles when they’re ready for full exposure. Wait until seedlings are 6-12 inches tall before fertilizing—young roots are sensitive to nutrients. Use a balanced, slow-release fertilizer (10-10-10) at half strength. Sprinkle lightly around the base, not directly on seedlings, to avoid burning tender foliage. Over-fertilizing causes weak, leggy growth. Prune only to remove dead or damaged branches. Spruce seedlings don’t need heavy pruning early on, but you can lightly shape them by pinching back 1-2 inches of new growth to encourage bushier growth. Avoid cutting into old wood—spruces heal slowly from deep cuts. Once seedlings reach 1-2 feet tall, prepare them for winter by mulching with 2-3 inches of organic mulch (like pine straw or shredded leaves) around the base. This insulates roots from freezing temperatures and retains moisture. Water deeply before the first frost to ensure roots stay hydrated. If planting in a cold climate, consider wrapping the base of young seedlings with burlap or frost cloth for extra protection. Avoid heavy snow buildup on branches—tap it off gently to prevent breakage. Healthy roots mean resilient growth, so prioritize moisture and insulation.☀️ Step 3: Provide Shade and Gradual Sun Exposure
✂️ Step 4: Fertilize Lightly and Prune for Strong Structure
🪴 Step 5: Protect Seedlings Through Their First Winter
Tips & tricks for growing healthy spruce seedlings
Here's what I learned the hard way about giving spruce seedlings the best possible start—these little details make all the difference.
The Soil Depth Secret: When loosening soil to that 6-inch depth in Step 1, don't just scratch the surface. Use your garden fork to break up compacted layers all the way down—this creates channels for roots to explore naturally. I learned this after seeing seedlings struggle with shallow roots that couldn't support their weight. Think of it like building a highway system for those tiny root hairs.
Watering Wisdom: That 4-6 week moist-but-not-soggy window in Step 2 is your golden opportunity. I recommend checking soil moisture by squeezing a handful—it should hold together but crumble easily. Too much water causes root rot, while too little stresses seedlings. A simple spray bottle makes this easy without disturbing delicate seedlings. Trust me, this is where most failures happen.
Sunlight Transition Hack: For the 8-12 week sun acclimation in Step 3, I suggest moving seedlings incrementally—like moving them 2 inches closer to sunlight each week. This gradual approach prevents shock that can cause those dreaded pale needles. Watch for dark green color as your signal they're ready for full sun exposure.
Winter Protection Pro Tip: When mulching in Step 5, consider adding a layer of pine straw over your organic mulch. It provides extra insulation while mimicking their natural forest habitat. I've seen seedlings survive harsher winters with this double-layer approach, especially in colder climates where temperatures drop below freezing.
Pro Tips for Spruce Tree Seedling
- Here's what I learned the hard way about giving spruce seedlings the best possible start—these little details make al...
- The Soil Depth Secret: When loosening soil to that 6-inch depth in Step 1, don't just scratch the surface. Use your g...
- Watering Wisdom: That 4-6 week moist-but-not-soggy window in Step 2 is your golden opportunity. I recommend checking ...
Frequently asked questions
Got questions about growing your spruce tree seedling? You’re not alone! Here are some of the most common concerns—and straightforward answers—to help you nurture a thriving young tree.
When is the best time to plant a spruce tree seedling?
Plant your seedling in early spring or fall (4–6 weeks before the first frost). Avoid extreme heat or cold, as these can stress the roots. If planting in summer, water deeply and provide shade to prevent transplant shock.
How long does it take for a spruce seedling to grow into a mature tree?
Spruces grow slowly—expect 10–20 years for a 10-foot tree, depending on species (e.g., Colorado blue spruce matures faster than Norway spruce). Patience pays off with proper care, including regular pruning and mulching.
Why are my spruce seedling’s needles turning brown?
Brown needles often signal overwatering, underwatering, or pest damage. Check soil moisture (it should be evenly damp but not soggy). Spider mites or bagworms can also cause browning—inspect the undersides of needles and treat with neem oil if needed.
Can I grow a spruce tree from seed instead of buying a seedling?
Yes, but it’s time-consuming! Spruce seeds need stratification (cold treatment) to germinate—soak seeds in water for 24 hours, then refrigerate in moist sand for 30–90 days. Seedlings from seed may take 5+ years to reach transplant size. Buying a seedling saves years of wait!
Should I prune my young spruce tree?
Prune only to remove dead or crossing branches—avoid heavy pruning until the tree is at least 3–5 years old. Over-pruning stresses young spruces. Use sterilized shears to prevent disease, and prune in late winter for best results.
Still stumped? Drop your question in the comments—we’re happy to help your seedling thrive!
Wrapping up and next steps
Growing a spruce tree seedling into a thriving evergreen is a rewarding journey that starts with patience, the right tools, and a little know-how. Whether you’re a beginner or a seasoned gardener, these fast-start tips—from soil prep to pruning—will give your seedling the best chance to flourish. You’ve got this!
Now that you’re armed with the essentials, take the next step: plant your seedling in the perfect spot and watch it grow stronger with each season. Happy gardening! 🌱💚