
Pruning
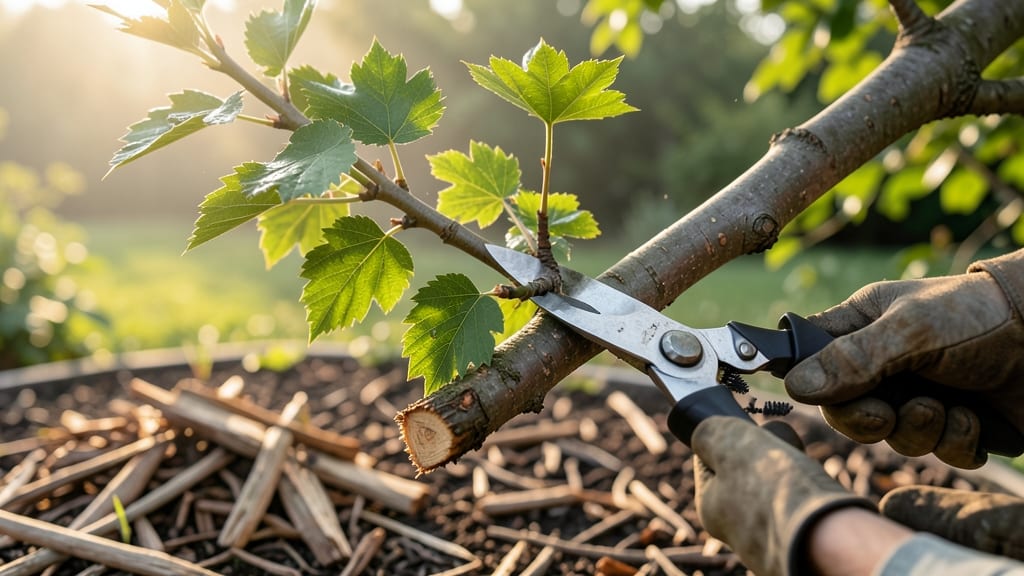
A single bad tree branch cut out can scar a tree for years—or worse, invite disease. ✂️ I’ve ruined more branches than I’d like to admit by rushing, but these precision cuts make all the difference in keeping your tree healthy and strong.
The right tools matter most: bypass pruners for small branches (under ½ inch thick), a pruning saw for medium limbs, and a pole saw for anything higher than your shoulder. Season matters too—late winter or early spring is ideal when trees are dormant but before new growth starts.
You’ll end up with clean cuts that heal properly, no jagged edges or bark tears. The key is cutting just outside the branch collar (that swollen area where the branch meets the trunk) at a 45-degree angle—this lets the tree seal itself naturally over time.
For branches thicker than your wrist, call a pro. Otherwise, grab your tools and let’s get trimming—your tree’s future depends on these small details.
📚 In This Guide
- What you need
- Instructions
- Tips and common mistakes
- Wrapping up and next steps
What you need
- ● Pruning shears: Sharp, bypass-style shears (for branches Tip: Clean blades prevent disease spread!
- ● Loppers: For branches 36-inch+ handles for leverage).
- ● Pruning saw: Curved-tooth saw for branches >2 inches thick (e.g., Felco or Corona models).
- ● Extension pole: 10–15 ft telescoping pole with a saw attachment for high branches.
- ● Gloves: Heavy-duty, cut-resistant gloves (e.g., Mechanix or PIP for grip and protection).
- ● Safety glasses: ANSI-rated goggles to shield eyes from debris.
- ● Ladder: Sturdy, extension ladder (rated for your height + 3 ft clearance). Pro tip: Use stabilizer wheels for uneven ground!
- ● Rope or harness: For high-risk cuts (e.g., 3M or Petzl climbing gear).
- ● Tree wound dressing: Pruning sealant (e.g., Tanglefoot Tree Wound Pruning Seal) for large cuts.
- ● Disinfectant: 70% rubbing alcohol or bleach solution (1 part bleach : 9 parts water) to sterilize tools between cuts.
- ● Marking twine: Colored twine to map branches before cutting.
- ● Tarps or drop cloths: To contain debris below.
- ● Check weather conditions: Avoid cutting in wet, windy, or stormy weather.
- ● Confirm tree health: Look for disease signs (fungus, oozing sap) or pests—consult an arborist if unsure.
- ● Know your local regulations: Some areas require permits for large tree work.
- ● Have a first-aid kit and emergency contact handy.
Step-by-step guide to tree branch cut out
Here’s how to trim branches safely—no bark damage, no messy mistakes, just clean cuts that heal properly.
🪴 Step 1: Gather the Right Tools
You’ll need sharp, clean tools to make precise cuts without tearing the bark. Start with a hand pruner for smaller branches up to ½ inch thick, and a pruning saw for anything thicker. I always use bypass pruners—they cut cleanly without crushing. Disinfect your tools with rubbing alcohol before and after trimming to prevent spreading disease between cuts.
For larger branches, grab a pole pruner or loppers—these give you leverage without climbing. Wearing gloves protects your hands from splinters and sap. If the branch is high up, you’ll also want a stable ladder or extension pole rated for your weight. Never stand on the top rung or lean too far—balance is everything when you’re up there.
✂️ Step 2: Locate the Branch Collar and Make Your First Cut
The branch collar is the swollen area where the branch meets the trunk—this is your guide for where to cut. Never remove this collar, as it’s the tree’s natural healing tissue. For branches under ½ inch thick, make a clean cut just outside the branch collar, angled slightly away from the trunk. For thicker branches, start with an undercut about 12 inches out from the trunk to prevent bark from tearing when you remove the branch.
Hold the pruner at a 45-degree angle and cut through the bottom of the branch first. This creates a flat surface that won’t collect water, reducing rot risk. If the branch is large, make a second cut about ½ inch farther out on the top side, just above the undercut. The branch should now break away cleanly, leaving the collar intact. If it doesn’t, you’ve cut too close—start over.
🌿 Step 3: Remove the Branch and Smooth the Cut
Once the branch is free, inspect the cut area. If any rough edges remain, use your pruners to smooth them out—this prevents splits and speeds up healing. For branches over 2 inches thick, avoid cutting flush with the trunk. Instead, leave a small stub (about ¼ inch) to protect the collar. Over time, the tree will naturally shed this stub as it grows.
If the branch was particularly thick, you might see sap bleeding from the cut. This is normal—it’s the tree’s way of sealing the wound. Don’t worry about covering it with paint or sealant; research shows this can actually trap moisture and cause rot. Just leave it be and let the tree heal on its own. Water the base of the tree afterward to help it recover.
🌱 Step 4: Clean Up and Monitor the Tree
After trimming, remove all cuttings from the area to prevent disease or pests from lingering. Dispose of diseased branches immediately—don’t compost them. If you’ve made multiple cuts, space them out over a few days to reduce stress on the tree. Over-trimming in one session can shock the tree, leading to weak growth or even death in extreme cases.
Keep an eye on the cuts over the next few weeks. Healthy healing tissue will form a smooth, calloused layer over the wound. If you see oozing sap, mold, or dead bark, the cut might have been too aggressive. In that case, prune again to refine the shape, but only if the tree is healthy enough to handle it. Most trees recover well with proper cuts—just give them time.
⏰ Step 5: Time Your Trimming for Best Results
The best time to prune depends on your tree’s type. For deciduous trees, late winter or early spring (just before buds swell) is ideal—this encourages new growth. Evergreens can be pruned in early summer, but avoid heavy trimming in fall or winter when they’re dormant. If you’re unsure, trim in late winter as a safe default for most trees.
Avoid pruning during extreme heat or drought—stressed trees heal poorly. After trimming, water deeply to help the tree recover. You’ll notice new growth within a few weeks if the cuts were done correctly. If the tree looks weak or drops leaves, it might need more time to bounce back. Patience is key—rushing leads to mistakes, and mistakes take years to undo.
Tips & tricks for perfect tree branch trimming
Precision pruning prevents damage—here's how to avoid common mistakes and trim like a pro.
Tool Selection: I can't stress enough how important sharp tools are—dull pruners tear bark and create jagged cuts. Test your tools by making a clean cut on a scrap piece of wood before starting. For branches over 2 inches thick, a pruning saw with fine teeth will give you cleaner cuts than loppers. And if you're working with large branches, consider renting a pole saw—it gives you the leverage you need without climbing. Just make sure it's rated for the branch size you're cutting.
Branch Collar Awareness: The branch collar is your best friend when pruning. If you accidentally cut into it, you've damaged the tree's natural healing tissue. Here's a trick: use a permanent marker to outline the collar before making your first cut. This visual guide helps you position your pruners perfectly. For branches under ½ inch thick, your cut should be just outside this collar—no closer. For thicker branches, that undercut 12 inches out from the trunk becomes even more critical.
Cutting Technique: When making that second cut on larger branches, I've learned the hard way that patience pays off. Don't rush—make your top cut just above the undercut, and let gravity do the work. If the branch doesn't break cleanly, you've either cut too close to the trunk or haven't made the undercut deep enough. This is where that 45-degree angle comes into play—it creates a natural breaking point. For branches over 2 inches, that ¼-inch stub becomes your safety net, protecting the collar while allowing the tree to heal properly.
Seasonal Timing: Late winter is my go-to time for most pruning, but I've made exceptions for evergreens in early summer. The key is understanding your tree's growth cycle. If you're unsure about your specific tree type, observe it for a season—note when buds swell in spring or when new growth appears. This helps you time your cuts for maximum healing. And remember, those few weeks of monitoring after pruning are crucial for catching any issues early before they become major problems.
Pro Tips for Tree Branch Cut Out
- Precision pruning prevents damage—here's how to avoid common mistakes and trim like a pro.
- Tool Selection: I can't stress enough how important sharp tools are—dull pruners tear bark and create jagged cuts. Te...
- Branch Collar Awareness: The branch collar is your best friend when pruning. If you accidentally cut into it, you've ...
Frequently asked questions
Got questions about cutting out tree branches safely and effectively? Here are answers to the most common concerns—so you can trim with confidence!
What’s the best time of year to cut out a tree branch?
The ideal time is late winter or early spring (before new growth starts). This minimizes stress on the tree and reduces disease risks. Avoid pruning during extreme heat or drought—wait for mild, dry weather. If you’re removing dead branches, do it anytime, but never in storm season to avoid hazards.
How do I prevent damaging the bark when cutting?
Use the three-cut method to avoid bark tears:
- Under-cut 2–3 inches from the branch collar (top of the branch stem) at a slight upward angle.
- Top-cut 1–2 inches farther out on the branch, just outside the under-cut.
- Finish-cut through the notch, just outside the branch collar.
Can I cut a large branch without professional help?
Small to medium branches (under 3 inches in diameter) are DIY-friendly with the right tools. For larger branches (4+ inches), hire an arborist—especially if the branch is near power lines, roofs, or heavy traffic. Falling branches can cause serious injury or property damage, so when in doubt, call a pro!
What should I do with the cut branch afterward?
Disposing of branches depends on size and local regulations:
- Small branches: Chip into mulch (great for gardens!) or add to compost.
- Large branches/trunks: Check if your city offers free curbside pickup or a tree waste program. Never burn branches—it’s illegal in many areas and releases harmful toxins.
My tree is bleeding sap after cutting—is that normal?
Yes! Sap oozing from the cut is a natural response, especially in maples, birches, or willows. It’s harmless and will seal over time. To speed healing:
- Avoid sealing the wound with paint or pruning paste (it traps moisture and causes rot).
- Keep the area dry and clean to prevent fungal infections.
What if my cuts aren’t healing properly?
If the branch collar isn’t sealing or the wound looks sunken/infected after 1–2 years:
- Check for bacterial or fungal infections (e.g., cankers, oozing lesions).
- Ensure you didn’t cut too close to the trunk—always leave the collar intact.
- Prune only during dormancy next time to reduce stress.
Wrapping up and next steps
Mastering the art of tree branch cut out ensures your trees stay healthy and beautiful while avoiding costly mistakes. With the right tools, techniques, and a little patience, you can trim with confidence—whether you’re a seasoned gardener or just starting out. 🌿
Ready to take the next step? Start small—practice on a few branches before tackling larger cuts. And if you’re unsure about a tricky job, don’t hesitate to call a professional arborist. Your trees will thank you!