
Pruning
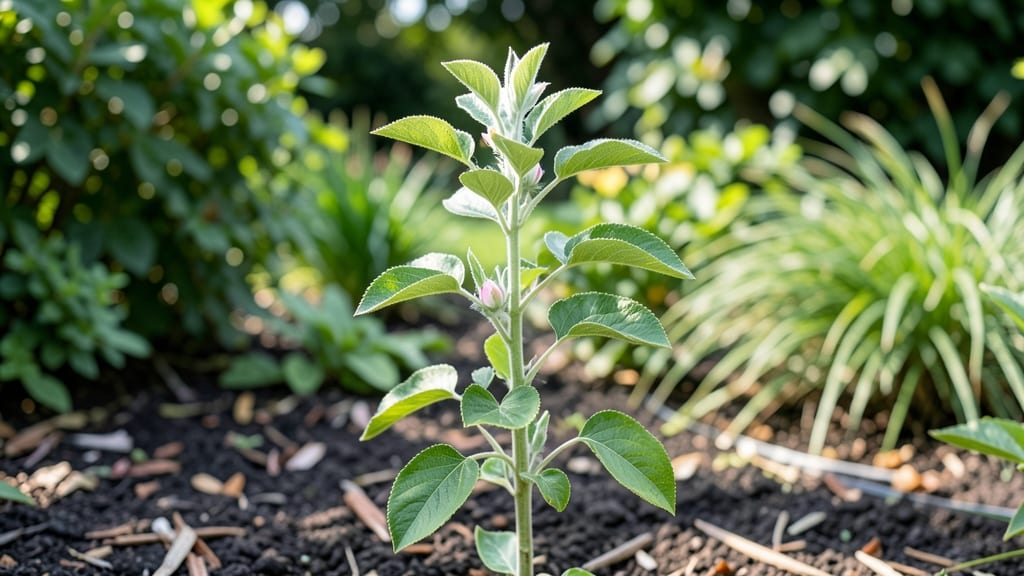
Apple tree shoots need the right pruning to become strong, bushy trees that produce fruit for decades. ✂️ I’ve watched weak, leggy shoots transform into sturdy frames just by following a few key cuts—no fancy tools or horticultural degree required.
The secret lies in shaping growth early, before bad habits set in. Start with clean, sharp pruners and focus on removing suckers (those wild shoots sprouting from the base) and crossing branches that rub together.
Aim to open the center of the tree to sunlight and air, which prevents disease and encourages fruit production. A well-pruned young tree will reward you with healthier branches and better harvests down the road.
Spring is the best time to prune, but don’t wait until the tree is already crowded. Even a 10-minute trim every few months keeps things manageable. The goal? A balanced shape where sunlight reaches every branch—no dead wood, no tangled mess. For weak shoots, check your soil first.
Apple trees thrive in well-draining, slightly acidic soil (pH 6.0–6.5) with plenty of organic matter. If your shoots struggle, they might need a boost of compost or a balanced fertilizer. Patience is key—strong growth takes time, but the payoff is worth it.
📚 In This Guide
- What you need
- Instructions
- Tips and common mistakes
- Wrapping up and next steps
What you need
- ● Pruning shears: Sharp, bypass-style shears (for cuts up to ½ inch thick). Example: Felco F-2 or Corona Tools.
- ● Loppers: For thicker branches (½ to 1½ inches). Example: Fiskars PowerGear or Bahco Forester.
- ● Pruning saw: For branches thicker than 1½ inches. Example: Felco F-3.
- ● Disinfectant: 70% isopropyl alcohol or a copper-based pruning sealant (to prevent disease spread).
- ● Gloves: Heavy-duty, cut-resistant gloves (e.g., Mechanix or garden-specific brands).
- ● Safety glasses: Protect your eyes from debris.
- ● Ladder (if needed): Sturdy, extension ladder (24+ ft for tall trees).
- ● Marking twine or tape: For tagging branches to prune later.
- ○ Sharpie or paint: To mark cuts (optional but helpful for large trees).
- ● Pruning oil: Apply to cuts to seal and protect wounds (e.g., Tanglefoot Tree Wound Pruning Seal).
- ● Tree wound dressing: Controversial but useful for large cuts (e.g., Tree Seal).
- ● Work gloves with grip: For extra comfort during long sessions.
- ● First-aid kit: Just in case of minor scrapes or thorns.
- ● Camera or phone: To document your progress before/after pruning.
Instructions for pruning young apple tree shoots
Here's how I shape young apple trees into strong, productive canopies—no guesswork, just clear cuts.
✂️ Step 1: Identify the Central Leader and Main Branches
Start by finding your tree's central leader—the straightest, upward-growing shoot at the center. This becomes your main trunk. Look for 3-4 strong scaffold branches emerging from the trunk at wide angles (45° or more). These will support your tree's weight and fruit load.
Use your pruning shears to make a clean cut just above a bud (the small bump on the branch) that faces outward. This ensures new growth will angle away from the trunk, creating an open center. If you see water sprouts (thin, vertical shoots), remove them entirely—they drain energy from fruit production.
✂️ Step 2: Thin Out Competing Shoots and Weak Growth
Remove any shoots growing directly opposite strong branches—these compete for nutrients and create crowded spots where fruit can't ripen properly. Cut these back to the collar (the swollen area where the branch meets the trunk) using sharp shears at a 45° angle to prevent water pooling.
For suckers (shoots growing from the base of the tree), pull them out by hand if they're small. If they're thick, cut them at ground level. Real talk: Skipping this step leads to a messy, unproductive tree in just a few years.
✂️ Step 3: Shape the Canopy for Airflow and Light
Step back and visualize your tree's open-center form. Aim for a rounded dome where sunlight reaches all branches. Cut back any limbs that grow too close together or cross over others—these rub and create wounds. Make cuts just outside the branch collar to avoid damaging the tree's protective layer.
For laterals (side branches), trim back to one-third of their length if they're growing too long. This encourages bushier growth. Watch for dead or diseased wood—snip it out immediately to prevent spread. A healthy branch should snap with a clean break when bent slightly.
🌿 Step 4: Clean Up and Protect the Tree
After pruning, sterilize your tools with rubbing alcohol to prevent spreading disease. Rake up all clippings and dispose of them—leaving them on the ground attracts pests. Now's the time to apply wound dressing (like pruning sealant) only if you've made large cuts (over ½ inch thick).
Water the base of the tree deeply to help it recover. You'll see new growth within 4-6 weeks—this is your reward for shaping the tree correctly. If you notice oozing sap at the cuts, it's normal and will harden over time.
Tips & tricks for perfect apple tree pruning
Shaping your apple tree correctly makes all the difference between a healthy, fruitful tree and one that struggles. Here's what I've learned after years of shaping my own orchard:
The Angle Matters: When you cut back to the collar in Step 2, aim for a 45° angle just outside the branch collar. This prevents water from pooling at the cut, which can cause rot. I always visualize a "smiley face" with the wider part of the cut facing away from the trunk—this keeps moisture off the wound. The 45° angle also gives you more surface area for faster healing.
Bud Identification Secret: In Step 1, look for outward-facing buds when making your cuts. The trick is to find buds that point away from the center of the tree—this creates that open canopy we want. I learned this the hard way: cutting above an inward-facing bud will create a branch that grows right back into the center, blocking sunlight and airflow. Use a magnifying glass if needed to spot those tiny outward-facing buds.
Timing is Everything: The best time to prune is late winter or early spring, just before new growth begins. This gives your tree the full growing season to recover. If you must prune later in the season, do it in the morning so any cuts have time to dry out before evening moisture sets in. I prune my trees in February when the ground is still frozen—this prevents pests from finding fresh cuts.
Tool Care Prevents Disaster: After you finish pruning, sterilize your tools with rubbing alcohol to prevent spreading disease between cuts. I keep a small bottle of 70% isopropyl alcohol in my toolkit. Also, sharpen your pruning shears regularly—dull blades tear wood instead of making clean cuts, which can damage the tree. A quick test: if your shears can't cut a piece of paper cleanly, they need sharpening.
Pro Tips for Apple Tree Shoots
- Shaping your apple tree correctly makes all the difference between a healthy, fruitful tree and one that struggles.
- The Angle Matters: When you cut back to the collar in Step 2, aim for a 45° angle just outside the branch collar.
- Bud Identification Secret: In Step 1, look for outward-facing buds when making your cuts.
Frequently asked questions
Got questions about nurturing those apple tree shoots into a thriving, well-shaped tree? You’re not alone! Here are some of the most common queries—plus straightforward answers to keep your orchard (or backyard) on track.
When is the best time to prune apple tree shoots?
The ideal window is late winter or early spring (just before buds swell). This timing minimizes disease risk and lets you see the tree’s structure clearly. Avoid pruning in fall—it can leave wounds vulnerable to pests. For young trees, a light pruning in summer (after harvest) can also encourage bushier growth.
Should I remove all the shoots, or just some?
Not every shoot needs to go! Focus on thinning out competing growth—especially water sprouts (thin, vertical shoots) and crowded branches. Aim to keep 3–5 main scaffolds (large branches) spaced evenly. Remove 1/3 of the shoots to improve airflow and fruit production.
What if my apple tree shoots are dying or brown?
Brown or wilted shoots could signal fungus, pests, or over-pruning. First, check for sooty mold (black residue) or aphids (sticky leaves). Prune affected areas 1/4 inch above a healthy bud and sterilize tools with rubbing alcohol. If the issue persists, test soil pH or consult a local extension service.
Can I prune apple tree shoots in summer instead?
Yes, but with caution! Summer pruning is best for controlling vigorous growth or shaping the tree. Avoid heavy cuts—stick to trimming only 10–20% of the foliage to prevent stress. Time it after harvest (late summer) to reduce disease spread. Always use clean, sharp tools to minimize damage.
Are there chemical-free ways to encourage bushier growth?
Try these natural methods:
- Pinch back tips of new shoots with your fingers to redirect energy to side branches.
- Apply a balanced fertilizer (10-10-10) in early spring to support robust growth.
- Use shade cloth for young trees to reduce sun stress and promote branching.
- Plant companion plants like comfrey (which improves soil nitrogen) nearby.
Wrapping up and next steps
Pruning your apple tree shoots is the secret to stronger branches, better fruit production, and a healthier tree—and you’ve got all the tools to make it happen! 🌱 By following the right techniques, you’ll encourage bushy growth while keeping your tree balanced and disease-free.
Now that you’re armed with knowledge, it’s time to grab those pruners and get growing.
Ready to take the next step? Mark your calendar for the best pruning season (late winter or early spring) and start small—even a few well-placed cuts can make a big difference. Happy pruning, and may your apple tree thrive! 🍏✨