
Blooming
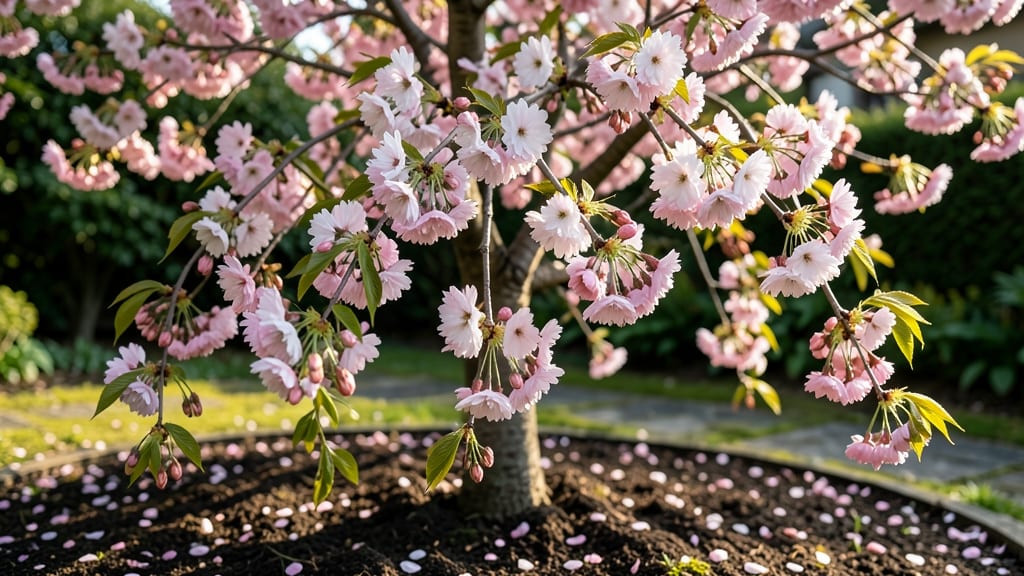
Cherry tree blossom time arrives like nature’s most stunning invitation—pale pink petals unfurling across your yard in a fleeting, breathtaking display. 🌸 I’ve watched my own trees burst into bloom anywhere from late March to mid-April, depending on the variety and where you live, but the magic always feels like a fresh start after winter’s gray.
The timing isn’t random: it’s a delicate dance between chill hours (the cold winter nights the tree needs) and warm spring days that trigger the bloom. Some varieties, like the early-blooming Yoshino, wake up first, while later types like the Kwanzan hold onto their secrets a bit longer.
Your local climate plays a huge role—warmer winters can delay blooms, while a cold snap in early spring might push them ahead. Once those blossoms appear, the real work begins.
Prune lightly after they fade to shape the tree, fertilize to encourage next year’s buds, and keep an eye out for pests like aphids that love fresh new growth. A well-timed watering now means even more dramatic blooms next spring. This isn’t just about beauty—it’s about understanding your tree’s rhythm.
Whether you’re planning a spring photography session or just want to enjoy the show, knowing the signs helps you make the most of this magical, temporary spectacle.
📚 In This Guide
- What you need
- Instructions
- Tips and common mistakes
- Wrapping up and next steps
What you need
- ● Cherry tree saplings: Choose between Prunus serrulata (Japanese cherry) or Prunus avium (sweet cherry). Opt for disease-resistant varieties like ‘Kanzan’ or ‘Autumnalis’ for year-round appeal. Quantity: 1-3 trees (depending on desired coverage).
- ● High-quality potting soil: A mix of 60% topsoil, 30% compost, and 10% perlite for drainage. Quantity: 5-10 cubic feet per tree.
- ● Organic mulch: Wood chips or shredded bark to retain moisture and suppress weeds. Quantity: 2-3 inches, spread in a 3-foot radius around the base.
- ● Slow-release fertilizer: A 10-10-10 NPK ratio blend (e.g., Miracle-Gro Shake ‘n Feed) to support early growth. Quantity: 1 lb per tree.
- ● Tree stakes and ties: 2-3 stakes per tree (4-6 feet tall) and soft jute or fabric ties to secure young saplings.
- ● Shovel and spade: For digging planting holes (1.5x wider and as deep as the root ball).
- ● Pruning shears: Bypass pruners with sharp, bypass blades for trimming dead branches.
- ● Garden hose or watering can: With a spray nozzle for gentle watering.
- ● Measuring tape: To ensure proper spacing (15-25 feet between trees).
- ● Gloves and knee pads: For comfort during planting.
- ● Tree guard: A metal or plastic spiral wrap to protect young trunks from pests.
- ● Drip irrigation system: For automated, deep watering (especially in dry climates).
- ● Soil pH tester: To check acidity (ideal range: 5.5–7.0 for cherry trees).
- ● Seasonal blooming enhancers: Epsom salt (magnesium sulfate) or fish emulsion for vibrant blossoms.
How to extend and enhance your cherry tree’s blossom season
Here’s how to coax your cherry tree into its most spectacular spring show—with minimal fuss.
🌸 Step 1: Prune for Optimal Flowering Structure
Prune your cherry tree in late winter or early spring, just before buds swell but before they break. Use clean, sharp pruners to remove any dead, crossing, or inward-growing branches. I always cut back to an outward-facing bud or lateral branch to encourage an open canopy—this lets sunlight reach all the blossoms.
Focus on thinning out the center of the tree first. Dense growth blocks air circulation and sunlight, which weakens blossoms. You’ll know you’re on track when you can see light filtering through the branches. Avoid heavy pruning—never remove more than 25% of the tree’s canopy in one season, or you’ll sacrifice next year’s bloom.
☀️ Step 2: Position for Maximum Sunlight
Cherry trees thrive in full sun—at least 6-8 hours daily. If your tree is in partial shade, move it now or supplement with a grow light during winter months. I’ve seen blossoms fade prematurely on trees in dappled shade—pale pinks instead of vibrant whites or deep pinks.
Check your tree’s light exposure by observing it from dawn to dusk. If branches on one side are consistently darker, rotate the tree’s position or thin nearby trees/shrubs blocking light. Mulch the base with 2-3 inches of organic mulch to retain moisture and regulate soil temperature—this helps roots support the blossoms better.
💧 Step 3: Water Deeply During Bud Development
Start watering deeply when you see buds begin to swell, usually in late winter. Water once a week until the soil is moist 12 inches deep. Use a soil probe or your finger to check—if it feels dry, water again. Overwatering now causes root rot, which starves the tree of nutrients it needs for blossoms.
Morning watering is best—it gives leaves time to dry before evening, reducing fungal risks. If your tree is in a container, water when the top inch of soil feels dry. Containers dry out faster, so check them daily during warm spells. A drip irrigation system works wonders for consistent moisture without overwatering.
✂️ Step 4: Fertilize for Vibrant Blooms
Apply a balanced, slow-release fertilizer (like 10-10-10) in early spring, just as buds begin to open. Spread it evenly over the root zone, then water it in. I avoid high-nitrogen fertilizers—they promote leafy growth at the expense of flowers. Instead, use a fertilizer with equal parts nitrogen, phosphorus, and potassium to support both roots and blossoms.
For organic options, try a compost tea or worm castings. These add nutrients gradually and improve soil structure, which helps the tree absorb water and minerals more efficiently. Stop fertilizing once new leaves appear—too much late-season feeding can delay dormancy and weaken next year’s buds.
🌿 Step 5: Protect Blossoms from Pests and Disease
Inspect your tree weekly for signs of pests like aphids or spider mites, which can weaken blossoms. Spray with neem oil if you spot clusters of tiny insects on new growth. I’ve also had success with insecticidal soap—it’s gentle but effective when applied early.
Watch for fungal diseases like powdery mildew, which appears as white, powdery patches on leaves. Improve air circulation by pruning densely packed branches and remove any infected leaves immediately. A preventive fungicide spray in early spring can also help, especially if your area has a history of fungal issues.
Tips & tricks for stunning cherry tree blossoms
Here's what nobody tells you about making your cherry tree's spring display truly unforgettable.
Pruning Precision: In Step 1, when you're pruning, focus on removing branches that grow inward or cross each other - these are the biggest culprits for blocking sunlight. I learned this the hard way after seeing blossoms fail on one side of my tree. Use a small mirror on a stick to check hard-to-see spots. Remember, you're sculpting an open vase shape, not a dense hedge - this creates that magical "cloud of blossoms" effect that makes cherry trees famous.
Sunlight Secret: The 6-8 hours of sunlight requirement in Step 2 isn't just about quantity - it's about quality. If your tree gets morning sun but afternoon shade, the blossoms will fade faster. I've seen trees in dappled shade produce pale pink blooms instead of vibrant whites. For container trees, rotate them weekly to ensure even sun exposure all around the trunk. A simple trick: place a white board near the tree during peak sun hours - if it casts a shadow, that's where your blossoms will suffer.
Watering Wisdom: When buds begin to swell in Step 3, that's your signal to start the once-weekly deep watering routine. The key is getting moisture down to 12 inches - I use a long screwdriver to check. If it comes out dry, water again. For container trees, I've found that soaking the pot for 10 minutes in a tub of water works better than surface watering. The goal is to mimic natural spring rains that gradually penetrate the soil without creating waterlogged conditions.
Fertilizer Timing: In Step 4, applying fertilizer just as buds begin to open is crucial - this gives the tree exactly what it needs when it needs it most. I've had the best results with a slow-release 10-10-10 formula spread evenly over the root zone. Pro tip: water the area first to help the fertilizer penetrate the soil, then apply it, and water again. This prevents burning the roots. Stop fertilizing once leaves appear to avoid confusing the tree about its growth priorities.
Pro Tips for Cherry Tree Blossom Time
- Here's what nobody tells you about making your cherry tree's spring display truly unforgettable.
- Pruning Precision: In Step 1, when you're pruning, focus on removing branches that grow inward or cross each other - ...
- Sunlight Secret: The 6-8 hours of sunlight requirement in Step 2 isn't just about quantity - it's about quality. If y...
Frequently asked questions
Got questions about cherry tree blossom time? You’re not alone! Here are answers to the most common queries to help you make the most of this magical season.
When is the best time to plant a cherry tree for optimal blossoms?
Plant your cherry tree in early spring or fall—when temperatures are mild and soil is workable. This gives roots time to establish before dormancy or peak bloom season. Avoid planting in extreme heat or cold, as stress can delay flowering.
How long do cherry blossoms last, and how can I extend their beauty?
Cherry blossoms typically last 1–2 weeks, depending on the variety and weather. To prolong their display, choose late-blooming cultivars like ‘Kanzan’ or ‘Stellar Pink’. Prune lightly in late winter, avoid heavy pruning during bloom, and water consistently to keep trees healthy and vibrant.
Will rain or cold weather ruin cherry blossoms?
No—rain and cooler temps actually enhance blossom longevity! Heavy rain may cause petals to fall faster, but it won’t harm the tree. Late frosts (<32°F) can damage buds, so monitor forecasts. If frost is forecasted, cover young trees with frost cloth for protection.
Can I grow cherry trees in containers, or do they need garden space?
Dwarf or semi-dwarf varieties (like ‘Shirofugen’) thrive in large containers (20+ gallons), making them perfect for patios or small yards. Ensure containers have drainage holes, use well-draining soil, and repot every 2–3 years. Standard cherry trees need permanent garden space.
Are cherry blossoms safe for pets and kids?
Yes! Cherry blossoms are non-toxic to pets and children, but avoid ingesting large quantities of fallen petals or seeds (they’re not digestible). Watch for pollen allergies in sensitive individuals—some may experience mild irritation. Always supervise pets near trees to prevent digging or chewing bark.
Why aren’t my cherry tree blossoms opening this year?
Several factors can delay blooms: young age (trees <3–5 years old may not flower), poor nutrition (lack of phosphorus/potassium), drought stress, or disease/pests. Check for yellowing leaves, holes in buds, or fungal spots. Fertilize in early spring and water deeply during dry spells.
Wrapping up and next steps
Cherry tree blossom time is a magical moment that turns your yard into a breathtaking canvas of pink, white, and soft hues—offering not just beauty, but also a chance to connect with nature’s fleeting wonders.
Whether you’re planning a celebration, capturing photos, or simply savoring the tranquility, this season reminds us to slow down and appreciate life’s delicate moments. So, why not embrace the magic? 🌸
Your next step? Plan a visit to a local cherry blossom festival or start your own backyard celebration—invite friends, pack a picnic, and let the petals inspire joy. The blossoms won’t last forever, but the memories will!