
Pruning
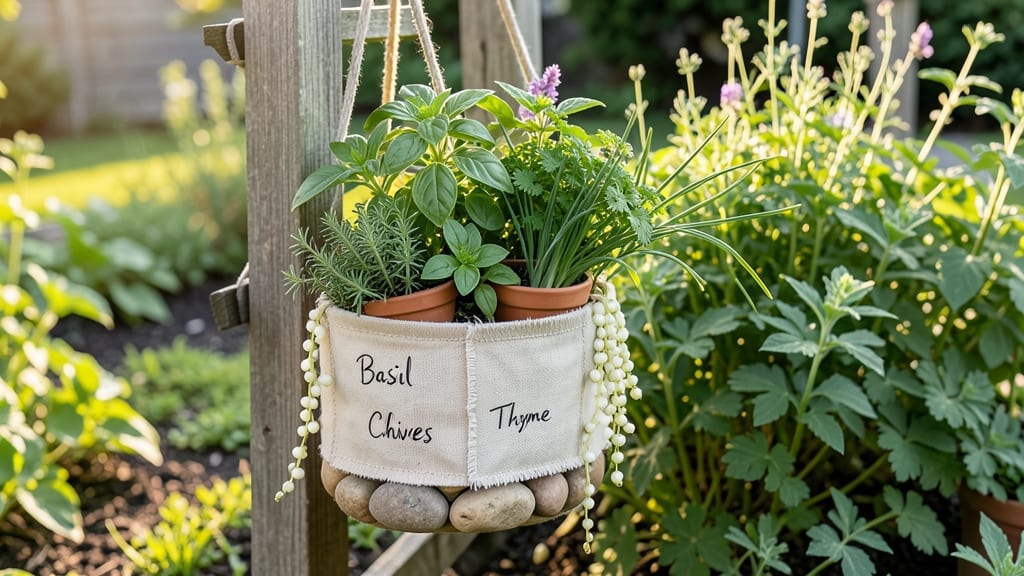
Transforming your tiny balcony into a jungle of vines doesn’t require a fortune—just a Dollar Tree vertical planter and a little creativity. ✨ I’ve turned these $1 finds into lush vertical gardens that climb upward instead of sprawling outward, saving space while adding drama to my urban patio.
The secret? Pairing lightweight plastic planters with fast-growing climbers like morning glories, jasmine, or even edible nasturtiums. A single wall-mounted planter can hold three to five plants stacked vertically, turning blank walls into green tapestries. You’ll be snipping fresh herbs or admiring blooms without sacrificing floor space.
Start with a sturdy hook or bracket, fill the planters with well-draining soil, and watch your plants send out tendrils within weeks. The best part? You can paint the planters or wrap them in burlap for a custom look—no two setups need to be alike.
Perfect for renters, small yards, or anyone who loves a good upcycling project. Let’s make that vertical space work for you!
📚 In This Guide
- What you need
- Instructions
- Tips and common mistakes
- Wrapping up and next steps
What you need
- ● 1 Dollar Tree vertical planter (check the garden or home goods section—often $1.25 or less!)
- ○ 1-2 rolls of landscape fabric (optional but recommended for moisture control)
- ● 1 bag of lightweight potting soil (1-2 cubic feet, depending on planter size)
- ● 1-3 climbing plants (e.g., ivy, jasmine, or trailing pothos—pick based on your planter’s depth!)
- ● 1 spray bottle (for misting soil or seedlings)
- ○ Optional: Slow-release fertilizer or compost for extra plant power!
- ● 1 pair of scissors (for trimming fabric or plants)
- ● 1 small hand trowel (for soil adjustments)
- ● 1 watering can or hose with a gentle spray nozzle
- ○ Optional: Gloves (to keep hands clean while handling soil or thorny plants)
- ○ Optional: A level (if mounting the planter to a wall for perfect alignment)
- ● A sunny or partially shaded spot (check your plants’ light needs!)
- ● Access to a water source (nearby sink or hose)
- ● 10-15 minutes of prep time (plus planting time!)
- ○ Optional: A drill and screws (if mounting the planter to a wall or fence)
Step-by-Step instructions for building a Dollar Tree vertical planter
Here’s how to transform thrift-store finds into a stylish, space-saving vertical garden for climbing plants.
🪴 Step 1: Gather Materials and Prep Containers
Hit Dollar Tree for 4 plastic plant hangers (or similar shallow containers) and 1 wooden board (about 2 feet long and 6 inches wide). You’ll also need 4 zip ties (or thin wire), potting soil, and climbing plants like ivy, jasmine, or morning glories. Clean the containers and board thoroughly—dust or grime can block drainage.
Arrange the hangers in a square pattern on the board, spacing them 4-6 inches apart. This gives roots room to spread without crowding. Use a pencil to mark the zip tie positions where the hangers will attach. I like to space them 3-4 inches from the edges so the whole setup feels balanced.
🌱 Step 2: Attach Hangers and Fill with Soil
Flip the board over and secure each hanger to the underside using 2 zip ties per hanger. Tighten them snugly but don’t crush the plastic—you want the hangers to stay put without cutting into the board. Flip it back and fill each hanger with potting soil, leaving ½ inch of space at the top. Press the soil down lightly to remove air pockets.
Moisten the soil with a spray bottle until it’s damp but not soggy. Overwatering here will cause the soil to compact and suffocate roots later. If your soil feels dry after pressing, add a little more water—it should hold together when squeezed but not crumble.
☀️ Step 3: Plant and Train Climbing Plants
Plant 1 climbing plant per hanger, placing it near the center. Dig a hole twice as wide as the root ball and gently press soil around it to secure it without burying the stem. Water lightly to settle the soil. For vines like morning glories, I tuck the stem into the soil slightly deeper than it was in its pot—this encourages stronger root growth.
Attach a trellis or twine to the top of the board for the plants to climb. I use jute twine because it’s sturdy but blends naturally. Space the twine 3-4 inches apart vertically so the vines have something to grip as they grow. Water the entire setup until the soil is evenly moist—this helps the roots establish quickly.
💧 Step 4: Position and Maintain Your Vertical Garden
Place your vertical planter in a spot with at least 6 hours of sunlight daily—most climbing plants thrive in bright, indirect light. If indoors, a south-facing window or grow light works best. Rotate the board a quarter turn weekly so the plants grow evenly toward the light instead of leaning.
Water when the top inch of soil feels dry, which usually means every 2-3 days in warm weather. Avoid letting soil dry out completely, but don’t drown the roots—water should drain freely through the hangers. Fertilize lightly every 4-6 weeks with a balanced liquid fertilizer to keep the vines lush and vigorous.
✂️ Step 5: Prune and Encourage Growth
As the plants grow, gently weave new vines through the twine to guide them upward. Prune any leggy or overcrowded stems to encourage bushier growth. I trim back 10-15% of the plant’s length in early spring to stimulate new shoots—this keeps the vertical planter looking full and healthy.
Watch for pests like spider mites or aphids, especially if placing outdoors. A quick spray of soapy water (1 tsp mild dish soap per quart of water) keeps them in check. With proper care, your climbing plants will cover the board in 6-8 weeks, turning a simple DIY project into a lush, eye-catching garden feature.
Tips & tricks for perfect Dollar Tree vertical planters
Here's what I learned after building mine—and how to avoid the mistakes I made.
Container Selection: If you can't find plastic plant hangers at Dollar Tree, look for shallow terracotta pots (with drainage holes) or even repurposed yogurt cups. The key is ensuring they're lightweight enough to hang securely. I used a 1-inch thick wooden board for stability, but a thinner board (like ½-inch plywood) works too if you're mounting it vertically on a wall.
Soil Moisture Balance: In Step 2, when moistening the soil, aim for the dampness of a wrung-out sponge—not dripping wet. Too much water causes compaction, while too little means roots won't establish properly. I've found that adding ½ cup of perlite to each hanger's soil mix improves drainage without sacrificing moisture retention. This prevents the dreaded "soggy bottom" that can rot roots.
Plant Spacing Secret: The 4-6 inch spacing between hangers in Step 1 might seem generous, but trust me—it's perfect. Plants will spread their roots outward, and the extra space prevents competition for nutrients. For faster coverage, you can reduce spacing to 3-4 inches, but you'll need to fertilize more frequently (every 3-4 weeks instead of 4-6).
Sunlight Optimization: While the instructions call for 6 hours of sunlight, I've found that morning sun (east-facing windows) plus afternoon shade works beautifully for delicate plants like jasmine. If you're using morning glories, they actually prefer full sun—just be prepared to water more frequently. A small trick: Place a mirror nearby to bounce extra light onto your planter during winter months when sunlight is scarce.
Pro Tips for Dollar Tree Vertical Planter
- Here's what I learned after building mine—and how to avoid the mistakes I made.
- Container Selection: If you can't find plastic plant hangers at Dollar Tree, look for shallow terracotta pots (with d...
- Soil Moisture Balance: In Step 2, when moistening the soil, aim for the dampness of a wrung-out sponge—not dripping w...
Frequently asked questions
Got questions about your new Dollar Tree vertical planter? We’ve got answers!
Whether you’re troubleshooting, planning, or just curious about alternatives, this FAQ covers the basics to help your climbing plants thrive.
What types of plants work best in a Dollar Tree vertical planter?
Climbing plants like pothos, ivy, string of pearls, or small succulents thrive in vertical planters. Avoid heavy vines (e.g., wisteria) or plants needing deep roots—stick to lightweight, trailing varieties for stability.
How often should I water a Dollar Tree vertical planter?
Check moisture weekly—vertical planters dry faster due to airflow. Water thoroughly when the topsoil feels dry (stick your finger in 1 inch deep). Overwatering risks root rot, so ensure drainage holes are present. Pro tip: Mist leaves occasionally for humidity-loving plants!
Can I reuse a Dollar Tree planter for multiple growing seasons?
Yes! Clean it with soapy water, rinse well, and disinfect with a 1:9 bleach-water mix (let dry). Replace old soil and add fresh compost. Just avoid reusing planters with mold or persistent pests—start fresh for best results.
Are there cheaper alternatives to Dollar Tree vertical planters?
Try:
- DIY pallet planters (free wood pallets + paint)
- Hanging shoe organizers ($3–$5 at thrift stores)
- Recycled plastic bottles (cut and stack)
How do I prevent pests in my vertical planter?
Keep pests at bay with:
- Neem oil spray (weekly preventive)
- Yellow sticky traps for flies
- Ensuring good airflow (avoid overcrowding)
Wrapping up and next steps
Transforming a simple Dollar Tree vertical planter into a stunning space-saving garden feature is easier—and more rewarding—than you think! With just a few basic supplies and a little creativity, you’ve unlocked a fresh way to grow your favorite climbing plants while maximizing your outdoor (or indoor!) real estate. 🌿✨
Now that you’re inspired, why not take the next step? Grab those supplies, follow your green thumb’s guidance, and watch your vertical garden thrive! Share your progress with fellow plant lovers—your upcycled masterpiece might just spark someone else’s gardening adventure. Happy planting! 🌱💚