
Container Gardens
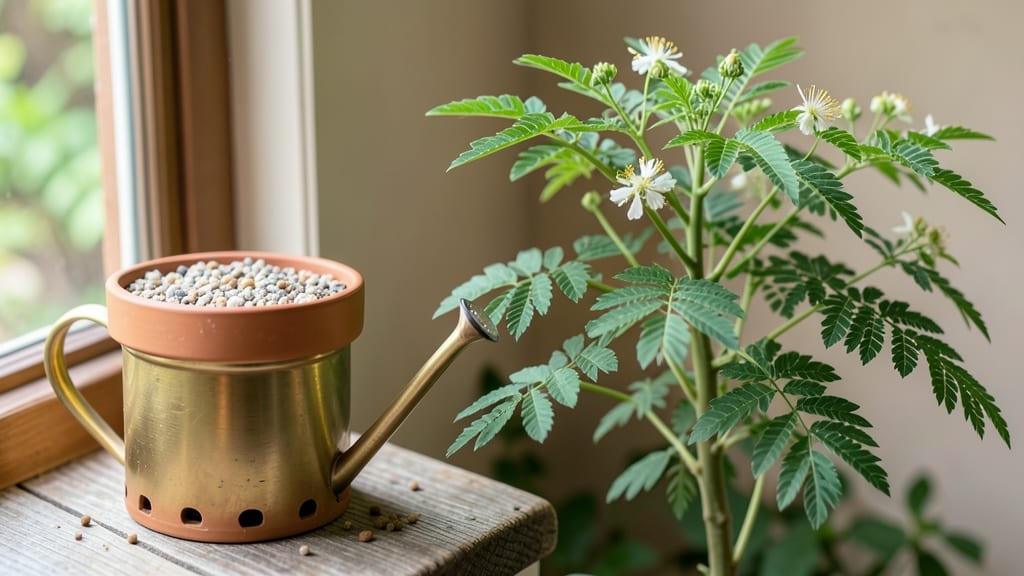
Growing a moringa tree in a pot lets you harvest this fast-growing superfood anywhere—balcony, patio, or even indoors. 🌱 I’ve watched mine shoot up 3-6 feet in just 6 months, and the leaves taste like a mix of spinach and asparagus.
The secret? Mimicking its tropical roots while keeping it contained.
Start with a 5-gallon pot (minimum) and well-draining soil—moringa hates soggy roots. A sunny spot (6+ hours of light) is non-negotiable, but if you’re indoors, a grow light saves the day.
Water when the top inch feels dry, and fertilize lightly every 4 weeks with a balanced organic mix. Prune regularly to encourage bushier growth and more leaves.
By summer, you’ll be harvesting nutrient-packed leaves weekly—rich in protein, iron, and antioxidants. The tree stays compact (5-8 feet tall in pots), so it’s perfect for small spaces. Just avoid overwatering (yellow leaves = too much love) and watch for spider mites, which love dry air.
Outdoors in warm climates? Keep it in full sun. Indoors or cooler zones? Move it near a sunny window or under lights. Either way, you’ll have fresh moringa leaves year-round—no grocery store required. Ready to grow your own superfood powerhouse?
📚 In This Guide
- What you need
- Instructions
- Tips and common mistakes
- Wrapping up and next steps
What you need
- ● Moringa seeds or seedlings: 1–3 (organic, non-GMO preferred for best results).
- ● Container: Minimum 12-inch diameter (deeper is better for root growth).
- ● Drainage holes mandatory (use a drill if repurposing a non-potted item).
- ● Material: Terracotta, fabric, or plastic (terracotta helps regulate moisture).
- ● High-quality potting mix: 1–2 bags (well-draining, cactus/succulent mix or add perlite/sand for aeration).
- ● Slow-release fertilizer: 1 packet (balanced 10-10-10 NPK or organic options like worm castings).
- ● Watering can or spray bottle: With a narrow spout for precision.
- ● Trowel or small shovel: For transplanting or mixing soil.
- ● pH testing kit: To check soil pH (ideal range: 6.0–7.5).
- ● Mulch (e.g., straw or coconut coir): To retain moisture and suppress weeds.
- ● Support stake or trellis: For taller varieties (moringa can grow 6–10 feet in pots!).
- ● Grow lights (LED, full-spectrum): If indoor-grown (12+ hours of light/day).
Step-by-step instructions for growing a moringa tree in a pot
Here's how to cultivate this nutrient-packed tree quickly in containers—no yard needed.
🌱 Step 1: Choose the Right Pot and Soil Mix
Moringa thrives in well-draining soil with 6+ inches of depth per plant. I use 10-12 inch pots for each of the 4 trees you'll grow, with multiple drainage holes to prevent root rot. Terra cotta works best because it wicks away excess moisture.
Fill the pot halfway with a fast-draining mix—I blend 60% potting soil, 30% perlite, and 10% compost. This combination prevents compaction while providing the nutrients moringa loves. Moisten the mix until it feels like a wrung-out sponge: damp but not dripping.
🌿 Step 2: Plant Seeds at the Correct Depth and Spacing
Plant 2-3 seeds per pot at a depth of ½ inch, about 1 inch apart. Moringa seeds germinate quickly, so don't bury them too deep—they need light to break through the soil. Cover lightly with additional mix and tap gently to settle.
Water immediately after planting, keeping the soil evenly moist but not soggy. Place the pot in a warm spot (75-85°F)—a sunny windowsill or under a grow light. You'll see sprouts in 5-10 days, so patience is key here. If only one seedling emerges, thin to the strongest one.
☀️ Step 3: Provide Bright, Indirect Light for Rapid Growth
Moringa needs 6-8 hours of bright, indirect light daily to grow fast. A south-facing window works, but if your space is dim, supplement with a full-spectrum LED grow light kept 6-12 inches above the plants. You'll notice leaves turning pale or stretching? That's a sign your light isn't intense enough.
Rotate the pot quarter-turn weekly so the tree grows straight, not lopsided. Once seedlings reach 4 inches tall, you can transplant them into their final pots if needed. Moringa grows 3-6 feet per year, so prune leggy stems to encourage bushier growth.
💧 Step 4: Water and Fertilize for Maximum Speed
Water when the top inch of soil feels dry—moringa hates soggy roots but won't tolerate drought either. I use room-temperature water to avoid shocking the roots. During rapid growth phases (spring/summer), water every 2-3 days, reducing to once weekly in cooler months.
Feed with a balanced liquid fertilizer (10-10-10) every 4-6 weeks during active growth. You'll see dark green, glossy leaves as a sign your tree is thriving. Moringa is drought-tolerant once established, but young plants need consistent moisture to reach harvest size quickly.
✂️ Step 5: Prune and Harvest for Continuous Production
Start harvesting young leaves when the plant reaches 12 inches tall—they're most nutritious then. Pinch back the top 2-3 inches of new growth to encourage bushier growth. Moringa regrows quickly, so you can harvest every 2-3 weeks without stunting the plant.
Prune leggy branches in early spring to shape the tree and promote dense foliage. Remove any yellow or damaged leaves immediately—they slow down growth. With proper care, your moringa tree will produce year-round, making it one of the fastest-growing superfoods in your home.
Tips & tricks for growing a moringa tree in a pot
Here's what nobody tells you about growing this superfood—tricks that'll help your moringa thrive in tight spaces.
Soil Mix Precision: The 60-30-10 ratio of potting soil, perlite, and compost is non-negotiable for moringa's rapid growth. I've found that adding a handful of worm castings to the mix gives an extra nutrient boost without altering the drainage. The key is maintaining that perfect balance—too much compost can make the soil too dense, while too much perlite might not retain enough moisture for young roots.
Germination Hack: Don't be tempted to rush the planting depth—those ½-inch seeds need light to break through. I've seen seeds planted too deep take weeks to sprout, if they ever do. After planting, place the pot in a clear plastic bag (like a produce bag with holes poked in it) to create a mini greenhouse effect. This can cut your germination time from 10 days to just 5-7 days while keeping humidity high.
Lighting Strategy: That 6-8 hours of bright, indirect light is critical, but not all light sources are equal. If using artificial lighting, position your grow lights 6 inches above the seedlings initially, then raise to 12 inches as they grow. I've noticed that blue spectrum LEDs (around 450nm) promote leafy growth, while red spectrum (around 660nm) encourages stem elongation—balance both for optimal results.
Watering Wisdom: The "top inch dry" rule is perfect, but there's more to it. I've found that watering in the morning gives plants time to dry out before evening, reducing fungal risks. For the first two weeks after germination, I mist the leaves lightly with room-temperature water to maintain humidity while the roots establish. This mimics the tropical conditions moringa thrives in.
Pro Tips for Growing A Moringa Tree In A Pot
- Here's what nobody tells you about growing this superfood—tricks that'll help your moringa thrive in tight spaces.
- Soil Mix Precision: The 60-30-10 ratio of potting soil, perlite, and compost is non-negotiable for moringa's rapid growth.
- Germination Hack: Don't be tempted to rush the planting depth—those ½-inch seeds need light to break through.
Frequently asked questions
Got questions about growing moringa in pots?
You’re not alone! Here are answers to the most common concerns—from timing to troubleshooting—so you can cultivate this nutrient-packed tree with confidence.
How long does it take for a moringa tree to grow in a pot?
A moringa tree grows fast—expect seedlings to sprout within 7–14 days! In pots, they can reach 3–5 feet tall in 6–12 months with proper care. Prune regularly to encourage bushier growth and harvest leaves within 2–3 months of planting.
What’s the best pot size for a moringa tree?
Start with a 5–7 gallon pot for young plants, then upgrade to 10+ gallons as they mature. Moringa trees have shallow but sprawling roots, so prioritize width over depth. Ensure pots have drainage holes to prevent root rot!
Can I grow moringa in a pot indoors?
Yes! Moringa thrives indoors near bright, indirect sunlight (e.g., south-facing windows or grow lights). Keep temps between 70–95°F and maintain humidity with a pebble tray. Just rotate the pot weekly for even growth—no direct sunburn!
Why are my moringa leaves turning yellow or dropping?
Yellow leaves often signal overwatering (check soil moisture!) or nutrient deficiencies. Brown edges? Try fertilizing with compost tea or a balanced liquid fertilizer. Pests like aphids are rare but can be treated with neem oil if spotted.
Can I grow moringa from cuttings instead of seeds?
Take 4–6 inch cuttings from healthy stems, strip lower leaves, and dip in rooting hormone. Plant in moist soil or water—roots form in 2–4 weeks. Cuttings mature faster than seeds and retain the parent plant’s traits!
How do I protect my potted moringa in winter?
Moringa is tropical—keep pots indoors if temps drop below 50°F. Reduce watering (let soil dry slightly between waterings) and place near a sunny window. If outdoors, move to a garage or sheltered area and cover with frost cloth if needed.
Wrapping up and next steps
Growing a moringa tree in a pot is a rewarding experience that brings a nutrient-packed superfood right to your doorstep—even in small spaces! 🌱 With the right container, sunlight, and care, you’ll enjoy fresh leaves packed with vitamins, minerals, and antioxidants in just a few months.
Whether you’re a beginner or a seasoned gardener, this fast-growing plant proves that big nutrition doesn’t need big space.
Now that you’re ready to plant, why not share the benefits? Start by gifting a cutting to a friend or experimenting with moringa-infused recipes. Your green thumb—and your health—will thank you!