
Propagation
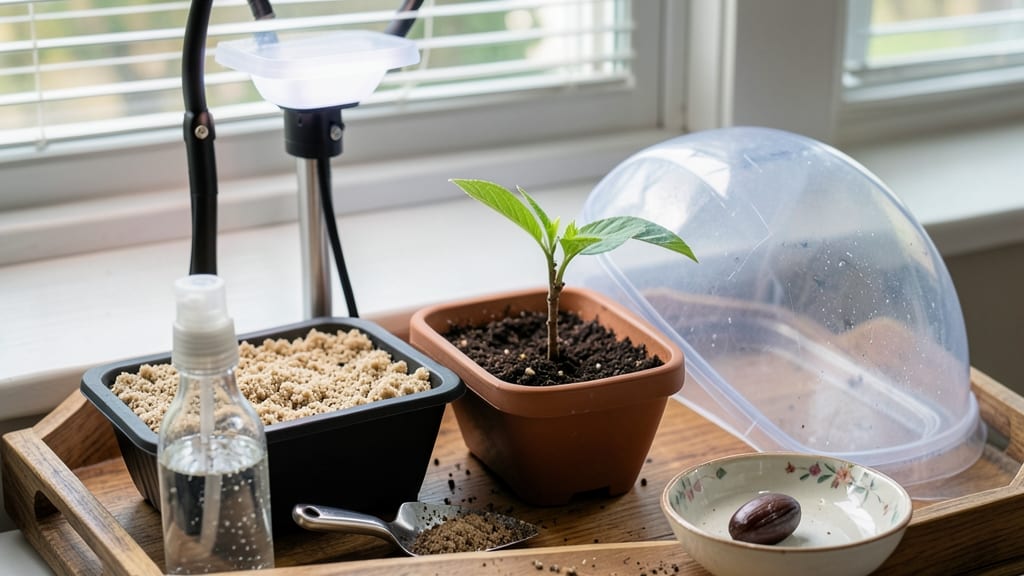
Growing a cherry blossom tree from seed means waiting 10 years for those iconic pink blooms—but the journey itself is magical. 🌸 I’ve tried it twice, and while the first tree still struggles through its awkward teenage years, the second one now stands proud, its branches heavy with buds.
The secret isn’t just patience; it’s understanding that seed-grown trees rarely bloom true to their parent’s glory, but they develop unmatched resilience and character.
Start with fresh seeds from a Prunus serrulata variety (or a similar ornamental cherry), and don’t expect miracles—germination takes 30-60 days in damp, well-draining soil.
The real test comes when you transplant the sapling: it’ll grow slowly at first, but with the right care—full sun, moist but not soggy soil, and winter protection—it’ll eventually outpace any grafted tree you’ve ever seen. The trade-off?
Your blossoms might be smaller, later, or a different shade of pink.
By year 5, you’ll notice stronger branches and the first hints of flower buds—proof the wait is worth it. The tree will reward you with longer-lived wood, deeper roots, and a canopy that feels like a living legacy.
Just be ready to prune aggressively in its early years to shape its future silhouette. This isn’t a quick project; it’s a decade-long love letter to spring.
For true-to-type blooms, grafting is the shortcut—but if you’re growing for the story, the seed method delivers something no nursery tree can: a tree that’s yours, from the very first crack in its seed coat. The pink payoff? Worth every season of watching it grow.
📚 In This Guide
- What you need
- Instructions
- Tips and common mistakes
- Wrapping up and next steps
What you need
- ● Fresh cherry blossom seeds: Harvest from a healthy, organic tree (or buy from a trusted supplier). Aim for at least 10 seeds—germination rates are low!
- ● Well-draining potting mix: A blend of 50% peat moss or coco coir and 50% perlite or coarse sand (sterilized). Avoid garden soil—it’s too dense!
- ● Small seed-starting trays or pots: 2–3 inch diameter with drainage holes (biodegradable pots work too!).
- ● Plastic wrap or humidity dome: To create a mini greenhouse effect.
- ● Spray bottle: For gentle watering (no heavy streams—seeds hate soggy conditions!).
- ● Grow lights or sunny windowsill: A south-facing window or LED grow lights (12–16 hrs/day) for seedlings.
- ○ Heat mat (optional but helpful): Set to 70–75°F (21–24°C) to speed up germination.
- ● Fertilizer: Balanced, water-soluble (e.g., 10-10-10) at half-strength once true leaves appear.
- ● Seed stratification kit: If seeds aren’t fresh, a moist paper towel + fridge (30–90 days) mimics winter cold.
- ● pH test kit: Keep soil slightly acidic (6.0–6.5) for optimal growth.
- ● Humidifier or pebble tray: Maintains moisture without overwatering.
- ● Pruning shears: For trimming leggy seedlings later.
- ● Journal/notebook: Track germination dates, watering, and growth milestones!
Step-by-step instructions for growing a cherry blossom tree from seed
Here's how to nurture a seed into a tree with stunning pink blooms—it takes time, but the reward is worth every step.
🌱 Step 1: Extract and Prepare the Seed
Cherry blossom seeds grow inside the fruit's pit—start by cleaning it thoroughly. Rinse the pit under cool water to remove any remaining pulp, then let it dry completely on a paper towel for 2-3 days. This prevents mold and ensures proper stratification later.
Once dry, gently tap the pit with a hammer or mallet to crack it open. Inside, you'll find a single large seed surrounded by a hard shell. Remove the seed carefully—it's the size of a small pea—and set it aside. The outer shell protects the seed but must be softened before planting.
💧 Step 2: Stratify the Seed for Germination
Cherry blossom seeds require cold stratification to break dormancy. Place the seed in a small plastic bag with a damp paper towel, then seal it tightly. Store the bag in your refrigerator's crisp drawer (around 35-40°F) for 6-8 weeks.
Check the seed weekly—if the paper towel dries out, mist it lightly with room-temperature water. The goal is to keep it consistently moist but not soggy. After 6-8 weeks, the seed will begin to sprout a tiny root. This is your cue that stratification worked.
☀️ Step 3: Plant the Stratified Seed
Fill a small pot (at least 4 inches deep) with a well-draining seed-starting mix. Plant the stratified seed ½ inch deep, pressing the soil lightly around it. Water gently until the soil is evenly moist but not waterlogged.
Place the pot in a warm, bright spot with indirect light—a south-facing window works well. Keep the soil consistently moist by watering when the top ½ inch feels dry. Germination can take 4-8 weeks, so patience is key.
🌿 Step 4: Transplant and Care for the Seedling
Once the seedling reaches 4-6 inches tall and has developed 3-4 true leaves, it's ready for transplanting. Choose a slightly larger pot (around 6 inches deep) and use the same well-draining mix. Gently remove the seedling from its original pot, keeping the root ball intact.
Plant it at the same depth as before, firming the soil around the base. Move the pot to a location with full sun (6+ hours daily) and protect it from strong winds. Water deeply once a week, allowing the top 1-2 inches of soil to dry between waterings.
⏰ Step 5: Gradually Acclimate to Outdoor Conditions
After the last frost date in your area, begin hardening off the seedling by placing it outside in a sheltered spot for 1-2 hours daily. Gradually increase outdoor time over 2-3 weeks, until it can stay outside full-time.
Once fully hardened off, transplant the seedling into the ground in a location with full sun and well-draining soil. Mulch around the base to retain moisture and protect roots. With proper care, your cherry blossom tree will eventually bloom—though it may take 5-10 years for full flowering.
Tips & tricks for growing a cherry blossom tree from seed
These practical insights will help you navigate the delicate balance between patience and precision as you nurture your cherry blossom seed into a tree.
Seed Extraction: Confession: I skipped the drying step for years and wondered why my seeds always molded. That 2-3 day drying period is non-negotiable—it prevents fungal growth while preparing the seed for stratification. Use a fan on low setting to speed up drying if you're impatient, but don't rush it. The seed needs to be completely bone dry before cracking the pit open.
Stratification Success: Here's what nobody tells you—the 6-8 week cold period mimics winter conditions that break seed dormancy. I learned this the hard way after trying to rush germination. Place your seed bag in the refrigerator's crispest drawer (usually the bottom shelf) where temperatures stay consistently around 35-40°F. If your fridge runs warmer, consider using a seed stratification kit for precise temperature control.
Germination Environment: The 4-8 week germination window can feel like an eternity, but consistency is key. I use a clear plastic container with drainage holes for my seed-starting pots to monitor moisture levels without overwatering. Place a small pebble tray filled with water beneath the pot to maintain humidity—this creates a self-watering system that prevents both soggy soil and dry roots. The goal is to keep the soil consistently moist, not wet.
Transplanting Timing: Don't make my mistake of transplanting too early! Wait until your seedling reaches 4-6 inches with 3-4 true leaves—this indicates it's developed enough root structure to handle the transition. When repotting, use a pot that's only about 2 inches larger in diameter than the current one. Larger pots can cause overwatering issues while the small root system struggles to absorb moisture.
Pro Tips for Grow A Cherry Blossom Tree From A Seed
- These practical insights will help you navigate the delicate balance between patience and precision as you nurture yo...
- Seed Extraction: Confession: I skipped the drying step for years and wondered why my seeds always molded. That 2-3 da...
- Stratification Success: Here's what nobody tells you—the 6-8 week cold period mimics winter conditions that break see...
Frequently asked questions
Got questions?
Growing a cherry blossom tree from seed is rewarding but comes with its own set of curiosities. Here are answers to the most common queries—so you can bloom with confidence!
How long does it take for a cherry blossom seed to germinate?
Germination can take anywhere from 4 weeks to 6 months, depending on the seed’s dormancy period and your stratification method. Some seeds may even take a year or more if conditions aren’t ideal. Patience is key—think of it as nature’s slow-motion drama!
Will my cherry blossom tree bloom in the first year?
Probably not! Cherry blossom trees grown from seed are notoriously slow to flower—often taking 5 to 10 years (or longer) before you see those iconic pink blooms. Grafted trees bloom faster (3–5 years), but seed-grown trees reward you with unpredictable, wild beauty over time.
Can I grow a cherry blossom tree indoors?
While you can start seeds indoors (in a sunny window or under grow lights), cherry blossom trees thrive outdoors and need full sun, space, and seasonal changes to mature. If you’re set on indoor growth, expect a much smaller, less hardy tree—best for container gardening in mild climates.
Why did my cherry blossom seedling turn yellow or wilt?
Yellowing leaves (chlorosis) often signal overwatering, poor drainage, or nutrient deficiency. Wilting could mean underwatering, root rot, or transplant shock. Check soil moisture (it should be damp, not soggy), ensure pots have drainage holes, and consider a balanced fertilizer if growth stalls.
Are all cherry blossom trees edible?
Nope! While some sweet cherry varieties (like Prunus avium) produce edible fruit, ornamental cherry blossom trees (Prunus serrulata) are purely decorative—their fruit is bitter and inedible. Stick to admiring their flowers unless you’re growing a specific edible cultivar.
Wrapping up and next steps
Growing a cherry blossom tree from seed is a rewarding journey that blends patience, care, and a touch of magic—watch as tiny seeds transform into a stunning spring spectacle!
While it may take years for your tree to bloom, every step—from stratification to nurturing saplings—builds resilience and connection to nature. Once your tree is thriving, consider planting it in a shared space, like a park or community garden, to inspire others with its beauty.
Ready to take the next step? Share your progress with fellow gardeners online or explore local botanical societies for guidance. Your cherry blossom’s future starts with that first seed—so get planting! 🌸💚