
Pruning
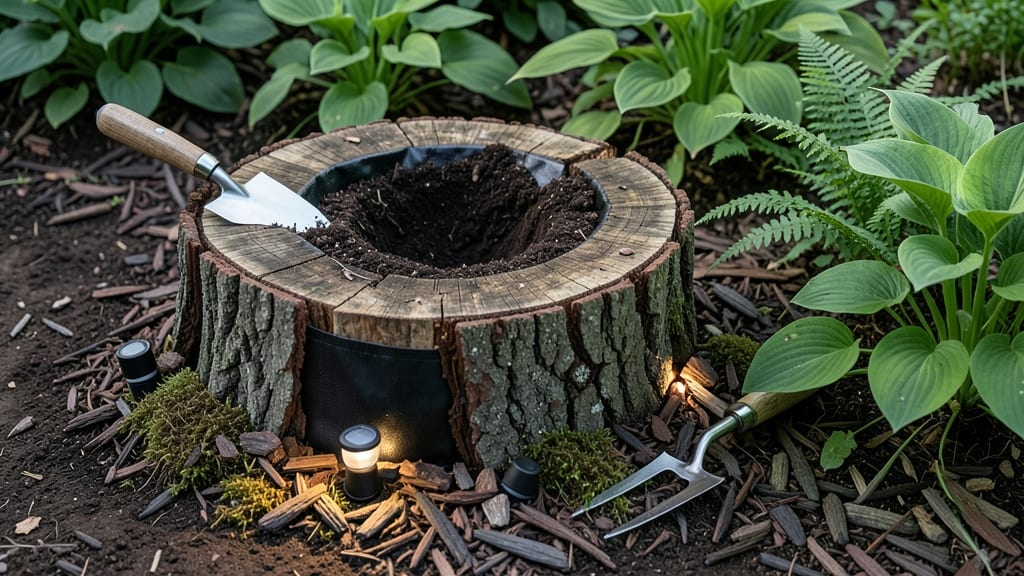
Transforming that leftover tree stump into a planter turns an eyesore into a showstopping garden feature—and it takes less than an hour. ✨ The right plants, a few simple tools, and a little creativity turn dead wood into a thriving micro-garden that attracts pollinators and adds rustic charm to any yard.
Start with safety: wear gloves and goggles when drilling, then clean the stump thoroughly to remove debris or old bark. A power drill with a hole saw creates drainage holes at the bottom, while a plastic liner (or even a heavy-duty trash bag) keeps soil contained.
For a polished look, paint the stump with outdoor-safe stain—just leave the top open for planting.
Fill with well-draining soil and nestle in shade-tolerant plants like ferns, moss, or small succulents. The key is moisture control: stumps dry out fast, so mulch the top layer to retain water.
In a few weeks, your planter will look like it’s been part of the garden forever—no one will believe it started as a stump.
Bonus: This project works for any stump size, from tiny saplings to massive oak remnants. Swap out plants seasonally for year-round interest, and watch your garden’s focal point evolve. Ready to get started?
📚 In This Guide
- What you need
- Instructions
- Tips and common mistakes
- Wrapping up and next steps
What you need
- ● Tree stump: Freshly cut (preferably within the last few weeks) or dried-out, with a diameter of at least 6–12 inches (smaller stumps may require extra support).
- ● Safety gear: Work gloves (heavy-duty, cut-resistant)
- ● Safety goggles
- ● Dust mask or respirator (if sanding or drilling)
- ● Cleaning supplies: Pressure washer or stiff-bristle brush + hose
- ● Bleach (1 part bleach to 10 parts water) or commercial wood cleaner
- ● Rag or sponge
- ● Drilling tools: Power drill (with 1/4-inch or 1/2-inch drill bit)
- ● Wood screws (exterior-grade, 2–3 inches long)
- ● Drill bit for drainage holes (if stump isn’t naturally porous)
- ● Liner options (pick one): Plastic nursery pot: Pre-drilled with drainage holes, slightly smaller than the stump’s diameter.
- ● Fabric grow bag: Heavy-duty landscape fabric (cut to fit snugly).
- ● Waterproof liner: EPDM rubber sheeting (for a seamless look).
- ○ Decorative finishes (optional but fun!): Wood stain or paint (exterior-grade)
- ● Sealer (polyurethane or outdoor wood preservative)
- ● Decorative screws, nails, or mosaic tiles (for flair)
- ● Potting soil (well-draining mix for containers)
- ● Slow-release fertilizer (for new plants)
- ● Mulch or pebbles (to hide liner edges)
- ● Solar-powered stake lights (for ambiance)
- ● Small watering can or drip irrigation kit
Step-by-Step instructions for creating a tree stump planter
Turn that old stump into a charming, functional planter in under an hour—no special tools required.
🪴 Step 1: Clean and Prepare the Stump
Start by removing any loose bark, moss, or debris from the stump using a putty knife or stiff brush. I like to work when the stump is dry so everything lifts away easily. If the wood feels soft or spongy in spots, that’s rot—trim those areas back with a handsaw or pruning shears to create a clean, stable base for your planter.
Once you’ve exposed fresh wood, sand the surface lightly with medium-grit sandpaper (80-100 grit). This removes rough edges and prevents splinters when you’re planting. Wipe away any dust with a damp cloth—you’ll want a clean surface for the next steps. A freshly cleaned stump looks inviting and makes your garden project feel like a fresh start.
💧 Step 2: Line the Stump for Drainage and Soil Retention
Cut a piece of heavy-duty landscape fabric to fit the inside of the stump, leaving a few inches of overhang at the top. This keeps soil in place while allowing excess water to drain through the wood. Push the fabric into the stump, smoothing it against the sides—you’ll want it snug but not stretched tightly, so it doesn’t tear when you add soil.
For extra drainage, I drill a few small holes in the bottom of the stump (if it’s not already hollow) using a power drill and ½-inch bit. These holes prevent water from pooling at the base, which can rot roots over time. If your stump is already hollow, skip this step—just make sure the fabric covers the bottom opening completely.
🌱 Step 3: Fill with Soil and Plant Your Choice of Greenery
Fill the stump about halfway with a mix of potting soil and perlite (or coarse sand) for better drainage. I use a 3:1 ratio of soil to perlite—this keeps moisture balanced while preventing soggy roots. Press the mix gently into the corners to eliminate air pockets, then add a slow-release fertilizer if you’re planting something hungry like ferns or impatiens.
For planting, choose shallow-rooted perennials, annuals, or even small shrubs that thrive in containers. I like trailing plants like sweet potato vine or creeping thyme—they spill over the edges beautifully and create a lush, cascading effect. Water the soil thoroughly after planting to settle everything in place, then let it drain completely before adding mulch.
✂️ Step 4: Add Mulch and Decorative Finishing Touches
Spread a 1-inch layer of mulch (like shredded bark or pine straw) over the soil surface to retain moisture and suppress weeds. Avoid piling mulch against the stump’s sides—leave a small gap so air can circulate around the wood. This prevents rot and keeps your planter looking neat while protecting the soil from drying out too quickly.
For a polished look, I often add a few decorative elements like pebbles around the base or a small ring of moss at the top edge. A quick spray of water helps settle everything in place. Step back and admire your work—your stump planter is now a unique garden feature that adds texture, color, and personality to any outdoor space.
☀️ Step 5: Water and Maintain Like a Pro
Water your new planter deeply right after planting, then check the soil every 2-3 days—stick your finger about an inch into the soil. If it feels dry, give it a drink, but avoid soaking it unless your plants are thirsty. Overwatering is the biggest mistake here, especially in humid climates where stumps can trap moisture.
Feed your plants every 4-6 weeks during the growing season with a balanced liquid fertilizer. If you notice leaves yellowing or growth slowing, that’s your cue to refresh the soil or switch to a slow-release fertilizer. With proper care, your stump planter will thrive for years, becoming a beloved part of your garden’s character.
Tips & tricks for perfect tree stump planters
Transforming a tree stump into a planter is all about preparation and smart choices—here's how to elevate your project from good to stunning.
Prep Like a Pro: In Step 1, when cleaning the stump, take the extra 5 minutes to trim back any rotten wood completely—even if it's not visible at first. I've seen stumps that looked solid on top but had hidden rot at the base that caused them to collapse later. Use a hammer to gently tap the wood—if it sounds hollow or crumbles, cut deeper. This creates a stable foundation that'll last seasons, not weeks.
Drainage is Everything: The ½-inch drainage holes in Step 2 are non-negotiable if your stump isn't already hollow. I've seen too many stump planters fail because water pooled at the bottom, creating the perfect conditions for root rot. If you're unsure about drilling, use a screwdriver to test the wood—if it goes in easily, you're in the clear. For extra insurance, add a layer of small pebbles at the very bottom before the landscape fabric.
Soil Mix Matters: Stick to that 3:1 ratio of potting soil to perlite in Step 3—it's the magic number for preventing soggy roots while still keeping moisture. I've found that adding a handful of worm castings to this mix gives plants an instant nutrient boost. For larger stumps, consider adding a slow-release fertilizer directly to the soil mix before planting—it'll feed your greenery for months without extra effort.
Plant Selection Strategy: In Step 3, when choosing plants, think about how they'll spill over the edges. For a dramatic look, pair a trailing plant like sweet potato vine with a taller centerpiece plant like a small fern. The key is to plant your trailing plants closer to the edge of the stump—this creates that beautiful cascading effect right away. If you're using succulents, reduce the perlite to a 2:1 ratio with soil—they prefer drier conditions.
Pro Tips for Make A Tree Stump Into A Planter
- Transforming a tree stump into a planter is all about preparation and smart choices—here's how to elevate your projec...
- Prep Like a Pro: In Step 1, when cleaning the stump, take the extra 5 minutes to trim back any rotten wood completely...
- Drainage is Everything: The ½-inch drainage holes in Step 2 are non-negotiable if your stump isn't already hollow. I'...
Frequently asked questions
Got questions?
You’re not alone! Turning a tree stump into a planter is a creative project, and everyone’s got a few concerns. Here are the most common questions—and their answers—to help you tackle this DIY task with confidence.
How long does it take to turn a tree stump into a planter?
Most projects take 1–3 hours, depending on the stump’s size and your method. Sanding and staining add time, while pre-cut stumps (like those from landscaping services) can be ready in under an hour. Plan ahead if you’re painting or sealing—drying time varies by product (usually 24 hours).
Will a tree stump rot if I use it as a planter?
Yes, but you can slow it down! Stumps are wood, and moisture + soil = a rot magnet. To extend its life:
- Apply a waterproof sealant (like polyurethane) before planting.
- Choose drought-tolerant plants (succulents, ornamental grasses).
- Avoid overwatering—let soil dry between waterings.
What’s the easiest way to clean a tree stump before repurposing it?
Start with a wire brush or sandpaper to remove loose bark, sap, and debris. For stubborn grime:
- Mix 1 part bleach + 3 parts water for a quick disinfectant scrub.
- Use a pressure washer (low setting) if the stump is large.
- Let it dry completely before staining or sealing.
Can I use a tree stump as a planter for vegetables or herbs?
Technically yes, but it’s not ideal for long-term veggie gardening. Stumps lack drainage and nutrients, and roots may decay faster. Better alternatives:
- Herbs (thyme, rosemary): Drought-resistant and shallow-rooted.
- Ornamental plants (moss, ferns): Low-maintenance and moisture-loving.
- Line the stump with a plastic liner to improve drainage if you’re set on veggies.
How do I prevent paint or stain from peeling off my stump planter?
Peeling happens when moisture traps paint under the surface. Prevent it with these steps:
- Sand the stump smooth and dry before applying any finish.
- Use a bonding primer (like Kilz) for extra grip.
- Choose a waterproof stain or paint labeled for outdoor use.
- Reapply sealant every 1–2 years to refresh protection.
Wrapping up and next steps
Transforming a tree stump into a planter is a creative, eco-friendly way to give your garden a unique touch—and you’ve got all the tools to make it happen! 🌱 Whether you’re repurposing an old stump or starting fresh, this project adds charm while keeping your space sustainable.
Now that you’re armed with tips and tricks, why not take the next step? Grab your supplies, pick a sunny spot, and let your green thumb shine—your garden’s new centerpiece is waiting!