
Planting
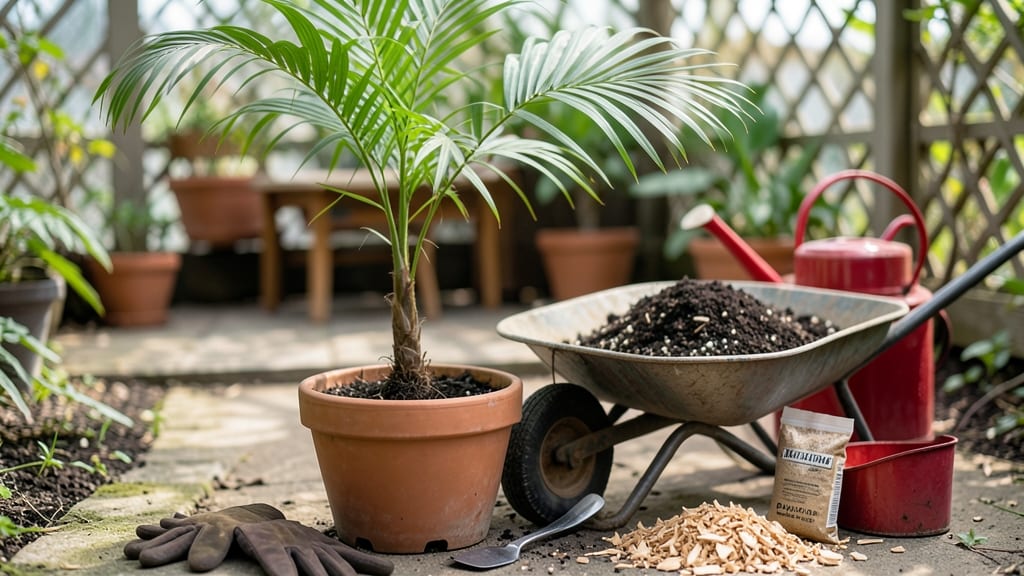
Repotting a palm tree plant isn’t as scary as it seems—it’s the secret to keeping yours healthy and thriving for years. 🌿 I’ve repotted everything from tiny parlor palms to towering arecas, and the key is moving fast, handling roots gently, and picking the right moment.
The stress of repotting actually kickstarts new growth if you do it right, but get it wrong and you’ll end up with yellow fronds and a sad plant. Timing matters most: spring or early summer gives roots time to settle before winter dormancy.
Choose a pot just 2 inches wider than the current one—palms hate too much extra space—and use a well-draining mix designed for palms or tropical plants. Skip the fancy soil blends unless they’re labeled for palms; most generic potting mixes work fine with a little perlite added.
When you lift the plant, tap the root ball gently to loosen it, but don’t tease apart the roots—palms are sensitive to root disturbance. Water lightly after repotting, then wait a week before giving it a good drink.
Place it in bright, indirect light and avoid fertilizing for at least two months while the roots recover. Indoor palms need extra humidity after repotting, while outdoor palms can handle a misting or two. Watch for signs of stress like drooping fronds—usually just a sign to ease up on watering.
With this method, my palms bounce back faster than ever, and the new growth is always lusher than before.
📚 In This Guide
- What you need
- Instructions
- Tips and common mistakes
- Wrapping up and next steps
What you need
- ● New pot: 1-2 inches larger in diameter than the current pot (ensure drainage holes are present). Pro tip: Choose a container made of terracotta, fiberglass, or plastic—avoid metal if your climate gets chilly!
- ○ High-quality potting mix: 1 bag (1-2 cubic feet) of well-draining palm/succulent mix (avoid garden soil—it compacts!). Optional: Add perlite or orchid bark (10-20%) for extra aeration.
- ● Gloves: 1 pair of gardening gloves (palm fronds can be prickly!).
- ● Trowel or shovel: 1 medium-sized hand trowel for digging and loosening roots.
- ● Watering can or hose: With a gentle spray nozzle for post-repotting hydration.
- ● Pruning shears or knife: 1 pair (sterilized with rubbing alcohol) for trimming only if roots are circling or rotted.
- ○ Mulch (optional): 1 bag of orchid bark or pine needles to retain moisture and regulate temperature.
- ● Timing: Repot during spring or early summer (active growth phase). Avoid winter—palms are dormant!
- ● Pre-watering: Water the plant 24 hours before repotting to reduce stress.
- ● Space: Clear a clean, flat surface (like a tarp or table) for easy cleanup.
- ● Safety: Wear closed-toe shoes—dropping a heavy pot on your toes isn’t fun!
Step-by-Step instructions for repotting a palm tree plant
Here’s my foolproof method for giving your palm a fresh start without shock or stress.
🪴 Step 1: Choose the Right Pot and Prepare Your Workspace
Select a container that’s 2-4 inches wider than your palm’s current pot—just enough room for roots to spread comfortably. I always look for pots with drainage holes (or drill them myself if needed) because palms hate soggy roots. Place a layer of fresh palm-specific potting mix at the bottom—about 2 inches deep—to encourage drainage and root growth.
Clear a clean workspace near a door or balcony. Lay down newspaper or a tarp to catch soil spills, and have a bucket of lukewarm water ready. I like to work outdoors when it’s 65-75°F—palms handle repotting better in moderate temps. If your home is too cold, wait until spring or summer for the best results.
✂️ Step 2: Gently Remove the Palm and Inspect the Roots
Water your palm 24 hours before repotting—this helps roots slide out more easily without breaking. Turn the pot on its side and tap the edges firmly while gently pulling the plant outward. If the roots are tightly bound, run a knife around the inside edge to loosen the soil. You’ll see a dense network of roots—this is normal, but if you spot black, mushy roots, trim them with sterilized scissors to prevent rot.
Inspect the root ball for signs of pests like scale or mealybugs. I always give the roots a quick rinse in lukewarm water to remove old soil, but don’t soak them—wet roots can invite fungal issues. If the root ball is solid and healthy, you’re ready for the next step. Here’s the thing—don’t rush this part. A little patience now means a stronger palm later.
🌱 Step 3: Position the Palm and Add Fresh Soil
Place your palm in the new pot so the top of the root ball sits ½ inch below the rim. This prevents water from spilling over during watering and gives you room to add soil later. Fill the gaps around the roots with fresh potting mix, pressing gently to eliminate air pockets. I like to use my fingers to tuck soil into crevices—this ensures roots make contact with nutrients right away.
Stop when the soil level is 1 inch below the pot’s rim. This extra space prevents overflow when you water. Tap the pot lightly on the table to settle the soil, then add a final layer of orchid bark or perlite on top for extra drainage. This isn’t just decoration—it helps keep the soil loose and aerated, which palms love.
💧 Step 4: Water and Acclimate Your Repotted Palm
Give your palm a deep drink right after repotting—water until it drains freely from the bottom. This helps settle the soil and rehydrates the roots. Place the pot in a shady spot (like a covered porch or east-facing window) for 1-2 weeks to reduce stress. Palms are tropical plants, and sudden bright light can scorch leaves during recovery.
Wait 7-10 days before fertilizing—repotted palms need time to adjust. You’ll know it’s doing well when new fronds start unfurling. If leaves yellow or droop, it’s usually a sign of overwatering. Here’s my trick: stick your finger in the soil. If it’s damp 1 inch down, hold off on watering. If it’s dry, give it a drink.
☀️ Step 5: Gradually Reintroduce Light and Care
After 2 weeks, slowly reintroduce your palm to its usual light conditions. If it’s an indoor palm, move it back to its original spot over 3-5 days. Outdoors? Shift it to partial shade first, then full sun after another week. You’ll notice new growth within 4-6 weeks—that’s your reward for a job well done.
Resist the urge to repot again for 12-18 months. Palms grow slowly, and frequent repotting stresses them out. Instead, focus on consistent care: water when the top 2 inches of soil dry out, and fertilize monthly in spring and summer with a balanced palm fertilizer. With this method, your palm will thrive for years—no stress, just steady growth.
Tips & tricks for stress-free palm repotting
These simple steps will help your palm recover faster and grow stronger after its big move.
Pot Size Matters: The 2-4 inch wider rule isn't just about space—it's about balance. Too much extra room means soil stays wet too long, while too little restricts root growth. I always measure the root ball first: if it's 8 inches wide, I look for a 10-12 inch pot. This gives roots room to spread without overwhelming the plant.
Root Health Check: When inspecting roots in Step 2, look for white, firm roots—they're healthy. Those black, mushy ones? Trim them immediately with sterilized scissors and toss them. Here's what nobody tells you—healthy roots should smell fresh, not sour. If you're unsure, a quick rinse in lukewarm water reveals their true condition without damaging them.
Soil Settling Secret: After adding fresh soil in Step 3, don't just pat it down—give the pot a few gentle taps on the table. This settles the soil without compacting it too much. I like to do this in 3 stages: after filling half the gaps, then after three-quarters, and finally when the pot is full. This prevents air pockets that can suffocate roots and cause rot.
Acclimation Timeline: The 1-2 week shady recovery period is crucial, but don't be afraid to extend it if needed. If your palm looks stressed (drooping fronds, yellowing leaves), give it another week in shade. I've had palms that needed 3 weeks of recovery before they were ready for normal light. Think of it like helping a friend recover from surgery—rushing them back to normal activities can set them back.
Pro Tips for Repot A Palm Tree Plant
- These simple steps will help your palm recover faster and grow stronger after its big move.
- Pot Size Matters: The 2-4 inch wider rule isn't just about space—it's about balance. Too much extra room means soil s...
- Root Health Check: When inspecting roots in Step 2, look for white, firm roots—they're healthy. Those black, mushy on...
Frequently asked questions
Got questions about repotting your palm tree? You’re not alone! Here are some of the most common concerns—and their stress-free solutions.
When is the best time to repot a palm tree?
Repot your palm tree in spring or early summer when it’s actively growing. Avoid winter or extreme heat—these times stress the plant. If you’re dealing with root-bound issues (roots circling the pot), don’t wait! A little patience goes a long way, but act before roots start strangling growth.
How do I know if my palm tree needs repotting?
Watch for these red flags: roots growing out of drainage holes, water draining too quickly, or stunted growth. Gently remove the plant from its pot—if roots are densely packed or circling, it’s time to upgrade. Pro tip: Tap the pot’s sides—if dirt falls away easily, roots may be too snug!
Can I repot a palm tree in a smaller pot?
Only if it’s severely root-bound and you’re pruning roots first. Most palms thrive with 2–4 inches of extra space per year. Downsizing risks stress, so choose wisely! For mature palms, stick to a slightly larger pot (1–2 inches wider) to encourage healthy root expansion.
How often should I water after repotting?
Hold off on watering for 3–5 days to let roots settle. Then, water thoroughly but less frequently—palms hate soggy soil. Use room-temperature water and avoid overhead spraying to prevent fungal issues. Yellowing fronds? Often a sign of overwatering; adjust as needed!
What if my palm tree looks sick after repotting?
Don’t panic! Wilting or browning fronds are normal for 2–4 weeks as it adjusts. If issues persist, check for root rot (smelly, mushy roots) or pests. Trim damaged roots, improve drainage, and keep it in bright, indirect light. Most palms bounce back with TLC!
Wrapping up and next steps
Repotting your palm tree doesn’t have to be stressful—just follow these simple steps to give your plant a fresh start! 🌿 With the right tools, timing, and care, you’ll help your palm thrive in its new home. Remember, patience and attention to detail are key to a successful repotting.
Now that you’re ready to tackle the task, why not take the next step? Monitor your palm’s progress in its new pot, adjust care as needed, and enjoy watching it grow stronger and healthier. Happy gardening! 🌱