
Pruning
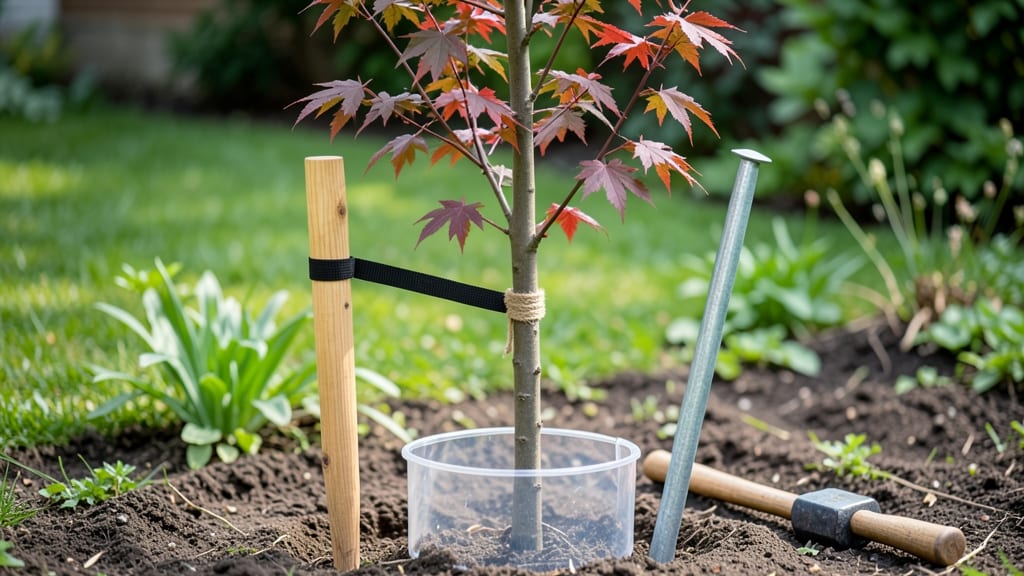
How to stake a tree without damaging it—doing it wrong can stunt growth or even kill the tree, but the right method ensures healthy support. 🌳 The secret is gentle support that guides the tree without restricting its natural movement. I’ve learned the hard way that cheap stakes and tight ties create problems later, but this method keeps trees strong for years. You’ll need flexible stakes (not metal) and wide, breathable ties that won’t cut into the bark. Position stakes at a 45-degree angle, 12–18 inches from the trunk, and only stake if the tree is top-heavy or in windy conditions. Most young trees don’t need staking at all—they’ll grow stronger if left to sway. The payoff? A straight trunk that’s naturally sturdy, not a tree that leans or splits later. Check ties every few weeks—they’ll loosen as the tree grows. By next season, you’ll have a healthy, self-supporting tree that thrives without your help. Works for saplings, newly planted trees, or even damaged trees needing temporary support. Here’s exactly how to do it without the common mistakes that trip up gardeners.
📚 In This Guide
- What you need
- Instructions
- Tips and common mistakes
- Wrapping up and next steps
What you need
- ● Stakes: 2–4 wooden, bamboo, or metal stakes (1–2 inches in diameter, 4–6 feet tall). Opt for untreated wood to avoid chemical exposure.
- ● Tree Tie or Soft Strap: 3–5 wide, stretchable fabric ties (3–4 inches wide) or rubber tree straps. Avoid wire or plastic—these can cut into the bark!
- ● Mallet or Hammer: A rubber-headed mallet (to protect stakes and roots) or a soft-faced hammer for driving stakes gently.
- ● Measuring Tape: For precise stake placement (aim for 1/3 of the tree’s height above ground).
- ● Shovel or Auger: To create small holes for stakes (about 1/3 the stake’s diameter and 6–12 inches deep).
- ● Gloves: Work gloves to protect your hands from splinters or rough bark.
- ● Stake Spreader: A Y-shaped or triangular stake spreader to create a stable base for multiple stakes.
- ● Tree Guard or Collar: A plastic or metal tree collar to protect the trunk where ties meet the bark.
- ● Pruning Shears: For trimming any damaged branches before staking.
- ● Mulch: Organic mulch (like wood chips) to cover the stake area after planting for moisture retention.
Step-by-step instructions for staking a tree without damaging it
Here's how to support young trees the right way—keeping them strong while avoiding long-term damage.
🪴 Step 1: Choose the Right Stakes and Tie Materials
Use flexible, wide stakes (2-3 inches wide)—never narrow ones that can cut into the trunk. I prefer 3-foot bamboo stakes for most young trees, placed on opposite sides of the trunk. Avoid metal or plastic stakes that can damage bark over time.
For ties, use soft, breathable materials like tree tie straps or wide strips of old T-shirt fabric. Never use wire, rope, or anything that can tighten over time. The goal is to allow the trunk to sway slightly—this builds strength naturally. If you're using fabric, cut strips about 1-2 inches wide.
✂️ Step 2: Position Stakes at the Correct Angle and Depth
Drive stakes into the soil at a 45-degree angle, about 12-18 inches deep. This creates a stable base while allowing the tree to move. Place them 4-6 inches away from the trunk—too close restricts growth, too far offers no support. Tap them in gently with a mallet to avoid shaking the tree.
Here's the thing—if your tree is already leaning, don't force it upright. Instead, stake it in its natural position. The goal is to prevent wind damage, not correct posture. You'll see the trunk grow thicker where it bends—this is a sign of natural strengthening.
🌿 Step 3: Attach the Tree to Stakes with Gentle Ties
Loop the tie around the trunk first, then around the stake. For fabric ties, make a figure-eight pattern that crisscrosses the trunk. The tie should be loose enough to fit two fingers between the trunk and the tie. Tighten just enough to prevent swaying in strong wind, but never restrict growth. If the tree grows and the tie feels tight after a few months, loosen it immediately.
Check the ties every 4-6 weeks—you'll notice the trunk thickening in some spots. If the tie leaves a permanent indentation, it's too tight. Adjust it so the tree can still move slightly. Real talk: I've seen trees with ties that cut into the bark for years—it's heartbreaking to see the damage.
🌱 Step 4: Remove Stakes Before the Tree Outgrows Support
Most trees only need staking for 1-2 years, until their root systems stabilize. You'll know it's time to remove stakes when the trunk is at least 1 inch in diameter and the tree stands upright on its own in windy conditions. Test by gently pushing the tree—if it doesn't topple, it's ready.
Remove stakes gradually over 2-3 weeks to avoid shocking the tree. Start by loosening the ties completely, then remove one stake at a time. Watch the tree for a few days after removal—if it leans slightly, that's normal. If it falls over, it wasn't quite ready. Don't rush this step; the goal is to grow a self-supporting tree.
☀️ Step 5: Monitor Growth and Adjust as Needed
Check the staking system after heavy rains or storms. You might find stakes have shifted or ties have loosened. Adjust immediately—proper support prevents long-term damage. Pay attention to where the trunk touches the tie; if you see a permanent mark, the tie is too tight.
Here's what I do: I mark the trunk height with a pencil before staking. After a year, if the tree has grown 12+ inches above the tie, it's time to move the tie higher. This ensures the trunk thickens evenly and doesn't develop weak spots where the tie was restricting growth. Healthy trees grow straight and strong—never force them into unnatural positions.
Tips & tricks for healthy tree staking
These simple adjustments will help your young trees grow stronger—and avoid the common mistakes that cause long-term damage.
Stake Placement Matters: When positioning those 3-foot bamboo stakes at a 45-degree angle, think of the "golden triangle"—the stake should form an equilateral triangle with the tree trunk. This creates the most stable support while allowing natural movement. Too close (less than 4 inches) can girdle the trunk, while too far (more than 6 inches) won't provide proper stabilization. I've seen trees with stakes placed too far end up toppling in storms.
Tie Tightness Test: That two-finger rule between the trunk and tie in Step 3 is non-negotiable. After a few months, check again—trees grow! If the tie now feels tight, immediately loosen it. I learned this the hard way when a young oak developed a permanent indentation from a tie that was too snug. The bark never fully recovered in that spot. Pro tip: Use a pencil to mark the trunk circumference before tying, then check against it later.
Seasonal Adjustments: Heavy rains or snow can loosen stakes over time. After storms, check that your 12-18 inch deep stakes are still firmly planted. If they've shifted, tap them back in gently with a mallet. I always do this check in early spring and late fall when storms are most common. Also watch for ties that may have loosened—just retighten them slightly, but never to the point of restriction.
Growth Monitoring: That pencil mark you make before staking isn't just for ties—use it to track growth. After a year, if your tree has grown 12+ inches above the tie, it's time to move the tie higher. This prevents weak spots where the trunk might grow unevenly. I've seen trees develop permanent bends exactly where old ties were left in place too long. Healthy growth means even thickening all around the trunk.
Pro Tips for Stake A Tree Without Damaging It
- These simple adjustments will help your young trees grow stronger—and avoid the common mistakes that cause long-term damage.
- Stake Placement Matters: When positioning those 3-foot bamboo stakes at a 45-degree angle, think of the "golden triangle"—the stake should form an equilateral triangle with the tree trunk.
- Tie Tightness Test: That two-finger rule between the trunk and tie in Step 3 is non-negotiable.
Frequently asked questions
Got questions about staking trees the right way? You’re not alone—here are some of the most common concerns, answered clearly and simply.
When is the best time to stake a young tree?
The ideal time is immediately after planting (or within 24–48 hours) to stabilize the root ball. Avoid staking in late fall or winter, as cold stress can weaken the tree. If you miss the window, wait until early spring—just ensure the ground isn’t frozen.
How long should I leave a tree staked?
Most trees only need stakes for 1–2 years, but it depends on species and wind exposure. Check monthly: if the tree stands upright without support or the trunk rubs against the stake, remove it. Over-staking can cause girdling (trunk damage) or weak stems.
Can I use wooden stakes instead of metal or plastic?
Wooden stakes can work, but they’re less durable and may rot or split over time. If using them, choose untreated cedar or redwood (avoid pressure-treated wood—chemicals can leach into soil). For long-term support, metal or fiberglass stakes are safer and reusable.
What if my tree is leaning after staking—did I do it wrong?
A slight lean isn’t always bad! Trees naturally adjust to wind, but if the trunk is bent at the base or the stake is too tight, you may have over-corrected. Loosen the tie slightly and monitor growth. If the lean is extreme (<30°), consider repositioning the stake or adding a second one on the opposite side.
Are there alternatives to traditional staking?
Yes! For small trees or windy areas, try:
- Tree rings or spiral supports (flexible, no digging needed).
- Burlap wraps or canvas ties (gentler than plastic straps).
- Natural windbreaks (plant nearby shrubs or use a temporary fence).
Wrapping up and next steps
Staking a tree the right way ensures strong roots, steady growth, and a thriving landscape—without the stress or damage.
By choosing the right materials, using gentle techniques, and monitoring progress, you’ve set your tree up for long-term success. Now’s the time to take action! Grab your tools, step outside, and give your tree the support it deserves. Your green thumb is about to make a real difference. 🌱✨
- Next step: Check your local climate and tree species for tailored care tips!