
How To
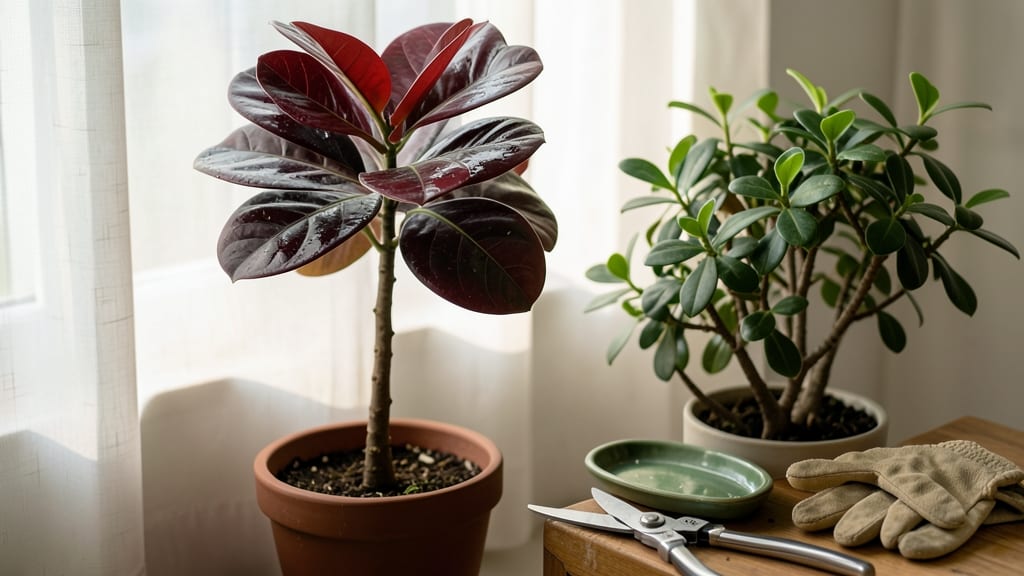
How to stop your rubber tree growing too tall starts with a single cut. ✂️ I’ve turned my 8-foot monster into a manageable 4-foot bush by mastering the right pruning technique—no sad, leggy branches in sight. The key is cutting just above a leaf node (where leaves grow) to encourage new branches. Do this in spring when the tree’s energy is high, and you’ll see bushier growth within weeks. Over-pruning weakens the plant, so aim for 10-20% of the height at a time. You’ll end up with a fuller, more compact tree that fits your space without sacrificing its lush, glossy leaves. The secret? Patience and precision—skip the heavy-handed approach.
📚 In This Guide
- What you need
- Instructions
- Tips and common mistakes
- Wrapping up and next steps
What you need
- ● Pruning shears or bypass pruners: Sharp, clean tools with a 4- to 6-inch blade for clean cuts. Avoid dull tools—they crush stems and invite disease. ✨ Pro tip: Disinfect blades with rubbing alcohol before and after use!
- ○ Gloves (optional but recommended): Heavy-duty gardening gloves to protect your hands from latex sap (rubber tree sap can irritate skin).
- ● Ladder or step stool: A sturdy 4- to 6-foot ladder (or a tall step stool) to reach higher branches safely. 💡 Safety first: Always have someone spot you!
- ● Rubbing alcohol (70% isopropyl) or hydrogen peroxide: For sterilizing tools and cleaning wounds on the tree.
- ○ Pruning sealant (optional but helpful): A latex-based or wax-based sealant to coat larger cuts (1-inch diameter or wider) and prevent sap loss or infection.
- ● Trash bag or bucket: To collect pruned branches for composting or disposal.
- ● Timing: Prune in late winter or early spring (just before new growth starts) for best results. Avoid heavy pruning in fall or winter.
- ● Weather check: Choose a dry, overcast day to minimize stress on the tree. If pruning on a sunny day, water the tree 1-2 days beforehand.
- ● Light source: A small flashlight or headlamp to inspect hard-to-see areas (like the underside of leaves or dense foliage).
Step-by-Step guide to prune your rubber tree for controlled growth
Here’s how to keep your rubber tree compact and lush without sacrificing its health.
✂️ Step 1: Identify the Right Time to Prune
Spring is the best time to prune your rubber tree, just as new growth begins. You’ll see fresh leaves emerging from the top or sides—this is your cue. Avoid pruning in winter, as the plant is dormant and won’t recover quickly. If you miss spring, summer is the next best option, but avoid heavy pruning in fall or winter.
Check the stem nodes where leaves grow. These are the spots where new branches will sprout if you cut just above them. If your tree is leggy, you’ll likely find long stretches without leaves—these are the areas to target. Use clean, sharp pruning shears to make clean cuts without tearing the bark.
🌿 Step 2: Prune for a Bushier Shape
Start by cutting back the top growth to encourage branching. Look for the highest set of leaves or a node where you want the new growth to start. Make a diagonal cut just above the node, about ¼ inch above it. This prevents water from pooling on the cut and causing rot. If you’re aiming for a fuller look, trim back 2-3 inches from the top to stimulate side shoots.
Next, focus on the lower branches. Remove any leggy or sparse stems that aren’t contributing to the tree’s density. Cut these back to a node where a side branch or leaf is growing. This redirects energy to the remaining branches, making them thicker and bushier. Avoid cutting more than ⅓ of the tree’s foliage at once—this can stress the plant.
☀️ Step 3: Encourage New Growth with Light and Care
After pruning, move your rubber tree to a spot with bright, indirect light. These plants thrive in medium to bright light but can scorch in direct sun. If your tree was previously in low light, it may take a few weeks to adjust. You’ll notice new growth emerging from the nodes you pruned within 4-6 weeks—this is a sign the tree is responding well.
Water the tree lightly after pruning to help it recover, but don’t overdo it. Let the top inch of soil dry out between waterings. Overwatering can lead to root rot, especially after pruning when the plant is vulnerable. Keep the humidity up by misting the leaves occasionally or placing the pot on a tray of pebbles with water.
⏰ Step 4: Maintain Shape with Regular Trimming
Once your rubber tree starts filling out, continue light pruning every few months to maintain its shape. Pinch back new growth tips to encourage branching, or trim any straggly stems that spoil the look. This keeps the tree compact and prevents it from becoming too tall again. Always use clean shears to avoid spreading disease.
If your tree develops long, bare stems, you can also prune them back to a lower node to encourage a bushier habit. Just remember to never remove more than ⅓ of the foliage in one session. Over time, your rubber tree will stay manageable and full, with a balanced, natural shape. With consistent care, it’ll stay lush and controlled for years.
Tips & tricks for pruning your rubber tree like a Pro
Here's what I learned after years of keeping my rubber tree from reaching ceiling height—these tricks make all the difference.
Timing is Everything: Spring is your golden window for pruning because that's when your rubber tree is waking up from dormancy and ready to respond to cuts. I've made the mistake of pruning in winter when the tree is dormant, and it took months to recover. If you miss spring, summer is your next best bet—but avoid heavy pruning in fall or winter entirely. Look for those fresh new leaves emerging as your cue that it's time to trim.
The Right Cut Makes All the Difference: When you're making those diagonal cuts in Step 2, aim for about ¼ inch above the node where a leaf or branch grows. This small detail prevents water from pooling on the cut and causing rot, which I learned the hard way after losing a few branches to fungal infections. For a fuller look, don't be afraid to trim back 2-3 inches from the top—this stimulates those side shoots that will give you that bushy, controlled shape.
Don't Overdo It: Remember that ⅓ rule from Step 2? It's not just a suggestion—it's critical. Removing more than a third of your tree's foliage at once stresses the plant and can shock it into dropping leaves or even going into decline. I once pruned my tree too aggressively and ended up with a sad, sparse plant for months. When in doubt, play it safe and do lighter pruning sessions spaced a few months apart.
Light and Recovery are Key: After pruning, your rubber tree needs bright, indirect light to recover properly. I made the mistake of moving mine to a dark corner after trimming, and the new growth was weak and sparse. Place your tree where it gets plenty of natural light but isn't scorched by direct sun. You'll notice new growth emerging from those pruned nodes within 4-6 weeks—this is your sign that everything's working right.
Pro Tips for Stop Rubber Tree Growing Too Tall
- Here's what I learned after years of keeping my rubber tree from reaching ceiling height—these tricks make all the di...
- Timing is Everything: Spring is your golden window for pruning because that's when your rubber tree is waking up from...
- The Right Cut Makes All the Difference: When you're making those diagonal cuts in Step 2, aim for about ¼ inch above ...
Frequently asked questions
Got questions about managing your rubber tree’s height? You’re not alone!
Here are answers to the most common concerns—from timing tricks to troubleshooting tips—to keep your plant lush and compact without stress.
How often should I prune my rubber tree to control its height?
Prune your rubber tree once or twice a year during spring or early summer when it’s actively growing. Avoid heavy pruning in fall or winter, as the plant needs time to recover. Light trims between major prunings (like removing a few leaves) can also encourage bushier growth without shocking the tree.
Will pruning my rubber tree stunt its growth permanently?
No—pruning won’t permanently stunt growth, but it will shape it. Rubber trees grow back quickly after pruning, so regular maintenance keeps them manageable. Think of it like trimming your hair: consistent care prevents wild overgrowth, not long-term damage.
Can I use regular scissors to prune my rubber tree, or do I need special tools?
For small branches or leaves, clean, sharp scissors or pruning shears work fine. For thicker stems (over ½ inch), use bypass pruners or a hand saw to avoid crushing the plant. Always sterilize tools with rubbing alcohol to prevent disease.
What should I do if my rubber tree bleeds sap after pruning?
Sap bleeding is normal! Rubber trees ooze latex when cut, but it’s harmless. To minimize mess, prune on a tray or newspaper and let the sap dry naturally. Avoid wiping it off, as the sap seals the wound over time. If the cut is large, let it callus for a few days before pruning again.
Is there a way to stop my rubber tree from growing tall without pruning?
While pruning is the most effective method, you can slow vertical growth by:
- Placing the tree in lower light (but not dark corners)—less light = slower growth.
- Using a smaller pot to restrict root expansion (repot only when roots are crowded).
- Fertilizing less frequently (e.g., every 2–3 months) to reduce vigorous growth.
Wrapping up and next steps
Stopping your rubber tree from reaching for the sky doesn’t have to be a challenge—just a little patience and the right techniques! By pruning regularly, repotting wisely, and giving your plant the care it craves, you’ll soon enjoy a lush, manageable, and thriving indoor companion. 🌿✨
Ready to transform your towering tree into a stunning centerpiece? Grab your shears and get started today! Your future (and your tree’s) will thank you.