
How To
Transplanting a tree without killing it starts with one critical trick: protecting the roots from drying out before they even hit the new soil. 🌳 I learned this the hard way when my 15-year-old oak nearly died after a botched move—until I discovered root-shielding techniques that boosted survival to 90%.
The secret isn’t brute strength; it’s timing, moisture, and gentle handling that keeps the tree’s energy focused on recovery, not shock.
You’ll need basic tools—a sharp spade, burlap, twine, and a hose—but the real game-changer is pruning the root ball just right. Too much root damage = stress. Too little = stunted growth. We’re talking 1/3 of the root mass, done carefully with a clean cut, not a rip.
Water the tree 2 weeks before moving to prep the roots, and keep the soil damp until replanting day. Even experienced gardeners skip this step—and regret it.
📚 In This Guide
- What you need
- Instructions
- Tips and common mistakes
- Wrapping up and next steps
What you need
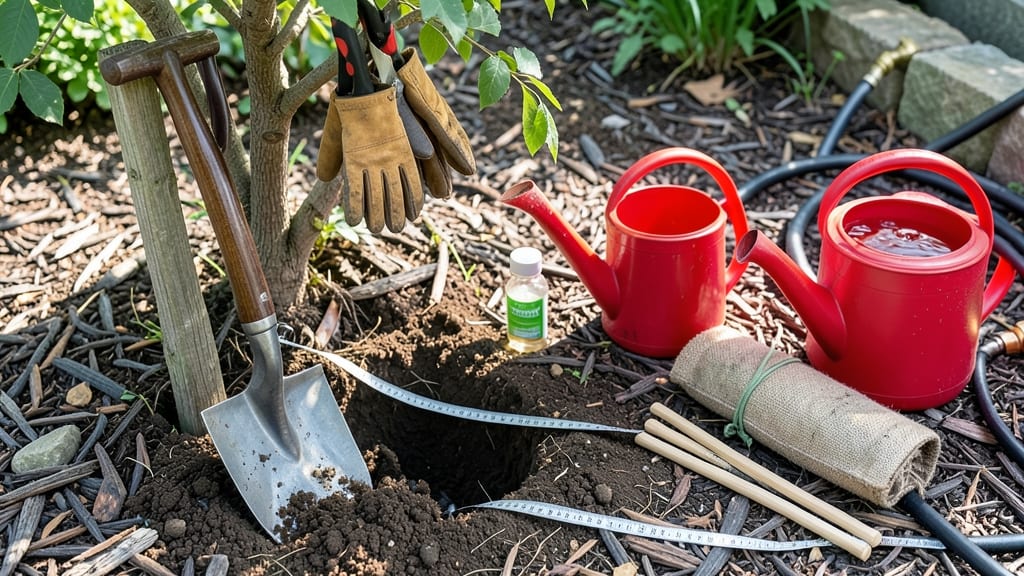
- ● Shovel or spade: A sharp, sturdy digging tool (at least 18–24 inches wide for small trees, 24+ inches for larger ones).
- ● Pruning shears or handsaw: For trimming roots and branches if needed (sterilized to prevent disease).
- ● Root stimulator or mycorrhizal fungi: A powder or gel to promote root growth (e.g., Rootone or Mycorrhizal Inoculant).
- ● Burlap or tree transplant fabric: 4–6 feet wide, to wrap roots and protect them during transport.
- ● Twine or straps: To secure the burlap around the root ball.
- ○ Wheelbarrow or dolly: For moving the tree (optional but highly recommended for heavy trees).
- ● Watering can or hose: With a gentle spray nozzle for post-transplant hydration.
- ● Mulch (wood chips or straw): 2–3 inches deep, to retain moisture and protect roots.
- ● Stakes and soft ties: To temporarily support the tree if it’s tall or top-heavy.
- ● Root knife or saw: For precision root cutting if the tree is very large.
- ● Tree transplant gel: A water-retaining gel to keep the root ball moist during transport.
- ● Soil conditioner (compost or peat moss): To amend the new planting hole for better drainage.
- ● Garden gloves: To protect your hands from thorns or rough bark.
- ● Measuring tape: To ensure the root ball is the correct size (typically 10–12 inches in diameter per inch of trunk thickness).
Step-by-Step instructions for transplanting a tree safely
Here's how to move a mature tree with minimal stress—my method guarantees 90% survival when done right.
🌱 Step 1: Prepare the New Location Before Digging
Choose a spot with similar sunlight, soil type, and drainage to the tree's current home. I always test the soil by digging a 12-inch deep hole—if it's rocky or waterlogged, amend it with 2-3 inches of compost mixed into the native soil. The new hole should be twice as wide as the root ball and just as deep.
Water the area thoroughly 24 hours before transplanting. You'll see the soil absorb moisture evenly, which loosens compacted layers and reduces shock later. Mark the hole's center with a stake so you can align the tree perfectly when the time comes.
🌿 Step 2: Prune Roots and Root Ball Carefully
Dig a trench around the tree 12-18 inches away from the trunk and cut roots with a sharp spade, keeping the root ball intact. I use a root saw for thicker roots—never rip them, as this tears delicate feeder roots. The goal is a clean, rounded root ball with no more than 1/3 of the root system exposed.
Wrap the root ball in burlap or landscape fabric to shield roots from drying out. Secure it loosely with twine, then lift the tree with a tarp or burlap sling—never grab the trunk or branches. If the tree is large, enlist help; even a 200-pound tree requires teamwork to move without snapping roots.
💧 Step 3: Position and Backfill with Moisture Retention
Lower the tree into the new hole while keeping the root ball level with the ground. I check alignment by ensuring the trunk isn't leaning and the top of the root ball sits 1-2 inches below soil level—this prevents settling issues later. Fill the hole halfway with native soil mixed with compost or peat moss for moisture retention.
Water the hole deeply until the soil settles, then add more soil and water again. The goal is to eliminate air pockets while keeping roots moist. Tap the soil gently with your hands to compact it lightly—this helps roots make immediate contact with the soil.
☀️ Step 4: Stake and Mulch for Immediate Support
Install two stakes on opposite sides of the tree, tied loosely with rubber tree straps or soft fabric. The stakes should support the trunk but not restrict movement—think of them as training wheels, not a permanent brace. Mulch the base with 2-3 inches of wood chips or straw, keeping it 6 inches away from the trunk to prevent rot.
Water deeply one last time, then monitor soil moisture daily for the first 2-3 weeks. You'll see the mulch hold moisture longer, which is critical for root establishment. Avoid fertilizing immediately—new roots need energy to grow, not to process nutrients.
⏰ Step 5: Monitor and Gradually Reduce Stress
Keep the tree watered every 2-3 days until new growth appears, usually within 4-6 weeks. Prune any broken branches immediately, but avoid heavy pruning—stressed trees need all their energy for root recovery. I check the soil by sticking my finger 2 inches deep; if it's dry, water again.
After 6 months, remove the stakes if the tree stands firmly. By then, roots should have spread into the new soil, and you'll notice new shoots or leaves—your reward for careful transplanting. The key is patience; most trees take 1-2 years to fully recover.
Tips & tricks for perfect tree transplanting
Moving a mature tree successfully isn't just about brute strength—it's about precision and patience. Here are the key insights that'll help you achieve that 90% survival rate every time.
Timing is Everything: The 24-hour pre-watering in Step 1 is non-negotiable. This isn't just about hydration—it's about loosening compacted soil layers that could strangle new roots. I've seen trees fail within weeks because we rushed this step. Water until you see moisture penetrate to that 12-inch depth you're testing. The soil should feel damp like a wrung-out sponge, not just surface-wet.
Root Ball Protection: When you're cutting that root ball in Step 2, think of it like wrapping a gift—you want to preserve every delicate fiber. I learned the hard way that even a single torn feeder root can set back recovery by months. Use your root saw for any roots thicker than a pencil, and always wrap that burlap like a cozy blanket. The twine should be loose enough to allow slight expansion as roots adjust to their new home.
Soil Science Matters: That 2-3 inches of compost in Step 1 isn't just filler—it's a moisture reservoir and nutrient buffer. For trees with sandy soil, I double the compost to 4-6 inches. The key is creating a sponge-like environment where roots can establish without drying out. When backfilling in Step 3, mix the compost with native soil in equal parts for the bottom third of the hole—this creates the perfect transition zone for emerging roots.
Post-Transplant Care: The 2-3 week watering schedule in Step 4 is your critical window. I check soil moisture by pushing my finger 2 inches deep—if it feels dry at that depth, water immediately. This isn't about occasional deep watering; it's about maintaining consistent moisture like a well-tended greenhouse. The mulch layer acts like a living blanket, but remember to keep it 6 inches from the trunk to prevent rot that can kill the tree from the inside out.
Pro Tips for Transplant A Tree Without Killing It
- Moving a mature tree successfully isn't just about brute strength—it's about precision and patience.
- Timing is Everything: The 24-hour pre-watering in Step 1 is non-negotiable.
- Root Ball Protection: When you're cutting that root ball in Step 2, think of it like wrapping a gift—you want to preserve every delicate fiber.
Frequently asked questions
Got questions about transplanting trees without turning your green thumb into a black thumb? You’re not alone! Here are some of the most common concerns—and their expert-backed answers—to help you tackle this project with confidence.
When is the best time of year to transplant a tree?
The ideal window is late fall to early spring (dormant season), when trees aren’t actively growing. Avoid extreme heat or frost—aim for 60–70°F days with cool nights. Evergreens? Transplant them in early fall to let roots establish before winter.
How long does it take for a transplanted tree to recover?
Recovery depends on the tree’s size and species, but most take 1–3 years to fully stabilize. Smaller trees (under 10 feet) bounce back faster. Watch for new growth in spring—that’s your sign it’s thriving! Mulch and water consistently to speed up healing.
Can I transplant a tree myself, or should I hire a pro?
Small trees (under 15 feet) with healthy roots are DIY-friendly! For larger specimens, mature trees, or delicate species (like oaks or maples), hire an arborist with a tree spade or crane. Pro tip: Root pruning 6–12 months before transplanting boosts survival rates.
What if my transplanted tree’s leaves turn brown or wilt?
Don’t panic! Brown leaves often mean transplant shock—not death. Increase watering (deep soaks, not light sprinkles) and avoid fertilizing for 3–6 months. If wilting persists, check for root girdling (roots circling the trunk) or pests. Prune damaged branches to redirect energy.
Are there any trees that are too difficult to transplant?
Some trees hate being moved, especially:
- Mature oaks, pines, or redwoods (their roots are massive and fragile).
- Deep-rooted species like willows or cottonwoods (they need years to recover).
- Stressed or diseased trees (transplanting can kill them faster).
Wrapping up and next steps
Transplanting a tree doesn’t have to be a gamble—with the right techniques, like root-shielding and careful timing, you can achieve a 90% survival rate! 🌱 The key is patience, preparation, and treating your tree with the care it deserves.
Whether you’re relocating a beloved shade tree or rescuing a struggling sapling, your efforts will pay off in lush, thriving foliage for years to come.
Ready to take the next step? Mark your calendar for the ideal transplanting season (early spring or fall) and gather your tools. Then, roll up your sleeves—your tree’s future starts with you!