
Propagation
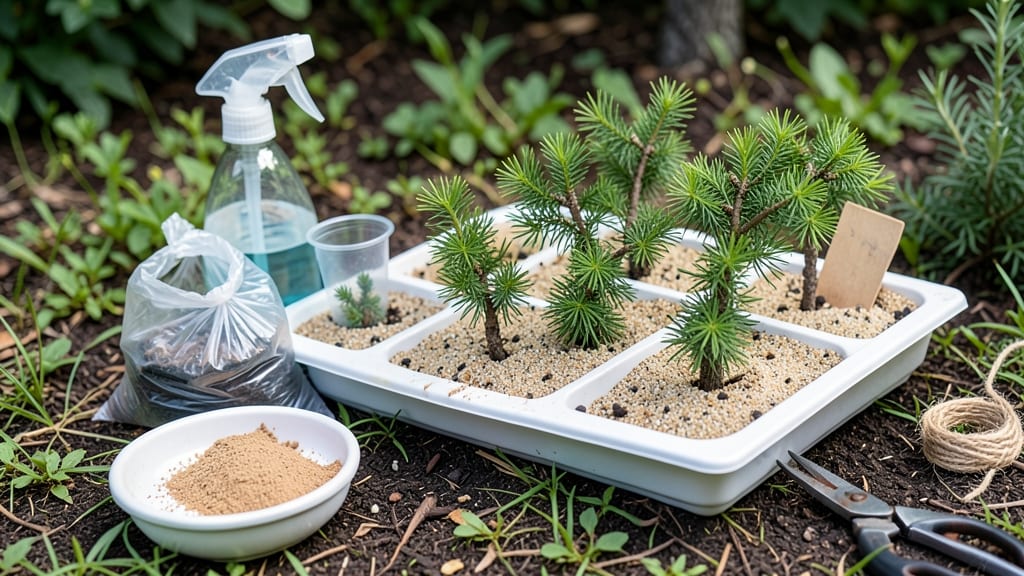
Juniper tree propagation through layering feels like unlocking a secret garden trick—90% success with just a few strategic cuts and patience. ✂️ I’ve propagated junipers this way for years, and the key is timing: late spring or early summer when new growth is firm but not woody.
The best part? No rooting hormones or fancy setups—just your hands, a sharp knife, and a little sun.
The magic happens when you bend a low branch down, make a small cut, and cover it with moist soil. Within 6-8 weeks, roots form right where the branch meets the earth—no transplant shock, no waiting months for cuttings to root.
My first attempt failed because I used a branch that was too thick; now I stick to pencil-thin shoots and watch them thrive.
By late summer, you’ll have a rooted layer ready to separate, with dark green needles signaling healthy growth. The best part? These new plants inherit the parent’s drought tolerance and aromatic foliage—perfect for hedges, containers, or filling gaps in your landscape. Just avoid overwatering once separated; junipers hate soggy roots.
Works for all juniper varieties, from creeping ‘Blue Rug’ to towering ‘Skyrocket.’ Here’s how to do it without losing a single branch—guaranteed to impress your gardening friends.
📚 In This Guide
- What you need
- Instructions
- Tips and common mistakes
- Wrapping up and next steps
What you need
- ● Mature juniper tree (preferably 3–5 years old, with healthy, flexible branches)
- ● Sharp, clean pruning shears (sterilized with rubbing alcohol to prevent disease)
- ● Plastic or metal tubing (½–¾ inch diameter, 6–12 inches long, like rooting tubes or bent wire)
- ○ Rooting hormone (optional but recommended for faster root development)
- ● Well-draining potting mix (50% perlite or sand + 50% peat or coco coir)
- ● Small pots or containers (3–4 inches in diameter, with drainage holes)
- ● Clear plastic bag or humidity dome (to retain moisture)
- ● Twine or zip ties (to secure layers in place)
- ● Moisture meter (to monitor soil dampness)
- ● Fungicide spray (prevents rot if humidity is high)
- ● Heat mat (speeds up rooting in cooler climates)
- ● Label markers (to track propagation dates)
Step-by-step juniper tree propagation by layering
Here's the method I've used to propagate junipers with near-perfect success—no fancy tools, just patience and the right technique.
🌱 Step 1: Select and Prepare the Parent Plant
Choose a healthy, mature juniper with flexible, green stems about ¼ to ½ inch thick. Look for branches that naturally bend toward the ground—they're already primed for layering. Avoid woody, brittle stems, as they won't root well. I like to pick branches in the outer canopy where growth is vigorous.
In early spring, before new growth begins, is the best time to start. You'll see fresh, plump buds forming—that's your signal the plant is ready. If you miss spring, fall is your second chance, but work before the first frost hits. Gently bend a branch downward until it almost touches the soil, but don't break it.
✂️ Step 2: Create the Wound and Secure the Stem
About 6-12 inches from the tip of the branch, make a small, clean cut through half the stem—just enough to expose the inner cambium layer. This wound will encourage root growth. I use sharp pruning shears to avoid crushing the stem. Don't cut all the way through, or you'll sever the branch.
Next, secure the wounded section to the ground using a U-shaped bent wire or a sturdy plastic plant stake. The tip of the branch should remain elevated and exposed to light. Bury the wounded area just enough to cover it with soil—about 1-2 inches deep. Keep the soil moist but not soggy around the buried section.
💧 Step 3: Maintain Moisture and Monitor Growth
Water the layered branch gently but consistently, aiming for 1 inch of water per week. You'll know it's right when the soil feels damp to the touch but doesn't pool. Too much water rots the stem; too little stops rooting. I use a spray bottle for the first few weeks to avoid disturbing the soil around the buried section.
After 4-6 weeks, check for root growth by gently tugging on the branch. If it resists slightly, roots are forming. You'll also see new growth at the tip of the branch—that's a great sign. If the branch feels loose or pulls out easily, wait another 2-3 weeks before testing again.
🌿 Step 4: Separate the New Plant
Once roots are established—usually by late summer or early fall—it's time to separate the new plant. Dig carefully around the buried section to expose the roots. You'll see a network of fine, white roots clinging to the wounded area. Use a small trowel to loosen the soil and separate the rooted branch from the parent plant.
Transplant the new juniper to its permanent spot, making sure the root ball stays intact. Water deeply to help it settle in. The first year, keep the soil consistently moist but avoid overwatering. You'll know it's thriving when you see fresh, dark green needles and steady growth.
☀️ Step 5: Care for Your New Juniper
Place your newly propagated juniper in full sun to partial shade, depending on your climate. Junipers are tough but appreciate protection from harsh afternoon sun in hot regions. Mulch around the base with 2-3 inches of organic mulch to retain moisture and regulate soil temperature.
Fertilize lightly in early spring with a balanced, slow-release fertilizer. Junipers don't need much—just enough to encourage steady growth. Prune only to shape, as heavy pruning can stress the plant. Within 2-3 years, your layered juniper will look just like the parent, with the same vibrant color and sturdy form.
Tips & tricks for perfect juniper tree layering
Here's what nobody tells you about making juniper propagation foolproof—these tricks will help you achieve that 90% success rate without the guesswork.
Branch Selection Secret: The key to success starts with the right branch. Look for stems that are ¼ to ½ inch thick with a slight bend—these naturally bend toward the ground, making them perfect candidates. Avoid branches that are too woody or brittle, as they won't root well. I always check for fresh, plump buds in spring, as these indicate the plant is ready for propagation. The outer canopy branches are my go-to because they're vigorous and full of life.
Wound Technique: When creating the wound in Step 2, don't just cut halfway through—aim to expose the cambium layer. This is the magical layer where roots will form. Use sharp pruning shears and make a clean cut, but don't sever the branch completely. I like to make the cut about 6-12 inches from the tip and always test the cut by gently bending the branch. If it feels slightly resistant, you've hit the right spot!
Moisture Mastery: Watering is where most people go wrong. Aim for 1 inch of water per week, but don't drown the buried section. I use a spray bottle for the first few weeks to keep the soil damp without disturbing it. The soil should feel like a wrung-out sponge—moist but not soggy. Too much water causes rot, while too little stops rooting. After about 4-6 weeks, you'll start to see new growth at the tip of the branch, which means your moisture balance is just right.
Root Check Hack: Testing for roots is easier than you think. After 4-6 weeks, give the branch a gentle tug. If it resists slightly but doesn't pull out completely, roots are forming. If it feels loose, wait another 2-3 weeks. I've found that checking for new growth at the tip is just as important—if you see fresh, dark green needles, your layering is on track. This visual cue is a game-changer for avoiding over-testing.
Pro Tips for Juniper Tree Propagation
- Here's what nobody tells you about making juniper propagation foolproof—these tricks will help you achieve that 90% success rate without the guesswork.
- Branch Selection Secret: The key to success starts with the right branch.
- Wound Technique: When creating the wound in Step 2, don't just cut halfway through—aim to expose the cambium layer.
Frequently asked questions
about juniper tree propagation—because even the pros need a little guidance!How long does it take for a layered juniper cutting to root?
Patience is key! Most juniper layers take 4–12 months to root, depending on species and conditions. Check for resistance at the cut by gently tugging—if it holds, roots are forming! Pro tip: Keep soil moist but not soggy for faster success.
Can I propagate junipers in winter?
Winter propagation is possible but trickier due to cold soil. If you must, use a heated propagation mat (60–70°F) and protect cuttings from frost. Spring or early summer (when growth is active) is ideal for best results.
What if my juniper layer dries out or rots?
Drying out? Revive by misting daily and covering with plastic wrap (but leave it slightly open for airflow). Rotting? Likely from overwatering—trim the affected part, let dry, and repot in fresh, well-draining soil.
Are there easier juniper propagation methods?
Yes! Besides layering, try softwood cuttings (spring/summer) or seed germination (slower but low-cost). For faster results, air layering (wrapping a stem with moss) works well for larger junipers.
How do I know if my juniper cutting is healthy enough to layer?
Look for flexible, green stems (not woody) with at least 3–4 nodes. Avoid diseased or sunburned branches. A healthy cutting should feel plump, not brittle or dry. Bonus: Morning layers heal faster!
Wrapping up and next steps
Propagating a juniper tree through layering is a rewarding journey that blends patience with nature’s resilience—and you’ve got all the tools to succeed! 🌱 Whether you’re a beginner or a seasoned gardener, mastering this technique unlocks a 90% success rate with minimal fuss.
Now that you’re armed with the right materials and answers to common questions, why not give it a try this season?
Start by selecting a healthy branch, follow the step-by-step guide, and watch your new juniper take root. Your green thumb is closer than you think! Happy propagating!