
Container Gardens
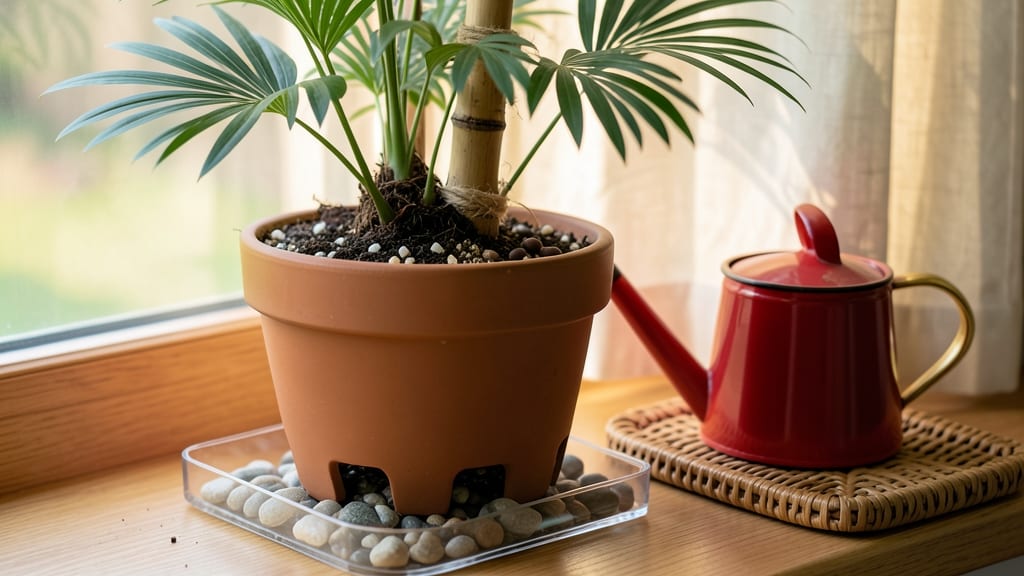
Caring for palm trees in pots means you can enjoy their tropical beauty anywhere—even in apartments or small yards. 🌴 The key is mimicking their natural conditions: well-draining soil, bright indirect light, and consistent moisture without soggy roots.
I’ve kept palms thriving for years using these simple but critical adjustments that most gardeners miss.
Start with the right pot—one with drainage holes and enough space for roots to spread (at least 12 inches wide for dwarf palms, bigger for larger varieties). Use a fast-draining mix of potting soil, perlite, and sand to prevent root rot, the #1 killer of potted palms.
Overwatering is the silent enemy here, so let the top 1-2 inches of soil dry between waterings.
With proper light and fertilization (balanced palm fertilizer every 6-8 weeks in growing season), your palm will reward you with glossy fronds and new growth year-round. The trick is consistency—palms hate sudden changes in water or temperature. Even indoor palms need bright light near a south- or west-facing window.
For overwintering, move potted palms indoors before temps drop below 50°F, where they’ll stay dormant but healthy. Watch for yellowing fronds (usually overwatering) or brown tips (low humidity), and adjust care accordingly. With these adjustments, your potted palm becomes a low-maintenance tropical statement piece that lasts for years.
📚 In This Guide
- What you need
- Instructions
- Tips and common mistakes
- Wrapping up and next steps
What you need
- ● Container: Minimum 12-inch diameter for dwarf palms (e.g., Chamaedorea), 18+ inches for larger varieties (e.g., Kentia or Areca).
- ● Material: Terracotta (breathable) or plastic (retains moisture). Ensure drainage holes!
- ● Potting Mix: 50% peat moss or coconut coir, 30% perlite/pumice, 20% sand or orchid bark (well-draining and slightly acidic, pH 5.5–6.5).
- ● Fertilizer: Slow-release palm-specific granules (e.g., Osmocote or Miracle-Gro for palms).
- ● Liquid fertilizer (e.g., 20-20-20 or fish emulsion) for monthly feeding (spring–fall).
- ● Tools: Trowel or small shovel
- ● Watering can with rose attachment (for gentle watering)
- ● Spray bottle (for humidity-loving species)
- ● Support stake (bamboo or metal, 1–2 inches wider than the pot) for top-heavy palms.
- ● Mulch: Orchid bark or pine needles to retain moisture and mimic tropical soil.
- ● Humidity tray: A pebble tray with water to boost humidity for indoor palms.
- ● Grow lights: LED full-spectrum bulbs (12–14 hours/day) if placing indoors with low light.
- ● Palm-specific pruners: Sterilized, sharp shears for trimming dead fronds (avoid cutting live fronds!).
- ● Soil test kit: To monitor pH and nutrient levels every 6 months.
Step-by-Step instructions for growing palm trees in containers
Here’s how I keep my potted palms lush year-round—no guesswork, just proven techniques.
🪴 Step 1: Choose the Right Pot and Drainage
Palms need space to grow, so pick a container at least 12 inches wide and 12-18 inches deep—deeper is better for root expansion. I opt for unglazed terra cotta because it breathes, preventing root rot from trapped moisture. If using plastic, add 4-6 drainage holes at the bottom to mimic natural soil aeration.
Place a 2-3 inch layer of gravel or broken pottery in the bottom before adding soil. This creates a reservoir for excess water while keeping roots elevated—critical for avoiding soggy conditions. If your pot lacks feet, add a layer of 1 inch of gravel on top of the soil surface to improve airflow around the base.
🌱 Step 2: Use Fast-Draining, Airy Soil Mix
Never use garden soil—it compacts and suffocates roots. Instead, blend 60% premium potting mix with 30% perlite or pumice and 10% coarse sand. This combination mimics the loose, well-draining conditions palms thrive in. I like to add a handful of orchid bark for extra aeration and a slow-release palm fertilizer at planting time.
Fill the pot halfway, then tap it gently on the table to settle the mix without compacting it. The soil should feel light and fluffy—if it holds its shape when squeezed, add more perlite. Avoid pre-moistening the mix; instead, water it in after planting to prevent air pockets.
☀️ Step 3: Plant and Position for Optimal Light
Remove the palm from its nursery pot and loosen the roots if they’re circling. Place it in the center of your container, then backfill with soil, pressing lightly to eliminate gaps. Leave 1-2 inches of space between the soil surface and the pot rim—this prevents spills and allows for watering without overflow.
Palms crave bright, indirect light—think filtered sun through sheer curtains or dappled shade outdoors. Avoid harsh midday sun, which scorches leaves, especially for tropical varieties like the Kentia or Areca. If indoors, position near an east- or west-facing window. You’ll know the light is right when fronds stay vibrant green and new growth emerges consistently.
💧 Step 4: Water Deeply and Maintain Consistent Moisture
Water thoroughly until it drains from the bottom, then wait until the top 2 inches of soil feel dry before watering again. Overwatering is the #1 killer of potted palms—yellowing fronds or mushy stems are red flags. I use a self-watering pot in summer to keep moisture steady without soggy roots, but always empty the reservoir after 24 hours to prevent stagnation.
In winter, reduce watering to every 7-10 days, as cooler temps slow evaporation. Mist the fronds weekly to boost humidity, especially if your home has dry air. A hygrometer helps track humidity—aim for 50-60% for tropical palms. If leaves brown at the tips, it’s a sign of low humidity, not overwatering.
✂️ Step 5: Fertilize and Prune for Long-Term Health
Feed every 4-6 weeks during spring and summer with a balanced liquid fertilizer (10-10-10) diluted to half strength. I switch to a low-nitrogen, high-potassium formula in fall to encourage root growth and prepare for dormancy. Flush the soil with water every 3 months to prevent salt buildup—just run water through until it exits the drainage holes.
Prune only when necessary: Remove yellow or brown fronds at the base with clean, sharp shears, cutting as close to the trunk as possible. Never prune more than one-third of the fronds at once—this stresses the plant. If a frond is healthy but drooping, it’s likely thirsty, not dead. Wait a few weeks before pruning to confirm.
Tips & tricks for perfect container-grown palm trees
Between us, the difference between a struggling potted palm and a thriving tropical showstopper often comes down to these overlooked details.
Drainage Layer Depth: That 2-3 inch layer of gravel in Step 1 isn't just about drainage—it's about creating an air gap that prevents root suffocation. I've seen palms drown because people skipped this step entirely. For extra insurance, especially in plastic pots, add a second layer of broken terracotta shards above the gravel—they create even more airflow channels.
Soil Mix Texture Test: When mixing your soil in Step 2, you're aiming for a texture that resembles "wet sand"—not compacted dirt. Here's my trick: After blending your 60/30/10 mix, grab a handful and squeeze. If it holds its shape, add more perlite. If it crumbles completely, you're good. This test saves you from the frustration of waterlogged soil later.
Light Positioning Hacks: For Step 3, if your east-facing window doesn't get enough light, try this: Place your palm on a rotating plant stand (yes, they exist!) and turn it 180 degrees weekly. This ensures all fronds get equal exposure. For indoor growers, fluorescent grow lights on a timer (12 hours daily) work wonders for supplementing natural light during winter months.
Watering Schedule Adjustments: The 7-10 day winter watering guideline in Step 4 assumes average indoor humidity. If your home has dry air (like most do in winter), reduce to every 10-14 days. I test soil moisture by sticking my finger 2 inches deep—if it feels like a slightly damp sponge, it's ready. For extra humidity, place your pot on a tray filled with pebbles and water (just keep the pot elevated so roots don't sit in water).
Pro Tips for Palm Tree Care In Pots
- Between us, the difference between a struggling potted palm and a thriving tropical showstopper often comes down to t...
- Drainage Layer Depth: That 2-3 inch layer of gravel in Step 1 isn't just about drainage—it's about creating an air ga...
- Soil Mix Texture Test: When mixing your soil in Step 2, you're aiming for a texture that resembles "wet sand"—not com...
Frequently asked questions
Got questions about keeping your potted palm thriving?
Here are answers to the most common concerns—from repotting to winter care—so you can enjoy lush, green foliage all year long!
How often should I repot my palm tree?
Repot your palm every 2–3 years or when roots start circling the pot. Spring is the best time—avoid winter stress! Choose a container just 2–3 inches larger in diameter and ensure it has drainage holes. Pro tip: Refresh the soil mix with fresh potting soil to replenish nutrients.
How do I protect my potted palm in winter?
Most potted palms thrive in USDA Zones 9–11, but if temps drop below 40°F (4°C), move them indoors near a bright window or wrap the pot in bubble wrap for insulation. Reduce watering—overly wet soil can rot roots in cold weather. Bonus: A humidifier nearby helps mimic tropical conditions!
Why are the tips of my palm fronds turning brown?
Brown tips usually mean underwatering or fluoride buildup from tap water. Water deeply when the top 1–2 inches of soil dry out, and use rainwater or distilled water if your tap water is hard. Avoid letting the palm sit in standing water—drainage is key!
Can I grow a palm tree in a small pot long-term?
Palms need room to grow, so small pots (under 12 inches wide) will stunt their development. If space is limited, opt for dwarf varieties like the Pygmy Date Palm or Parlor Palm, which adapt better. Prune old fronds regularly to encourage new growth and keep the plant healthy.
What pests should I watch for in potted palms?
Keep an eye out for spider mites, mealybugs, and scale insects, which love palm fronds. Wipe leaves with a soapy water cloth (1 tsp mild soap per gallon of water) for minor infestations. For severe cases, use neem oil or insecticidal soap. Prevent pests: Inspect new plants before bringing them home!
Wrapping up and next steps
Caring for a palm tree in a pot is totally doable—just remember: drainage, sunlight, and patience are your best friends! 🌴 With the right container, soil, and a little TLC, your tropical beauty can thrive year-round, even in smaller spaces.
Now that you’ve got the know-how, why not pick your favorite variety and get planting?
💡 Pro tip: Snap a photo of your palm’s progress and share it—your green thumb will inspire others!