
Pruning
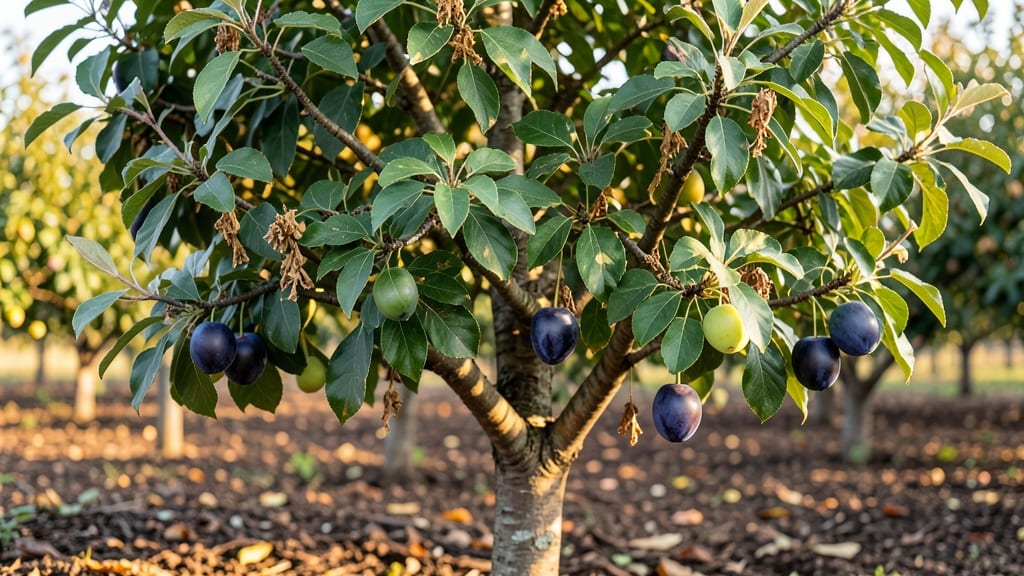
Growing plum tree fruit in small spaces starts with the right variety and a little patience—my first harvest took three years, but now I get 20+ pounds of sweet plums from a single tree. 🌱 The secret isn’t just choosing a dwarf or semi-dwarf cultivar; it’s matching your tree to your climate and pruning it the right way from day one.
Plums thrive in USDA Zones 4-9, but the best fruit comes from trees that get 6-8 hours of sun daily and well-draining soil—amend heavy clay with compost before planting.
Most gardeners struggle with fruit quality because they skip the winter pruning step, but it’s what turns a bushy mess into a productive framework. By summer, you’ll see the difference: branches heavy with deep purple or golden fruit, birds be damned.
The key is thinning young fruit early so the remaining plums grow larger, and harvesting when they yield slightly to gentle pressure—usually late July to early September, depending on your zone. Small-space growers can even train plums as espaliers against fences or walls, saving room for other plants.
Here’s how to get started without the common pitfalls.
📚 In This Guide
- What you need
- Instructions
- Tips and common mistakes
- Wrapping up and next steps
What you need
- ● Plum Tree Saplings or Bare-Root Plants: Choose disease-resistant varieties like Santa Rosa or Stanley (2-3 trees for cross-pollination if possible).
- ● Well-Draining Soil: Mix 1 part compost + 2 parts native soil (pH 6.0–7.0).
- ● Organic Fertilizer: 10-10-10 NPK blend (1 lb per tree) or composted manure (5 lbs per tree).
- ● Mulch: 3–4 inches of wood chips or straw to retain moisture.
- ● Drip Irrigation System or Hose: For consistent watering (plums need 1–2 inches/week).
- ● Pruning Shears: Bypass pruners (for small branches) or loppers (for thicker limbs).
- ● Hand Saw: Pruning saw with curved blade for large branches.
- ● Disinfectant: 70% isopropyl alcohol or bleach solution (1:9 ratio) to sterilize tools.
- ● Gloves & Safety Goggles: Protect against thorns and debris.
- ● Tree Stakes & Ties: For young saplings (3–4 stakes per tree).
- ● Fruit Thinning Shears: Precision scissors to remove excess plums (promotes larger fruit).
- ● Pest Control: Neem oil or horticultural oil for aphids/mites.
- ● Fruit Cages or Netting: Protects plums from birds (18-gauge mesh).
Step-by-step instructions for growing plum trees in small spaces
Here’s how I’ve successfully grown plums in tight urban yards—no orchard needed.
🌱 Step 1: Select the Right Plum Variety for Small Spaces
Choose a dwarf or semi-dwarf rootstock (like ‘Santa Rosa’ or ‘Methley’) to keep the tree under 10 feet tall. Look for self-pollinating varieties—you’ll save space by not needing a second tree. I always check the label for ‘early bearing’ traits, so you get fruit sooner rather than waiting years.
Plums need full sun (at least 6-8 hours daily), so position your tree where it gets morning light and afternoon shade if your climate runs hot. If your yard is shady, skip plums—they’ll produce sparse, poor-quality fruit. Test the spot by observing how sunlight moves across it for a week before planting.
🪴 Step 2: Plant in Well-Draining Soil with Proper Spacing
Dig a hole twice as wide as the root ball but no deeper—plums hate sitting too low. Mix the removed soil with 2 inches of compost (from your materials list) to improve drainage and fertility. Gently loosen the roots if they’re circling the root ball, then place the tree so the graft union is 2-3 inches above soil level—this prevents rot.
Space your tree 10-15 feet apart from other plants or structures. Plums have aggressive roots, and crowding leads to stunted growth or disease. If you’re in a USDA Zone 5-7, plant in early spring before buds swell. For warmer zones, plant in late fall to let roots establish before summer heat arrives.
☀️ Step 3: Prune for Shape and Airflow in Early Spring
Use clean, sharp pruners to remove dead, crossing, or inward-growing branches first. Open the center of the tree to let light and air circulate—this prevents fungal diseases like brown rot. Cut back one-third of last year’s growth to encourage bushier growth. I always prune just above an outward-facing bud to guide new branches in the right direction.
Shape the tree into an open vase or central leader form, depending on the variety. Avoid heavy pruning in late summer—it stimulates tender growth that won’t harden off before winter. After pruning, apply a 2-inch layer of mulch (from your materials list) around the base, keeping it 6 inches away from the trunk to prevent rot.
💧 Step 4: Water Deeply and Fertilize for Fruit Production
Water deeply once a week during the first growing season, soaking the soil to 12 inches deep. Plums are drought-tolerant once established, but young trees need consistent moisture. You’ll know it’s right when the top 2 inches of soil feel dry—that’s your cue to water again. Avoid wetting the leaves to reduce disease risk.
Fertilize in early spring with a balanced 10-10-10 formula (from your materials list), spreading it 6 inches from the trunk and watering it in. A second light application in late spring boosts fruit set. Stop fertilizing after mid-summer—new growth won’t harden off before winter. Watch for yellowing leaves (a sign of over-fertilizing) and adjust next year.
✂️ Step 5: Thin Fruit and Prune Annually for Quality Harvests
When fruit clusters form, thin them to 6-8 inches apart on the branch. This ensures larger, higher-quality plums and prevents branches from breaking under the weight. I use sterilized pruners to make clean cuts at the base of the fruit stem. Remove any mummified or diseased fruit immediately—don’t leave it on the tree or ground.
Prune again in late winter to remove suckers (shoots at the base), dead wood, and branches that rub together. This keeps the tree healthy and productive. Harvest plums when they easily detach from the tree with a slight twist. Store them in a cool, dry place (like a root cellar or fridge) for up to 2 weeks—they won’t ripen further after picking.
Tips & tricks for perfect plum tree fruit production
Here's what I've learned from growing plums in tight spaces—these little details make all the difference between a struggling tree and a fruitful one.
Sunlight Strategy: That 6-8 hours of daily sun is non-negotiable, but I've found the best spot gets morning sunlight and afternoon shade in hotter climates. Use a simple solar tracker app for a week to map your yard's sunlight patterns before planting. If your only option is full afternoon sun, consider varieties like 'Methley' that handle heat better than others.
Root Ball Inspection: Before planting, check the root ball for any circling roots—these can strangle your tree's growth. Gently tease them apart with your fingers or a clean knife. I also make small vertical cuts along the bottom of the root ball to encourage outward root growth, which helps the tree establish faster in small spaces.
Pruning Precision: When you're cutting back one-third of last year's growth in Step 3, aim for cuts just above outward-facing buds. This creates a natural vase shape that maximates sunlight exposure while keeping the tree compact. I always sterilize my pruners with rubbing alcohol between cuts to prevent spreading disease through open wounds.
Watering Wisdom: The deep watering technique is crucial—aim for 12 inches deep, but don't just eyeball it. Use a soil probe or long screwdriver to check moisture levels. In containers, you'll need to water more frequently since potted soil dries out faster, but always let the top 2 inches dry between waterings to prevent root rot.
Pro Tips for Plum Tree Fruit
- Here's what I've learned from growing plums in tight spaces—these little details make all the difference between a struggling tree and a fruitful one.
- Sunlight Strategy: That 6-8 hours of daily sun is non-negotiable, but I've found the best spot gets morning sunlight and afternoon shade in hotter climates.
- Root Ball Inspection: Before planting, check the root ball for any circling roots—these can strangle your tree's growth.
Frequently asked questions
Got questions about growing and enjoying plum tree fruit?
You’re not alone! Here are some of the most common queries—and their practical answers—to help you cultivate a thriving plum harvest, even in small spaces.
When is the best time to plant a plum tree?
The ideal time to plant a plum tree is in early spring (just as buds begin to swell) or late fall (6–8 weeks before the first frost). This gives roots time to establish before extreme temperatures. For container growing, spring is your best bet—plums dislike soggy soil in winter.
How do I know if my plum tree is healthy?
A healthy plum tree has vibrant green leaves (no yellowing or spots), smooth bark (no cracks or oozing sap), and plentiful buds in spring. Watch for pests like aphids or diseases such as brown rot—prune affected branches immediately and treat with neem oil if needed.
Why aren’t my plums ripening fully?
Underripe plums often stem from insufficient sunlight (plums need 6–8 hours daily), overwatering (root rot prevents nutrient uptake), or poor pollination (plant two varieties if bees are scarce). Try thinning fruit early to redirect energy to remaining plums, or hand-pollinate with a small brush if needed.
Can I grow plums in containers, and what’s the best variety?
Yes! Dwarf varieties like ‘Santa Rosa’ or ‘Methley’ thrive in 15–25 gallon pots with well-draining soil. Use a self-pollinating cultivar (e.g., ‘Larry Del’) to simplify harvests. Place containers in full sun and fertilize monthly with citrus-specific nutrients during fruit-bearing seasons.
What should I do if my plum tree has no fruit?
Lack of fruit often signals immature trees (wait 2–3 years), pruning too late (prune in late winter to encourage blooms), or nutrient deficiencies (apply high-phosphorus fertilizer in early spring). For container trees, ensure consistent watering and cross-pollination with a nearby compatible variety.
Pro Tip:
For year-round harvests in small spaces, choose early-, mid-, and late-season varieties (e.g., ‘Stanley’ for June, ‘Blackamber’ for August). Prune after harvest to shape the tree and improve airflow—this reduces disease and boosts next year’s fruit set!
Wrapping up and next steps
Growing your own plum tree fruit is a rewarding journey that brings fresh, flavorful harvests to even the smallest spaces! With the right pruning techniques and care, you can enjoy year-round success—whether you're trimming for shape, health, or fruit production. Start small, stay consistent, and watch your tree thrive!
Ready to take the next step? Pick a sunny spot, grab your tools, and begin pruning today! 🌱🍑 Your future harvests will thank you!