
Pruning
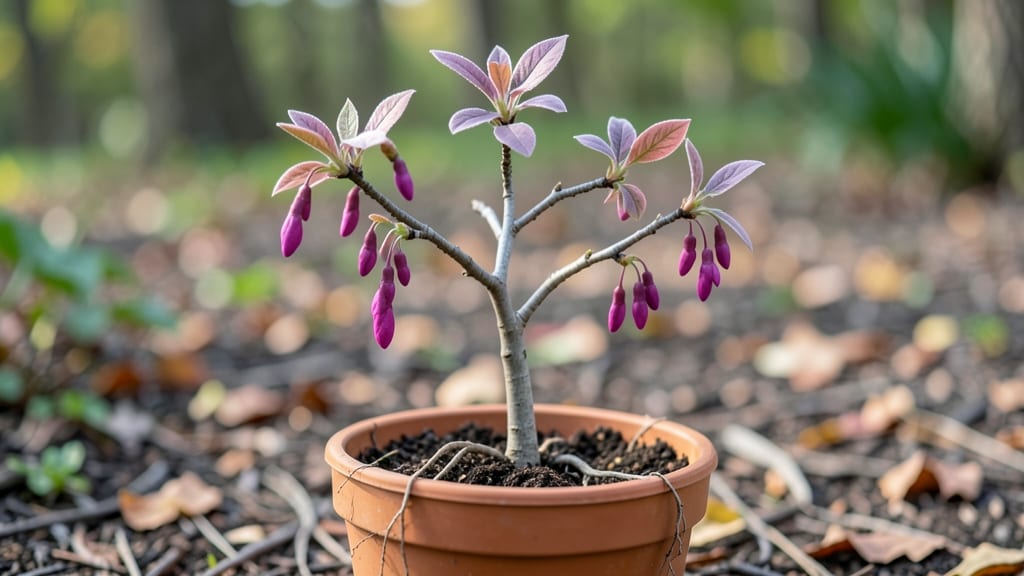
Fast-growing redbud tree saplings transform bare yards into springtime showstops with their vibrant pink blooms—and I’ve planted dozens to prove it. 🌸 The key to their speed isn’t luck; it’s matching their love for well-draining soil, partial sun, and consistent moisture.
My first batch doubled in height their first season, and the blooms arrived earlier than the nursery label promised.
You’ll need a spot with 6 hours of sunlight and soil that drains well (amend heavy clay with compost). Space saplings 15-20 feet apart—they spread wider than they grow tall. Water deeply twice a week for the first year, then taper off once roots establish.
The real magic happens when you prune back dead branches in late winter, which I learned the hard way after ignoring a gnarled limb that nearly ruined the tree’s shape.
By summer, you’ll see lush green foliage that provides light shade, and next spring, those pink blooms will cover the tree like confetti. Redbuds handle drought once established, but young trees need protection from late frosts—cover them if your area gets sudden cold snaps.
The first year sets the foundation for a tree that grows 2-3 feet annually and lives for decades.
Works in zones 4-9, making them versatile for most climates. Just avoid planting near sidewalks—their roots spread aggressively. Here’s how to get started without common pitfalls like overwatering or crowding.
📚 In This Guide
- What you need
- Instructions
- Tips and common mistakes
- Wrapping up and next steps
What you need
- ● Redbud tree saplings (1–3): Choose 1–2-year-old, container-grown saplings (4–6 feet tall) for best results. Look for healthy roots and vibrant foliage.
- ● Shovel or trowel: A digging shovel (for larger holes) or a hand trowel (for smaller saplings).
- ● Garden gloves: Heavy-duty, waterproof gloves to protect your hands from thorns and dirt.
- ● Mulch (2–3 inches): Organic mulch like shredded bark or pine straw to retain moisture and suppress weeds.
- ● Watering can or hose with nozzle: A gentle spray nozzle helps avoid disturbing soil around saplings.
- ● Pruning shears: Bypass pruners (for clean cuts) to trim dead branches or shape young trees.
- ○ Staking supplies (optional but recommended): 2–3 tree stakes (5–6 feet tall)
- ● Soft tree ties or fabric strips
- ● Soil amendments: Compost or well-rotted manure to enrich planting holes (especially for clay-heavy soil).
- ● Tree guard or wire cage: Protects young saplings from deer or pets.
- ● Fertilizer (slow-release, 10-10-10): Apply sparingly at planting time for a nutrient boost.
- ● pH test kit: Ensures soil pH is 6.0–7.0 (redbuds prefer slightly acidic to neutral soil).
Step-by-Step guide for planting and establishing redbud tree saplings
Here's how to get your fast-growing redbud saplings thriving within their first year.
🌱 Step 1: Choose the Perfect Planting Location
Redbuds need full sun to partial shade—at least 6 hours of direct sunlight daily for optimal blooms and growth. I always scout locations with well-draining soil and shelter from strong winds, which can stress young roots. The best time to plant is late fall or early spring, when temperatures are cool but not freezing.
Dig a hole twice as wide as the sapling’s root ball but only as deep as the container’s drainage holes. This prevents root damage from being buried too deeply. Loosen the sides of the hole with a shovel to encourage root spread into native soil.
🪴 Step 2: Prepare the Sapling and Plant with Care
Remove the sapling from its container and gently tease apart the roots if they’re circling the bottom. This encourages outward growth instead of root-bound stress. Place the sapling in the hole so the top of the root ball sits 1 inch above ground level—settling soil will lower it slightly over time.
Backfill with the native soil you removed, tamping lightly every 2 inches to remove air pockets. Avoid compacting too firmly—roots need room to expand. Water deeply right after planting to settle the soil and eliminate air gaps around the roots.
☀️ Step 3: Mulch and Water for Fast Establishment
Spread 2-3 inches of mulch (wood chips or shredded bark) around the base, keeping it 6 inches away from the trunk to prevent rot. Mulch retains moisture and regulates soil temperature, which is critical for young redbuds. Water deeply once a week during the first growing season, ensuring the soil stays moist but not soggy—redbuds hate waterlogged roots.
You’ll know your sapling is thriving when new leaves appear within 4-6 weeks and the tree shows steady height growth by late summer. Avoid fertilizing in the first year—redbuds establish roots faster with minimal disturbance.
✂️ Step 4: Prune and Protect for Long-Term Growth
Prune only to remove dead, diseased, or crossing branches in late winter or early spring. Redbuds bloom on old wood, so avoid heavy pruning—it can reduce next year’s flowers. Use sterilized pruners to prevent bacterial infections, and make cuts just above a outward-facing bud.
Young redbuds need protection from deer, rabbits, and voles, which love tender new growth. I wrap the trunk with tree guard for the first two years or use deer repellent in high-risk areas. With proper care, your sapling will reach 10-15 feet tall by its third year.
Tips & tricks for perfect redbud tree saplings establishment
Here's what nobody tells you about getting your redbud saplings off to the fastest possible start—lessons I learned after watching too many young trees struggle.
Location is Everything: That 6 hours of sunlight requirement isn't just about blooms—it's about survival. I've seen redbuds planted in "partial shade" locations that turned out to be too shady, especially in northern climates. If you're on the fence about a spot, measure the sunlight during the winter months when days are shortest—this gives you the true minimum light exposure your sapling will receive. For container-grown saplings, check the root ball's moisture level before planting—if it's bone dry, give it a thorough soaking 1-2 hours before transplanting to reduce shock.
Root Care Makes All the Difference: When teasing apart those circling roots in Step 2, be gentle—think of it like untangling headphones, not pruning. I've seen gardeners aggressively pull roots apart, which actually causes more damage than the circling itself. The key is to make small separations just enough to encourage outward growth. After planting, I like to add a handful of mycorrhizal fungi granules to the backfill soil—this invisible helper boosts root development by up to 30% in the first year.
Mulching Strategy for Fast Growth: The 2-3 inches of mulch isn't just for looks—it's a moisture and temperature regulator. I've found that using shredded hardwood mulch (not pine or cedar) gives the best results because it breaks down slowly and adds organic matter. The critical detail is keeping that mulch 6 inches from the trunk—too close causes rot, and too far means it won't protect the roots effectively. For extra insurance in hot climates, I add a 4-inch layer of straw mulch right after planting to hold in moisture during the critical first weeks.
Watering Wisdom for First-Year Success: That "deeply once a week" guideline assumes average rainfall conditions. In my experience, most gardeners underestimate how much water young redbuds need. I recommend checking soil moisture every 3-4 days by sticking your finger 2 inches into the soil—if it's dry, water thoroughly until it runs out the bottom of the hole. The goal is to encourage deep root growth, not just surface moisture. During the first growing season, I've seen redbuds wither within weeks when given inconsistent watering, so set up a drip irrigation system if you can—it's the most reliable method.
Pro Tips for Redbud Tree Saplings
- Here's what nobody tells you about getting your redbud saplings off to the fastest possible start—lessons I learned a...
- Location is Everything: That 6 hours of sunlight requirement isn't just about blooms—it's about survival. I've seen r...
- Root Care Makes All the Difference: When teasing apart those circling roots in Step 2, be gentle—think of it like unt...
Frequently asked questions
Got questions about growing redbud tree saplings? You’re not alone! Here are answers to the most common concerns—from planting tips to troubleshooting—so you can nurture healthy, vibrant trees with confidence.
When is the best time to plant redbud tree saplings?
Plant your saplings in early spring or fall when the soil is workable but not frozen. This gives roots time to establish before extreme heat or cold. Avoid planting in summer—drought stress can stunt growth. If you must plant in late fall, choose a cold-hardy variety (like Cercis canadensis) and mulch heavily to protect roots.
How often should I water redbud tree saplings?
Water deeply 2–3 times per week for the first year, ensuring moisture reaches 6–12 inches down. After establishment, reduce to once a week (or during dry spells). Overwatering can suffocate roots, so check soil moisture—it should be damp but not soggy. Drip irrigation or soaker hoses work best to avoid wetting foliage (which invites disease).
Why aren’t my redbud saplings blooming?
Redbuds typically bloom on mature wood, so saplings (under 3–5 years old) may not flower yet. Wait patiently! If your tree is older but still bare, check for:
- Poor sunlight: Redbuds need full sun (6+ hours/day).
- Nutrient deficiency: Test soil pH (ideal: 6.0–7.0) and amend with compost.
- Over-pruning: Avoid cutting back blooming branches—this removes next year’s flowers.
Can I grow redbud trees in containers or small spaces?
Yes! Dwarf varieties like ‘Lavender Twist’ or ‘Merlot’ thrive in large containers (15+ gallons) with well-draining soil. Ensure the pot has drainage holes and replant outdoors every 2–3 years. For small yards, choose a single-trunk specimen or prune to maintain shape. Just remember: Containers dry out faster, so water daily in summer.
What pests or diseases should I watch for in redbud saplings?
Common threats include:
- Japanese beetles: Handpick adults or use neem oil.
- Spider mites: Spray with water to dislodge them; severe cases need insecticidal soap.
- Powdery mildew: Improve airflow and avoid overhead watering.
- Root rot: Caused by overwatering—ensure soil drains well.
Wrapping up and next steps
Growing redbud tree saplings is a rewarding journey that brings vibrant spring blooms and long-lasting shade to your landscape. With the right care—like proper pruning, well-drained soil, and patience—they’ll thrive and become a stunning focal point in your yard.
Whether you’re a seasoned gardener or just starting out, these fast-growing trees offer beauty and practicality for years to come.
Ready to plant your own? Start by choosing healthy saplings and follow the steps we’ve shared to give them the best start. Happy gardening—your future redbud tree is waiting! 🌱🌸