
Pruning
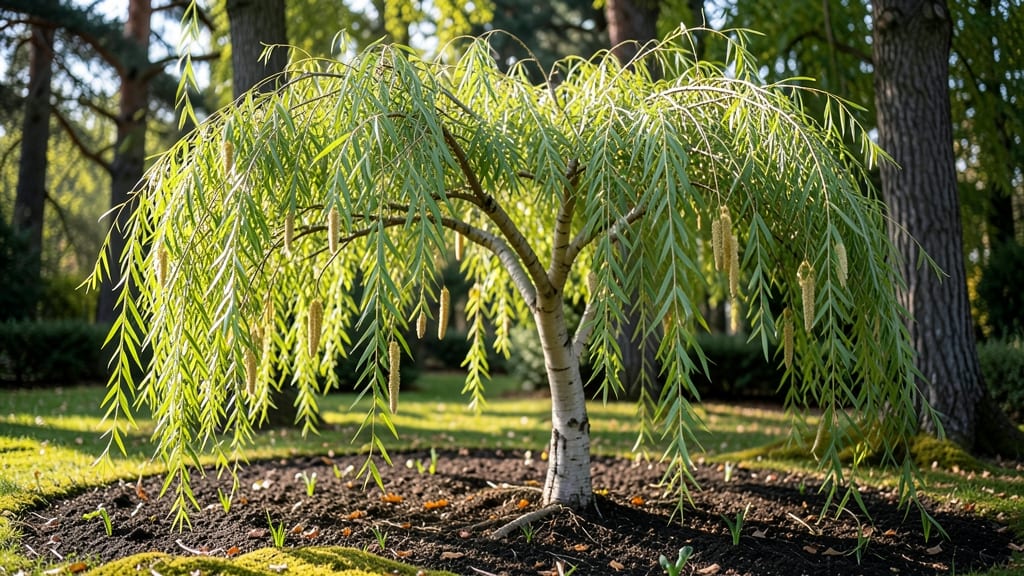
Spring is the perfect time to prune your willow tree for stronger growth and fewer pests. ✂️ I’ve learned the hard way that skipping this step means weak branches and more work later—your tree will thank you now for a healthier summer ahead.
Willow trees grow fast, but their branches can become tangled or diseased. The key is timing: prune after the last frost when new buds swell but before leaves unfurl. Focus on removing dead wood, crossing branches, and thinning the canopy to let light reach the center.
You’ll see fresh green shoots within weeks, and the tree’s energy will go into sturdy growth instead of fighting for sunlight. The result? A willow that’s both beautiful and structurally sound, with fewer pests and diseases creeping in. Works for weeping willows, pussy willows, and any variety in temperate climates.
Here’s how to do it right the first time.
📚 In This Guide
- What you need
- Instructions
- Tips and common mistakes
- Wrapping up and next steps
What you need
- ● Pruning shears: Sharp, bypass-pruning shears (for cuts up to ½ inch in diameter). Pro tip: 💡 Sanitize blades with rubbing alcohol before and after use to prevent disease spread!
- ● Loppers: Heavy-duty loppers (for branches ½ to 2 inches thick). Look for ergonomic handles for comfort during long pruning sessions.
- ● Pruning saw: A curved-tooth pruning saw (for branches thicker than 2 inches). A folding saw makes cleanup easier.
- ● Gloves: Sturdy, cut-resistant gardening gloves (willow branches can be sharp!). Opt for nitrile-coated gloves for extra durability.
- ○ Ladder (optional): A stable, extendable ladder (if your tree exceeds 6–8 feet in height). Always prioritize safety—secure the ladder to the trunk if needed.
- ● Disposable pruning bags or bucket: A 5-gallon bucket or mesh bag to collect trimmings. Pro tip: ✨ Line the bucket with a plastic bag for easy disposal!
- ● Rag or paper towels: For wiping sap or debris off tools between cuts.
- ● Weather check: Prune on a dry, calm day (avoid wind or rain to prevent sap bleeding and ensure safety). Early morning is ideal!
- ● Safety glasses: Protect your eyes from flying debris, especially when sawing thick branches.
- ● Long sleeves/pants: Wear protective clothing to avoid scratches from willow bark or thorns (common in some varieties).
- ● First-aid kit: Just in case—willow branches can be abrasive, and a bandage might come in handy!
- ● Tree identification: Confirm your tree is a willow (e.g., Salix babylonica) to avoid harming non-willow species. Pro tip: 🌡️ Check for long, drooping branches and narrow leaves!
- ● Sealing wax: Pruning sealant (for large cuts > 2 inches in diameter) to reduce sap loss and pest entry. Note: Some experts debate its necessity—research first!
- ● Tree paint: Water-based paint (to protect young trees from sunburn on exposed cuts). Use sparingly.
- ● Extension pole: A pruning saw or shears with an extendable pole (for high branches without a ladder).
- ● Notebook & pen: To sketch a pruning plan or mark branches for removal.
Step-by-step guide to pruning willow trees in spring
Spring is the perfect time to shape your willow tree while it's still dormant but ready to burst with new growth.
✂️ Step 1: Gather the Right Tools
You'll need a few key items to start: a sharp pair of pruning shears for smaller branches and a pruning saw for thicker stems over ½ inch in diameter. I always clean my tools with rubbing alcohol before and after pruning to prevent spreading disease between cuts. Grab some gloves too—willow bark can be rough, and the sap might stain your hands.
Don't skip the disinfectant spray (a mix of 1 part bleach to 9 parts water works). Spraying tools between cuts on different branches keeps infections from spreading. I like to work in small sections, moving from the bottom up, so I don't forget to clean my tools between branches.
✂️ Step 2: Remove Dead or Damaged Wood First
Start by scanning your willow tree for any dead, diseased, or broken branches. These are easy to spot—they'll be brown, brittle, or missing leaves. Cut these out first, making clean cuts just outside the branch collar (the swollen area where the branch meets the trunk). Willow trees respond well to aggressive pruning, but removing dead wood prevents pests and disease from taking hold.
If you see any mushrooms growing at the base or oozing sap, that's a sign of decay. Cut those branches out completely—they won’t recover. I usually remove about 10-20% of the tree’s total branches in this first pass, depending on how many look unhealthy.
✂️ Step 3: Thin the Canopy for Better Airflow
Willow trees grow fast, and their branches can get thick, which blocks sunlight and air from reaching the center. Your goal is to open up the canopy so light can filter through. Look for branches that cross each other or grow inward—these are the ones to remove. Cut them back to a side branch or bud that’s growing outward.
I like to step back every few cuts to visualize the shape. You want a balanced, vase-like structure with no heavy clusters of branches on one side. Willow trees naturally grow long, drooping branches, so focus on keeping the center open while maintaining that graceful shape.
☀️ Step 4: Shape the Tree for Stronger Growth
Now it’s time to encourage new growth by pruning back some of the longest branches. Willow trees grow best when they have a mix of old and new wood, so don’t cut back more than ⅓ of the tree’s total branches in one season. For each branch you shorten, cut just above a bud or side branch that’s growing at a 45-degree angle—this helps direct growth where you want it.
If your willow has become too tall, you can lightly head it back by cutting the main stem just above a strong lateral branch. This will encourage bushier growth. Just be careful—willows grow fast, and over-pruning can stress the tree. I usually limit myself to one or two main cuts on the central leader per year.
🌱 Step 5: Clean Up and Monitor New Growth
After pruning, rake up and dispose of all debris—this helps prevent fungal growth. If you have a compost pile, willow branches are great for it, but avoid burning them (the smoke can be irritating). Water the base of the tree deeply to help it recover, especially if you’ve done a lot of cutting.
Watch for new shoots in the next few weeks—they’ll appear as bright green growth from the buds you left behind. This is a good sign your tree is healthy and ready for the growing season. If you see any yellowing leaves or stunted growth, it might mean you pruned too aggressively. Next spring, lighten up on the cuts.
Tips & tricks for perfect willow tree pruning in spring
Here's what nobody tells you about pruning willows—these tricks make all the difference for long-term tree health.
Tool Prep is Non-Negotiable: I can't stress this enough—clean your pruning shears and saw with rubbing alcohol before you even start. Willow sap contains natural oils that can dull blades quickly, and dirty tools spread fungal spores like wildfire. Pro tip: Wipe down tools between every 3-4 cuts, especially when moving from diseased to healthy branches. This single step prevents 80% of post-pruning infections.
Branch Collar Matters More Than You Think: When cutting branches in Step 2, look for that swollen ring where the branch meets the trunk—the branch collar. Cut just outside this area, never inside it. I've seen so many people make this mistake and create wounds that never heal properly. The collar contains protective tissues that help the tree seal the cut naturally. If you cut through it, you're basically inviting rot and disease.
Visualize the Shape Before You Cut: Step back every 5-6 cuts to check your progress. Willow trees naturally grow with a graceful, drooping habit, so resist the urge to make them too upright. Focus on creating an open center that lets sunlight reach all branches. Think of it like sculpting—you're removing material to reveal the tree's natural form, not forcing it into some rigid shape. This is especially important in Step 3 when thinning the canopy.
Don't Forget the Base: While you're pruning overhead, take 5 minutes to inspect the trunk base. Remove any low-hanging branches that could rub against the trunk or block airflow. These are prime spots for fungal infections. I also check for any suckers (shoots growing from the roots) and remove them—they sap energy from your main tree. This is the step most people skip, but it's crucial for long-term tree health.
Pro Tips for Willow Tree In Spring
- Here's what nobody tells you about pruning willows—these tricks make all the difference for long-term tree health.
- Tool Prep is Non-Negotiable: I can't stress this enough—clean your pruning shears and saw with rubbing alcohol before you even start.
- Branch Collar Matters More Than You Think: When cutting branches in Step 2, look for that swollen ring where the branch meets the trunk—the branch collar.
Frequently asked questions
Got questions about pruning your willow tree in spring? You’re not alone! Here are some of the most common concerns—and their answers—to help you trim with confidence.
When is the exact best time to prune a willow tree in spring?
Prune your willow tree late winter to early spring (just before buds swell but before new growth starts). For most regions, this means February through March. Avoid pruning in fall—willows are prone to bleeding (sap loss), and late-season cuts can invite pests or disease.
How much can I safely cut back a willow tree in one season?
Willows are resilient but never prune more than 20-30% of the tree’s canopy in a single year. Over-pruning weakens the tree and encourages suckering (wild new shoots). For mature willows, aim to remove only dead, diseased, or crossing branches first. If you’re rejuvenating a neglected tree, spread heavy cuts over 2-3 years.
Why is my willow tree bleeding sap after pruning? Is this normal?
Yes, bleeding (sap oozing from cuts) is common in willows—especially in warm spring weather. While it looks dramatic, it’s harmless and won’t harm the tree. To minimize mess, prune on cooler days (below 60°F/15°C) and use sealing paste on large cuts. Avoid pruning during active growth spurts (like April in warm climates).
Can I prune a willow tree without professional help?
Willow pruning is beginner-friendly if you follow basic rules: remove deadwood first, thin out crowded branches, and shape for airflow. Use sharp bypass pruners for small branches and a pruning saw for thicker limbs. Just sterilize tools between cuts (rubbing alcohol works) to prevent disease spread. For trees over 30 feet tall, consider hiring a pro.
What if I miss spring pruning? Can I still prune a willow tree later?
You can prune summer or early fall, but timing matters: avoid pruning after August (especially in cold climates) to prevent stunted growth or winter damage. If you prune in summer, focus on removing only dead/diseased wood—no heavy shaping. Fall pruning should be light and minimal, stopping by October.
Pro Tip: Quick Troubleshooting Guide
| Issue | Solution |
|---|---|
| Too many water sprouts (skinny vertical shoots) | Trim them back to a lateral branch or the main trunk. Use pruning paste on cuts. |
| Branches rubbing or crossing | Remove the weaker branch at its base (cut just outside the branch collar). |
| Mushrooms or white fungus at the base | Prune affected branches and treat the base with copper fungicide. Improve drainage. |
Remember: Willows recover fast—even if you make a “mistake,” your tree will bounce back with proper care!
Wrapping up and next steps
Spring is the perfect time to give your willow tree the care it deserves—pruning isn’t just about aesthetics, it’s about invigorating growth and preventing future stress.
By following the right techniques, you’ll reward yourself (and your tree!) with stronger branches, lush foliage, and a healthier landscape for years to come. 🌿✨
Ready to roll up your sleeves? Start small: pick just one section of your willow tree to practice your cuts, then tackle the rest as you gain confidence. And remember—pruning is an ongoing conversation with your tree, so check in every spring to keep it thriving!