
Propagation
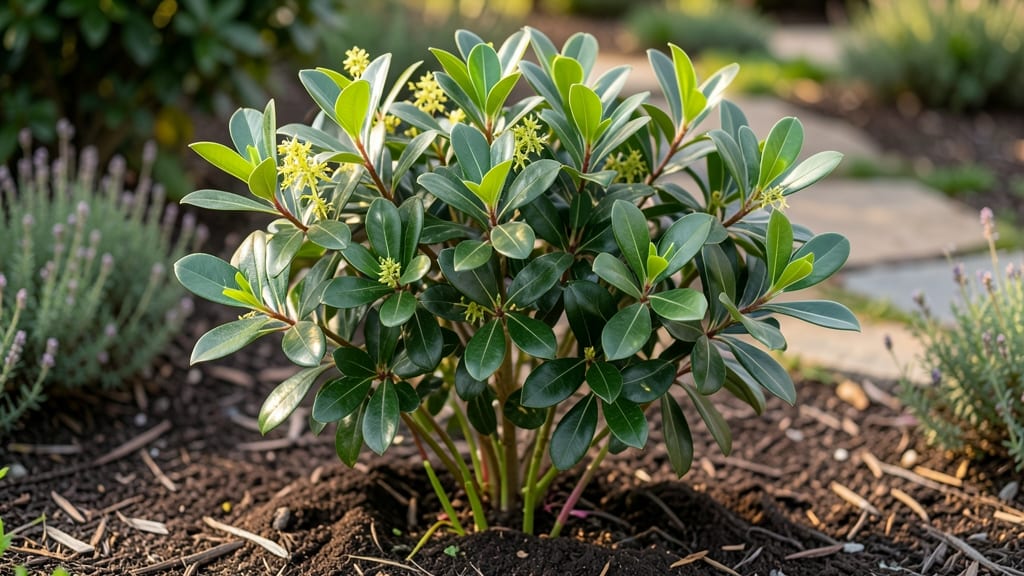
Root shoots are your bay tree's secret weapon for free, lush new plants. ✨ I've propagated bay trees from root suckers for years, and the method is simpler than most people think—no fancy equipment, just patience and the right timing.
The best time to act is spring, when new shoots emerge from the roots. You'll need sharp pruning shears, a small pot, well-draining potting mix, and a sunny windowsill. Dig carefully to avoid damaging the parent plant's roots, then pot up your cuttings with their attached root ball.
By summer, you'll have sturdy young plants ready for transplanting. The scent of fresh bay leaves in your kitchen or garden is unbeatable, and these new trees grow just as hardy as their parent. No more buying expensive nursery plants—just free, fragrant clones.
Works for both outdoor bay trees and container-grown plants. Here's how to do it right the first time!
📚 In This Guide
- What you need
- Instructions
- Tips and common mistakes
- Wrapping up and next steps
What you need
- ● Bay tree roots or cuttings: Healthy roots (2–3 inches long) or semi-hardwood cuttings (4–6 inches long) from a mature bay tree
- ● Ensure roots/cuttings are disease-free and fresh (harvested in early spring or late summer for best results)
- ● Potting mix: Well-draining cactus or succulent mix (or a blend of 50% perlite/vermiculite and 50% peat moss)
- ● Approx. 1 gallon per root/plant (or a small pot, 6–8 inches in diameter)
- ● Containers: Small pots with drainage holes (6–8 inches wide) or a seed tray with cells
- ○ Optional: Clear plastic dome or plastic bag for humidity (if propagating indoors)
- ○ Rooting hormone (optional but helpful): Powder or gel formula (e.g., Rootone or Clonex)
- ● Watering can or spray bottle: Fine mist setting for gentle hydration
- ● Pruning shears or sharp knife: Sterilized with rubbing alcohol for clean cuts
- ● Location: Bright, indirect light (e.g., east or north-facing window, or under grow lights)
- ● Consistent temperature: 65–75°F (18–24°C)
- ● Humidity control: Mist roots/cuttings daily or use a humidity tray (pebbles + water)
- ● Patience: Root development takes 4–8 weeks—avoid rushing!
- ● Fertilizer: Diluted seaweed extract (after 6–8 weeks)
- ● Pest control: Neem oil (preventative spray for aphids)
- ● Label markers: To track propagation dates!
How to propagate bay trees from root shoots
Here's the simple method I use to turn stubborn bay tree roots into thriving new plants.
🌱 Step 1: Identify and Select Healthy Root Shoots
Look for small shoots emerging from the base of your mature bay tree—these are your future plants. Choose the most vigorous ones with 2-3 inches of stem and at least 1-2 leaves. I avoid shoots that look yellowed or leggy, as they won't root well. The best candidates grow outward from the main root ball rather than upward.
Gently dig around the shoot with a small hand trowel, being careful not to damage the parent plant's roots. You'll want to get a 2-inch section of root attached to the shoot—this connection provides nutrients during the transition. If the shoot snaps easily, it's not ready for propagation yet.
🪴 Step 2: Prepare Small Pots and Potting Mix
Fill small 4-inch pots with a well-draining mix of 50% potting soil and 50% perlite or coarse sand. This blend prevents root rot, which is the biggest killer of bay tree cuttings. Moisten the mix until it's damp but not soggy—think of a wrung-out sponge. I like to work with the mix in a bucket so I can easily scoop it into pots.
Make a small hole in each pot with your finger or a pencil. This creates space for the root shoot without disturbing the soil structure. The hole should be just deep enough to accommodate the root section you dug up. Keep the pots ready nearby while you prepare the shoots.
💧 Step 3: Plant and Water the Root Shoots
Place each root shoot into its prepared pot, ensuring the attached root section is buried about 1 inch deep. Gently firm the soil around it to remove air pockets, but don't pack it down too tightly. The shoot's leaves should sit just above the soil line—burying them encourages rot. I like to use my thumb to press the soil lightly while holding the shoot steady.
Water the newly planted shoots immediately with room-temperature water until it drains freely from the bottom. This settles the soil and removes any air bubbles around the roots. After watering, place the pots in a location with bright, indirect light—a north-facing window or under a grow light works best. Direct sunlight can scorch the tender new growth.
☀️ Step 4: Maintain Humidity and Light for Root Development
Bay tree root shoots need consistent humidity to establish roots. Cover each pot with a clear plastic bag or use a humidity dome to trap moisture. Check daily and remove the cover for 10 minutes to prevent mold growth. You'll know the humidity is right when condensation forms on the inside of the bag but no black spots appear on the soil.
Keep the soil lightly moist—water when the top ½ inch feels dry to touch. Overwatering is the biggest mistake here; soggy soil suffocates roots. In 4-6 weeks, you'll see new growth at the top of the shoot, signaling successful root development. This is your cue to gradually reduce humidity by removing the cover for longer periods each day.
✂️ Step 5: Transplant and Care for Mature Shoots
Once the new shoots have 3-4 inches of new growth and feel firmly rooted when gently tugged, they're ready to transplant. Choose a larger 6-inch pot filled with regular potting soil mixed with 20% perlite. Handle the plants carefully by their leaves to avoid damaging the delicate stems. I like to water them thoroughly before transplanting to reduce shock.
After transplanting, place the pots in a spot with morning sun and afternoon shade for the first week. Gradually increase sunlight exposure over 2 weeks as the plants adjust. Bay trees are slow growers, so don't rush their development. With patience, your root-propagated bay trees will grow into lush, fragrant plants ready for your garden or kitchen.
Tips & tricks for perfect bay tree propagation
These simple tricks will help you turn those stubborn bay tree roots into thriving new plants with minimal fuss.
Selecting the Right Shoots: In Step 1, focus on shoots that are growing outward from the main root ball rather than upward. These horizontal shoots tend to have stronger root systems already developing. I've found that shoots with a slight curve at the base—where they emerge from the root—are often the most vigorous. Avoid any shoots that feel mushy when you gently squeeze the stem, as this indicates poor health.
Soil Mix Secrets: When preparing your 50% potting soil and 50% perlite mix in Step 2, I recommend adding a handful of worm castings to the soil portion. This organic boost gives your root shoots a nutrient head start without overwhelming them. The worm castings also help improve soil aeration, which is crucial for preventing root rot in this delicate propagation stage.
Planting Depth Matters: In Step 3, burying the root section about 1 inch deep is critical, but don't worry about perfect precision. What matters more is that the shoot's leaves remain above soil level. I've noticed that slightly deeper planting (up to 1.5 inches) actually works better for bay tree shoots—the extra root coverage provides more stability during the early growth phase.
Humidity Management: The 10-minute daily uncovering in Step 4 is your best defense against mold. I've learned that maintaining consistent humidity is more important than strict timing—watch for condensation on the plastic cover as your visual cue. If you notice water droplets forming on the soil surface, that's a sign you're keeping things too wet. A simple spray bottle can help maintain humidity levels between your daily checks.
Pro Tips for Bay Tree Shoots From Roots
- These simple tricks will help you turn those stubborn bay tree roots into thriving new plants with minimal fuss.
- Selecting the Right Shoots: In Step 1, focus on shoots that are growing outward from the main root ball rather than upward.
- Soil Mix Secrets: When preparing your 50% potting soil and 50% perlite mix in Step 2, I recommend adding a handful of worm castings to the soil portion.
Frequently asked questions
Got questions about propagating bay trees from roots? You’re not alone! Here are some of the most common queries—and their straightforward answers—to help you succeed with your new plants.
Can I propagate a bay tree from roots even if the parent plant is dead?
Yes! If the roots are still healthy and white (not brown or mushy), they’ll often sprout new shoots. Simply snip a 3–4 inch root section, plant it in moist potting mix, and keep it warm and humid. Roots are resilient—give them a chance!
How long does it take for bay tree shoots to grow from roots?
Patience is key! Shoots typically appear in 4–8 weeks, depending on conditions like warmth (70–75°F), humidity, and light. Keep the soil consistently moist but not soggy—overwatering can delay growth. A heat mat can speed things up!
What if my bay tree roots won’t sprout? Troubleshooting tips?
If roots refuse to grow, check these fixes:
- Root health: Trim any brown/mushy sections and replant healthy white roots.
- Light: Move to bright, indirect light (no harsh sun).
- Humidity: Use a clear plastic bag or pebble tray to trap moisture.
- Patience: Some roots take months—don’t give up!
Can I propagate bay trees from roots outdoors in cold climates?
Outdoor propagation is tricky in cold zones, but you can try! Start roots indoors in spring, then transplant after the last frost when soil is warm (60°F+). Mulch heavily to protect young shoots. Bay trees thrive in USDA zones 7–10, so indoor starts are safer. →
Are there alternatives if root propagation fails?
Try these backup methods:
- Water propagation: Place healthy bay leaves in water until roots form (2–4 weeks), then pot.
- Cutting propagation: Snip 4–6 inch stem cuttings with leaves, dip in rooting hormone, and plant.
- Layering: Bend a low branch to the ground, cover with soil, and wait for roots to form.
Wrapping up and next steps
Watching a bay tree sprout from its roots is like unlocking nature’s own propagation magic—simple, rewarding, and full of potential! 🌱 Whether you’re a seasoned gardener or a curious beginner, this method proves that lush new plants are just a few steps away.
Now that you’re armed with the right tools, timing, and techniques, why not give it a try?
Start small—grab a healthy bay tree, a pot, and some soil, and let the magic begin. Before you know it, you’ll be sharing your thriving new plants with friends or expanding your garden’s green canopy. Happy propagating! 🌿