Diseases
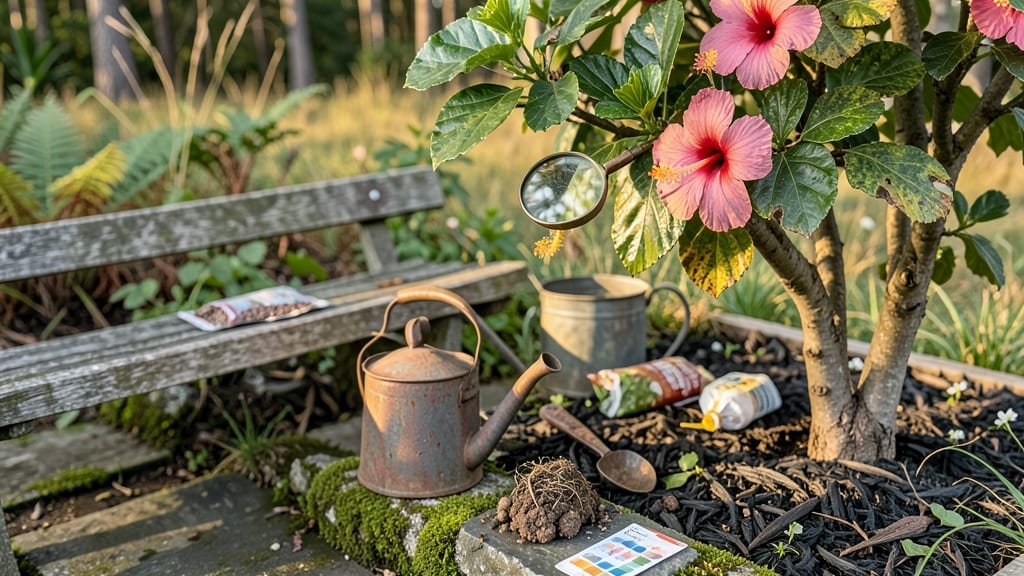
Why are the leaves on my hibiscus tree turning yellow?—it’s usually because it’s either drowning or starving. 🌿 The good news? This is one of those problems where a simple fix can bring back that deep, glossy green in just a few weeks. Overwatering, nutrient deficiencies, or even hidden pests could be the culprit, and I’ll walk you through how to diagnose and reverse it fast.
First, check the soil: if it’s soggy, you’re overwatering (hibiscus hate wet feet). If it’s bone-dry, you’re underwatering. Then inspect the leaves—are they crispy, sticky, or covered in tiny webs?
That tells you whether it’s water, pests, or something else. A quick soil test or leaf rub can reveal the real issue before you waste time guessing.
Once you pinpoint the problem, the solution is straightforward: adjust your watering, add a balanced fertilizer, or treat for pests. I’ve revived multiple hibiscus trees with just these three steps—no fancy tools or expensive treatments needed. The key is acting fast before the yellow spreads to the whole plant.
Prevention is even easier: water deeply but less often, fertilize every 4-6 weeks, and inspect leaves weekly for early signs of trouble. A healthy hibiscus should reward you with bold blooms all season—let’s get yours back on track.
Underlying Causes Explained
Yellowing hibiscus leaves aren’t just a random quirk of nature—they’re your tree’s way of signaling distress. Understanding the root causes (literally and figuratively) helps you diagnose the issue and take precise action.
Below, we break down the most common reasons your hibiscus is throwing yellow flags, complete with the science behind each problem and how to spot them early.
Hibiscus trees are heavy feeders, and when their diet lacks key nutrients, leaves turn yellow as a warning sign. The most common deficiencies and their telltale patterns:
- Nitrogen (N) Deficiency – The most frequent culprit, nitrogen is essential for leaf production. Without enough, older leaves (starting from the bottom) turn uniformly yellow while veins stay green. This is called chlorosis.
- Iron (Fe) Deficiency – Iron helps chlorophyll production, so a lack of it causes interveinal yellowing (yellowing between veins, while veins stay green). This often starts on new growth and spreads upward.
- Magnesium (Mg) Deficiency – Older leaves develop yellow patches with green veins, often with brown edges. Magnesium is mobile in plants, so symptoms appear where it’s needed most—older foliage.
- Potassium (K) Deficiency – Leaves may turn yellow along edges (scorching) or develop weak spots that turn brown. Potassium helps regulate water and nutrient transport, so stress from lack of it shows as marginal damage.
💡 Pro Tip: Conduct a simple soil test (DIY kits are affordable) to confirm deficiencies. If pH is too high (alkaline), iron and manganese become unavailable—even if they’re in the soil. Adjusting pH (aim for 6.0–6.5) can resolve yellowing instantly.
Hibiscus trees hate soggy roots. When soil stays waterlogged, roots suffocate, starving the plant of oxygen and nutrients. Signs to watch for:
- Yellowing leaves with wilting – Unlike nutrient issues, overwatering causes generalized yellowing (not just older or new leaves) and may include drooping or soft, mushy stems.
- Root rot symptoms – Check the base of the tree for black, foul-smelling roots or moldy soil. Fungal infections (like Phytophthora) thrive in waterlogged conditions.
- Slow growth or leaf drop – The plant may produce fewer flowers or shed leaves entirely as it struggles to survive.
🔥 Key Difference: Overwatered leaves often feel slimy or spongy to the touch, while nutrient-deficient leaves stay crisp but pale.
Hibiscus trees love sunlight, but too much direct sun (especially after transplanting) can cause scorching. Here’s how to spot it:
- Sudden yellowing on sun-exposed sides – Leaves may develop brown, crispy patches (like paper burn) on edges or surfaces facing the sun.
- Wilting despite moist soil – The plant is physically stressed by heat, not thirsty.
- Leaf drop – Severe cases may cause leaves to curl and fall rapidly.
🌡️ Heat + Wind Combo: If your hibiscus is in a hot, dry, or windy location, it’s more vulnerable. Mulching (2–3 inches of organic mulch) retains moisture and protects roots.
Not all yellowing is environmental—some sneaky pests and diseases mimic nutrient deficiencies. Look for these clues:
| Culprit | Symptoms | What to Do |
|---|---|---|
| Spider Mites | Tiny yellow stippling (tiny dots) on leaves, often with webbing underneath. Leaves may crinkle or fall prematurely. | Spray with neem oil or insecticidal soap. Increase humidity (mites hate it!). |
| Scale Insects | Sticky honeydew on leaves (ants love it!) and yellowing near infested areas. Infested spots may appear dull or waxy. | Scrape off scales with a soft brush and treat with horticultural oil. |
| Fungal Leaf Spot | Yellow halos around brown/black spots. Leaves may drop early. | Remove infected leaves and apply copper fungicide. Improve air circulation. |
🎯 Early Action: Isolate affected plants to prevent spread. Check the undersides of leaves and new growth first—pests often hide there.
Now that you know the why, the next step is fixing it. Stay tuned for actionable solutions tailored to each cause—because once you identify the problem, reversing it is easier than you think!
Quick Fixes for Yellowing Hibiscus Leaves
Yellowing hibiscus leaves don’t have to be a permanent problem—with the right care, your tree can bounce back to its vibrant best! Below are targeted solutions for each common cause, along with prevention tips to keep your hibiscus thriving. Let’s turn those sad yellow leaves into lush, green foliage again!
Signs: Yellowing leaves (especially lower ones), soggy soil, wilting despite water, or roots sitting in water.
How to Fix It: 🔥 Step 1: Check the Soil Moisture
- Stick your finger 2 inches deep into the soil. If it’s damp, hold off on watering. Hibiscus prefers slightly dry soil between waterings—think of a sponge that’s mostly squeezed out, not dripping wet.
🍳 Step 2: Improve Drainage - If your pot lacks drainage holes, repot immediately into a container with holes.
For in-ground plants, amend the soil with perlite, sand, or compost to loosen it up. - Pro tip: 💡 Raise pots off the ground (use saucers or bricks) to prevent water pooling.
👨🍳 Step 3: Adjust Your Watering Routine - Water deeply but less frequently—aim for once a week (or every 5–7 days in hot climates).
Let the top 1–2 inches of soil dry out before watering again. - Morning watering is best—it reduces fungal risks and gives leaves time to dry.
⏰ Step 4: Monitor for Recovery
- Trim severely yellowed leaves to redirect energy. Within 2–4 weeks, new growth should emerge in a healthier green.
Prevent Future Issues: ✔ Use well-draining potting mix (avoid heavy clay or peat-only blends). ✔ Mulch around the base (2–3 inches of organic mulch) to regulate moisture. ✔ Avoid saucers that trap water—empty them after watering.
Signs: Yellowing leaves with brown crispy edges, wilting in afternoon heat, or leaves dropping quickly.
How to Fix It: 🔥 Step 1: Provide Partial Shade
- Move potted hibiscus to a spot with morning sun + afternoon shade (e.g., under a patio umbrella or near a sheer curtain).
- For in-ground trees, plant near a building or tall shrubs to filter harsh afternoon rays.
🍳 Step 2: Boost Humidity (If Needed)
- Hibiscus loves 60–70% humidity. In dry climates, mist leaves daily or place a pebble tray with water nearby.
- Pro tip: 🌡️ Group plants together—they create a microclimate that retains moisture.
👨🍳 Step 3: Protect from Heat Waves
- If temps hit above 90°F (32°C), cover the tree lightly with shade cloth (30–50% block) for a few hours daily.
- Avoid cold drafts (like AC vents) if your hibiscus is indoors.
🔪 Step 4: Prune Damaged Leaves
- Snip off crispy or sunburned leaves to prevent disease. Focus on new growth—it’s more resilient.
Prevent Future Issues: ✔ Acclimate gradually if moving from shade to sun (or vice versa). ✔ Water deeply in extreme heat to help roots absorb nutrients. ✔ Choose heat-tolerant varieties like Hibiscus rosa-sinensis ‘Dwarf Red’ if you live in a hot zone.
Signs: Uniform yellowing (especially on newer leaves), slow growth, or purple stems (sign of phosphorus deficiency).
How to Fix It: 🔥 Step 1: Test Your Soil
- Grab a DIY soil test kit (or send a sample to a local extension office) to check pH and nutrient levels. Hibiscus thrives in slightly acidic soil (pH 6.0–6.5).
🍳 Step 2: Fertilize Correctly
- For potted hibiscus: Use a balanced liquid fertilizer (10-10-10 or 20-20-20) every 4–6 weeks during growing season (spring–fall).
- For in-ground trees: Apply a slow-release granular fertilizer (like 8-3-9) in early spring and mid-summer.
- Pro tip: 💡 Avoid high-nitrogen fertilizers (like lawn food)—they cause lush leaves but fewer flowers.
👨🍳 Step 3: Target-Specific Deficiencies
- Yellow with green veins? → Iron deficiency (use chelated iron or acidify soil with vinegar or sulfur).
- Yellow with purple stems? → Phosphorus deficiency (add bone meal or a high-phosphorus fertilizer).
- Weak, pale leaves? → Nitrogen deficiency (use fish emulsion or compost tea).
⏰ Step 4: Water After Fertilizing
- Always water thoroughly after applying fertilizer to prevent root burn.
Prevent Future Issues: ✔ Mulch annually with compost to replenish nutrients. ✔ Rotate fertilizers to avoid imbalances (e.g., alternate between organic and synthetic). ✔ Flush soil every 6 months (water heavily to leach excess salts).
Signs: Yellowing with dark spots, mushy stems, or a white powdery coating (fungus).
How to Fix It: 🔥 Step 1: Identify the Problem
- Powdery mildew? → White dusty spots on leaves.
- Root rot? → Foul-smelling soil, blackened roots.
- Bacterial leaf spot? → Yellow halos with dark centers.
🍳 Step 2: Prune and Clean
- Remove all infected leaves/stems (sterilize shears with rubbing alcohol).
- Disinfect tools between cuts to stop spread.
👨🍳 Step 3: Apply Fungicide
- For powdery mildew: Spray with neem oil or baking soda mix (1 tsp baking soda + 1 quart water + a drop of dish soap).
- For root rot: Repot in fresh, sterile soil and treat roots with hydrogen peroxide (3%) to kill fungus.
- For bacterial issues: Use copper fungicide (follow label instructions).
🔪 Step 4: Improve Airflow
- Space plants apart (hibiscus needs 3–6 feet of clearance).
- Thin out dense foliage to allow sunlight and air circulation.
Prevent Future Issues: ✔ Water at the base (avoid wetting leaves) to reduce fungal spores. ✔ Avoid overhead sprinklers—use drip irrigation instead. ✔ Rotate plants occasionally to prevent soil-borne diseases.
Signs: Yellowing with holes, sticky residue (aphids), or white webbing (spider mites).
How to Fix It: 🔥 Step 1: Inspect Closely
- Flip leaves to spot tiny bugs, eggs, or webs. Common culprits: aphids, spider mites, or scale insects.
🍳 Step 2: Blast Off Pests
- Strong water spray (hose down leaves) to dislodge soft-bodied pests like aphids.
- Neem oil spray (mix 1 tbsp neem oil + 1 tsp dish soap + 1 quart water) for mites and scale.
👨🍳 Step 3: Use Sticky Traps
- Place yellow sticky traps near the plant to catch flying pests.
⏰ Step 4: Introduce Beneficial In
Frequently asked questions
Why do hibiscus leaves turn yellow first on the bottom?
This is often a sign of nitrogen deficiency or natural leaf aging. Hibiscus trees prioritize nutrient delivery to newer growth, so older leaves (starting from the bottom) yellow first when nutrients are scarce. Check the soil—if it's dry or lacks organic matter, a balanced fertilizer can revive your plant within 2-3 weeks.
Can yellow hibiscus leaves turn green again?
Yes! If caught early, yellow leaves can recover completely. The key is identifying the cause (water issues, pests, or nutrients) and addressing it immediately. For example, overwatered plants bounce back in 1-2 weeks once you adjust watering, while nutrient deficiencies may take 3-4 weeks to show improvement. Prune severely yellowed leaves to encourage new growth.
Is yellowing always bad for hibiscus?
Not necessarily—some yellowing is normal during seasonal changes or when the plant sheds older leaves. However, if yellowing spreads rapidly, appears on new growth, or is accompanied by wilting, it's a sign of stress. Healthy hibiscus should have deep green leaves with minimal yellowing. Monitor for other symptoms like spots or pests to determine if action is needed.
How do I tell if my hibiscus has root rot?
Check for these key signs: yellowing leaves that feel soft or mushy, foul-smelling soil, and blackened roots when you gently dig around the base. If the soil stays soggy for days after watering, you're likely dealing with root rot. The solution is repotting in fresh, well-draining soil and ensuring proper drainage. Act fast—root rot can kill hibiscus quickly.
Will too much sun cause yellow leaves?
Yes, especially in hot climates. Look for yellowing with brown, crispy edges—this is classic sunburn. Hibiscus needs morning sun and afternoon shade. If your plant is outdoors, move it to a spot with filtered light or provide temporary shade during peak afternoon hours. Mulching also helps protect roots from heat stress.